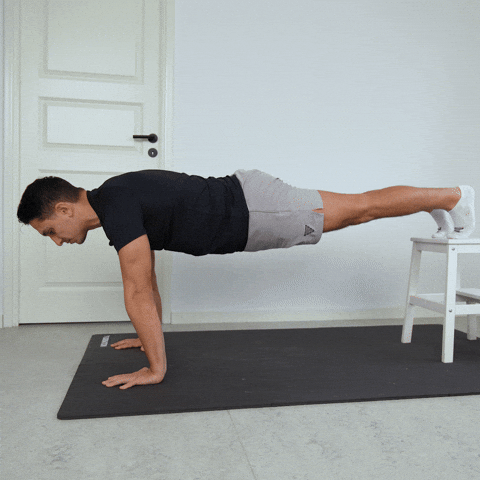
Decline Push Ups
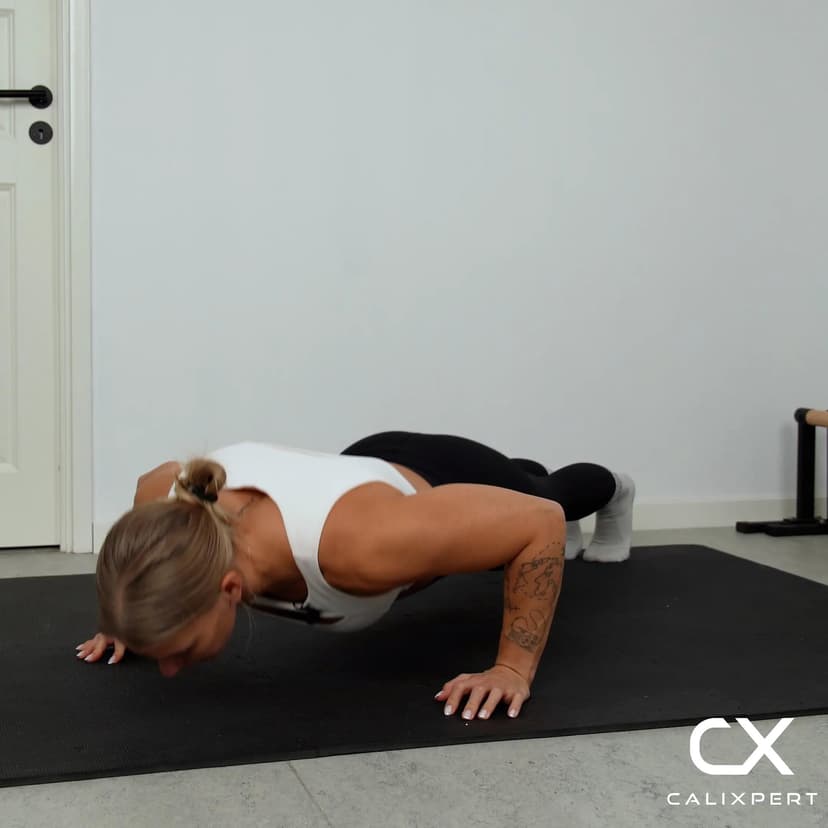
Decline push-ups are a bodyweight pressing exercise where your feet are elevated on a bench or step, shifting the load toward the upper chest and front deltoids. The angle creates a steeper pressing path that recruits the clavicular head of the chest more aggressively than a standard push-up, while also increasing demand on the shoulders and core. Mastered with proper hand placement and controlled depth, decline push-ups build pressing strength that transfers directly into handstand push-up progressions and overhead stability work.

Decline push-ups are a bodyweight pressing exercise where your feet are elevated on a bench or step, shifting the load toward the upper chest and front deltoids. The angle creates a steeper pressing path that recruits the clavicular head of the chest more aggressively than a standard push-up, while also increasing demand on the shoulders and core. Mastered with proper hand placement and controlled depth, decline push-ups build pressing strength that transfers directly into handstand push-up progressions and overhead stability work.
How to Do Decline Push Ups
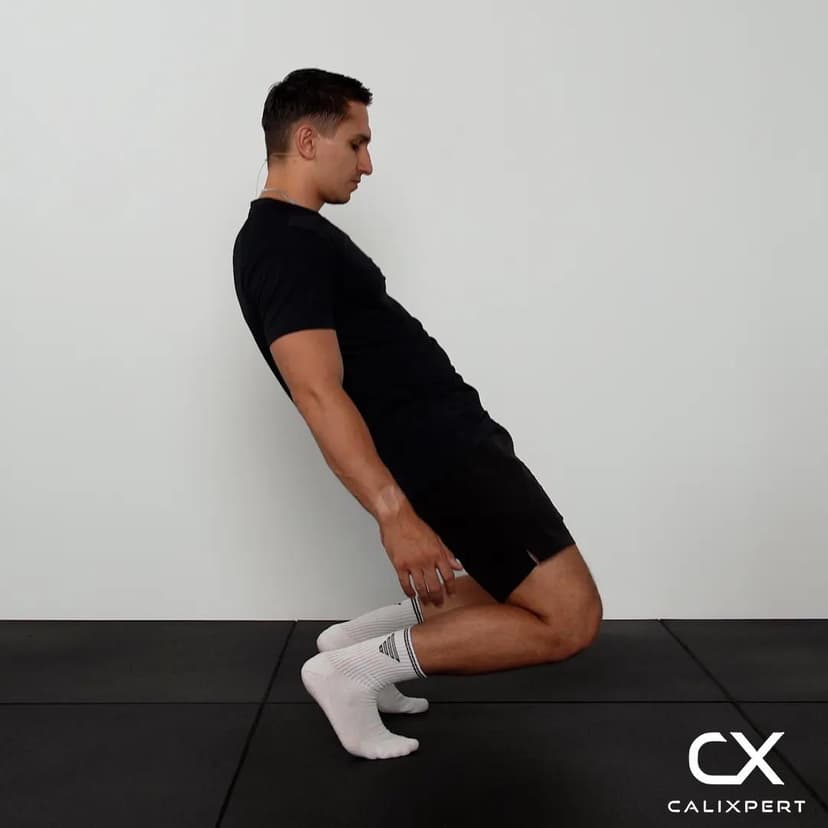
1. Choose Your Elevation Height
Start with a low surface like a step or stack of plates, roughly 15 to 20 centimeters high. As you build strength and confidence, progress up to a standard bench at knee height. The surface must be stable and non-slip so your feet do not shift mid-set.
Start low, progress to knee height
2. Position Your Hands Correctly
Place your hands on the ground slightly wider than shoulder width, but shift them forward enough that your body stays in a neutral line from head to heels. If your hands are directly below your shoulders, you will feel yourself pushing backward into the bench instead of pressing straight up. Adjust until you feel balanced pressure through both palms without leaning excessively forward or back.
Hands forward, not under the shoulders
3. Set Your Full Body Tension
Squeeze your quads, glutes, and abs as a single unit before you begin the first rep. This full-body tension prevents your hips from sagging or piking during the movement. Your body should form one rigid line from your ankles through your hips to the top of your head.
Squeeze everything before you move
4. Lower With a Controlled Descent
Bend your elbows and lower your chest toward the ground, keeping your elbows at roughly a 45-degree angle from your torso. Control the descent for at least two seconds. You do not need to touch your chest to the floor in the beginning. Start with a comfortable range and increase depth as your strength improves.
Slow descent, elbows at 45 degrees
5. Press Up Through the Palms
Push the ground away by driving through your full palms, spreading the force evenly across your hands. Exhale as you press and maintain your rigid body line throughout the ascent. Fully extend your arms at the top without locking the elbows aggressively.
Push the floor away from you
6. Reset and Repeat
At the top of each rep, confirm that your hips have not drifted up or sagged down. Re-engage your core and glutes if tension has slipped. Begin the next rep only when your body line is solid and your breathing is controlled.
Check your line before every rep
Most people get the hand placement wrong and spend the entire set fighting against the bench instead of pressing upward. Before your first rep, check that your hands are far enough forward that you feel balanced, not like you are sliding backward. Once that is dialed in, the movement should feel like a standard push-up with more shoulder and upper chest involvement, not a wrestling match with gravity.
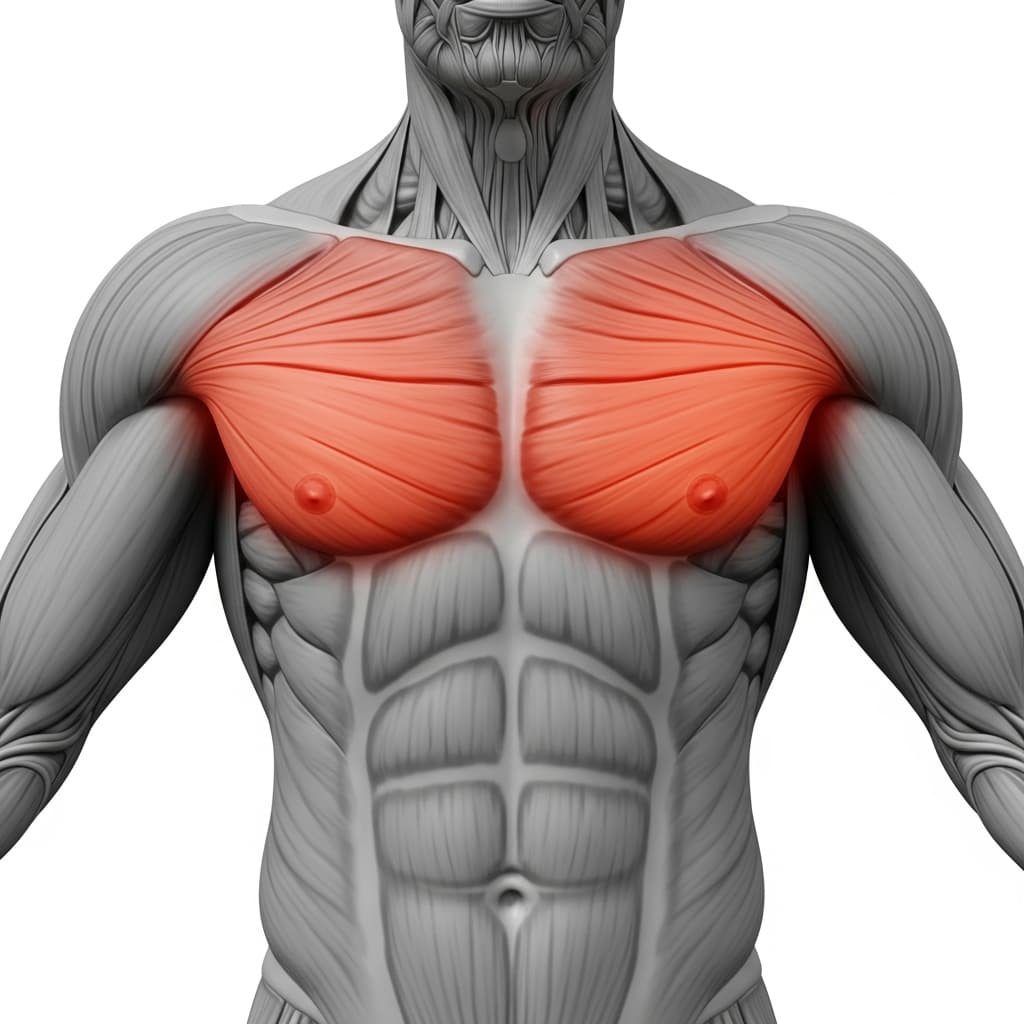
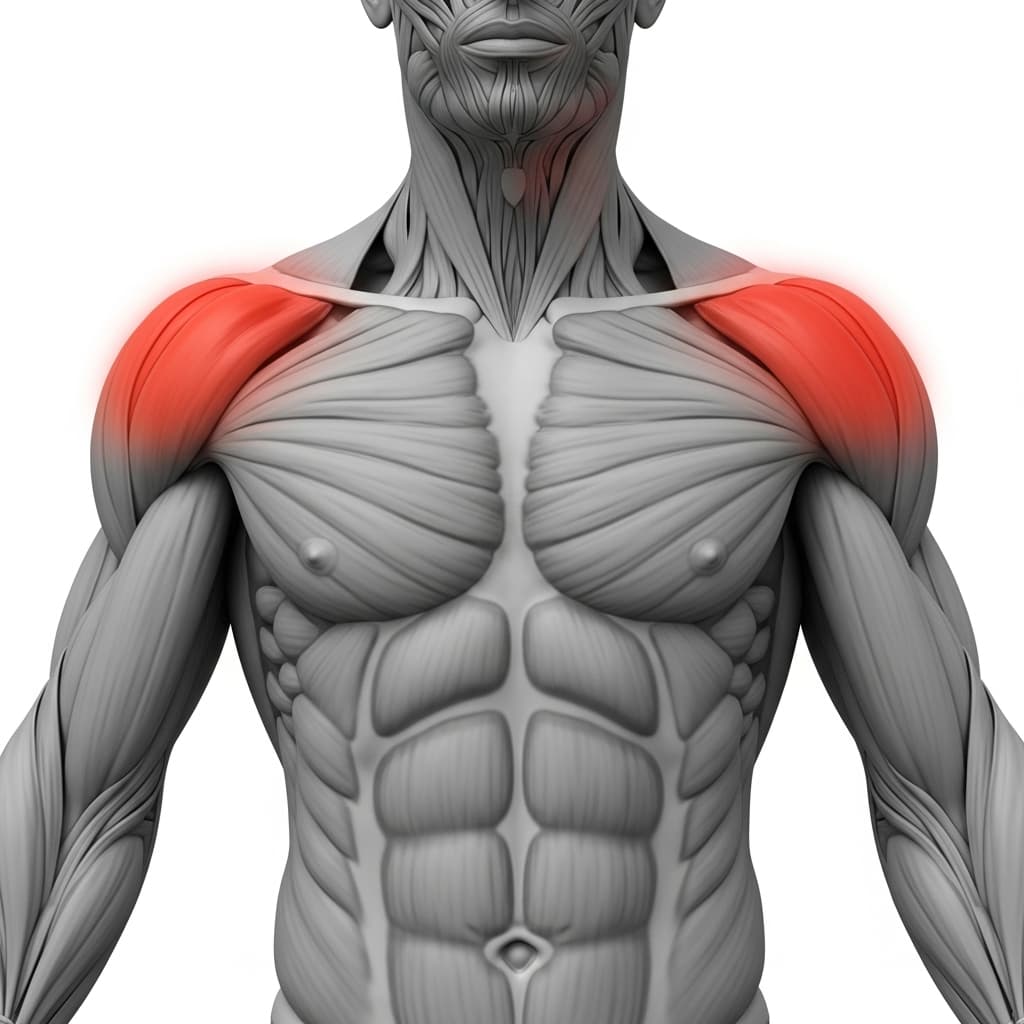
Muscles Worked During Decline Push Ups
Primary Muscles:
Secondary Muscles:

Primary Muscles
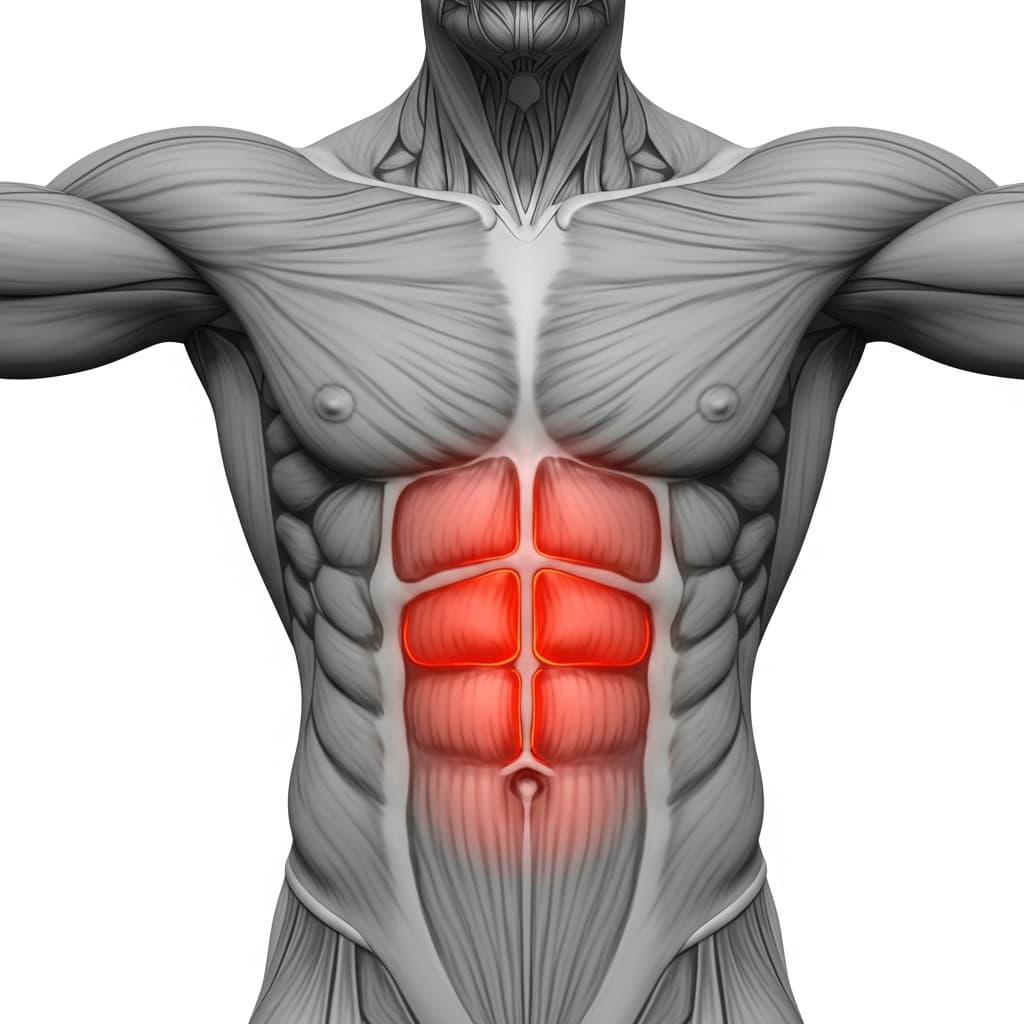
Pectoralis Major (Chest) - The chest, particularly the upper (clavicular) fibers, drives horizontal adduction of the arms during the pressing phase, working harder than in flat push-ups due to the angled body position.
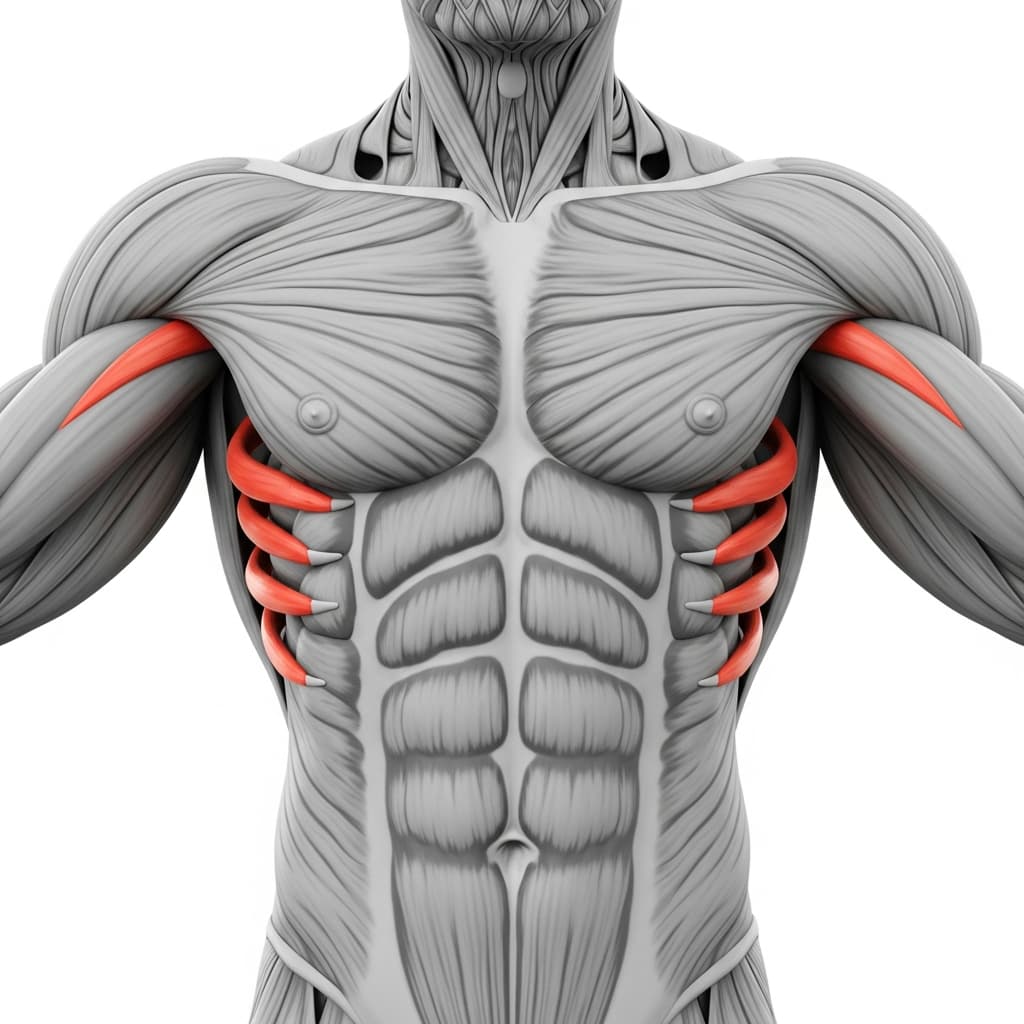
Anterior Deltoid (Front Deltoid) - The front deltoids assist the press by flexing the shoulder joint, taking on a greater share of the load as the decline angle shifts the movement closer to an overhead press pattern.
Secondary Muscles
Triceps Brachii (Triceps) - The triceps extend the elbows during the pressing phase, working through a full range of motion from the bottom position to full lockout.
Rectus Abdominis (Abs) - The abdominals brace isometrically throughout each rep to prevent the hips from sagging under the elevated angle, acting as the primary stabilizer of the trunk.
Serratus Anterior (Serratus Anterior) - The serratus anterior protracts the shoulder blades at the top of each rep, stabilizing the scapulae against the ribcage during the pressing motion.
Benefits of Decline Push Ups
- Targets the clavicular (upper) head of the chest more effectively than flat or incline push-ups, building a more complete chest
- Increases front deltoid strength under bodyweight load, which transfers directly into handstand push-up and pike push-up progressions
- Demands higher core activation than standard push-ups due to the downward angle, strengthening the abs as a stabilizer under pressing load
- Provides a scalable difficulty curve by simply adjusting the height of the elevation, making it easy to progress over weeks without equipment changes
Who Is This Exercise For?
You should be able to perform at least 10 clean standard push-ups with full range of motion and no hip sag before moving to the decline variation. If maintaining a straight body line during regular push-ups is still a challenge, the added angle will only amplify form breakdowns. Master the standard push-up with consistent core tension first.
Common Mistakes to Avoid
Hands placed too far back: When your hands sit directly under your shoulders, the decline angle forces you to push backward into the bench instead of pressing upward. Shift your hands forward 10 to 15 centimeters until you feel balanced and the pressing direction feels vertical.
Hips sagging toward the ground: A sagging midsection means your core has disengaged. Squeeze your glutes and brace your abs hard before each set, and if your hips drop mid-set, reduce reps or lower the elevation until you can hold the line.
Flaring elbows out to 90 degrees: Wide elbow flare puts excessive stress on the shoulder joint and reduces chest activation. Keep your elbows angled at roughly 45 degrees from your torso throughout the entire movement.
Rushing the eccentric phase: Dropping fast to the bottom wastes the strongest part of the exercise and increases injury risk. Lower for at least two seconds on every rep to build strength through the full range of motion.