Seated Commando Pull Ups
The Seated Commando Pull Up is a great upper body exercise that targets the back, shoulders, and arms. This exercise can be performed using a resistance band for assistance, making it accessible for beginners. Focus on maintaining proper form throughout the movement to maximize effectiveness and prevent injury.
How To Do Seated Commando Pull Ups
The Seated Commando Pull Up is a great upper body exercise that targets the back, shoulders, and arms. This exercise can be performed using a resistance band for assistance, making it accessible for beginners. Focus on maintaining proper form throughout the movement to maximize effectiveness and prevent injury.
Step-by-Step Guide to Properly Execute Seated Commando Pull Ups
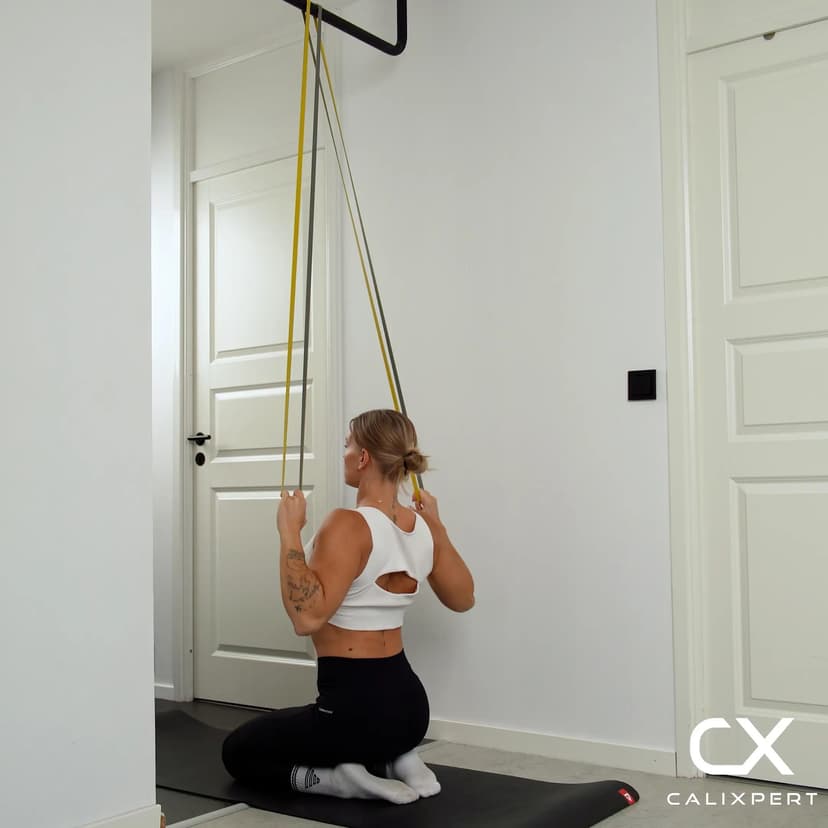
Starting Position
Sit on the floor with your legs extended in front of you. Loop a resistance band around a sturdy overhead anchor point and hold the ends of the band with both hands, palms facing each other. Keep your back straight and engage your core.
Pulling Phase
Begin by pulling the resistance band down towards your chest while leaning back slightly. Focus on squeezing your shoulder blades together as you pull. Keep your elbows close to your body and avoid using momentum.
Lowering Phase
Slowly release the tension in the band, allowing your arms to extend back to the starting position. Maintain control throughout the movement and avoid letting the band snap back quickly.
Finishing Position
Return to the starting position with your arms fully extended. Ensure your back remains straight and your core is engaged. Take a moment to reset before starting the next repetition.
Seated Commando Pull Ups Workout Plan for All Levels
- Beginner: 2 sets of 5-8 reps, 1 minute rest, 2 times per week
- Intermediate: 3 sets of 8-12 reps, 1 minute rest, 3 times per week
- Advanced: 4 sets of 12-15 reps, 30 seconds rest, 4 times per week
What Are The Benefits Of Seated Commando Pull Ups
- Builds upper body strength
- Targets back, shoulders, and arms
- Improves grip strength
- Enhances core stability
- Prepares for more advanced pull-up variations
Common Mistakes to Avoid
- Using momentum instead of controlled movement - Focus on slow, deliberate pulls.
- Letting the band snap back quickly - Control the release to maintain tension.
- Not engaging the core - Keep your core tight to support your back.
- Pulling too wide - Keep elbows close to your body for better form.
Similar Exercises To Try For Your Workout.
Assisted Pull UpsResistance Band RowsSeated Rows with Resistance BandLat Pulldowns with Resistance BandAustralian Pull Ups
How To Do Seated Commando Pull Ups
Step-by-Step Guide to Properly Execute Seated Commando Pull Ups
Starting Position
Sit on the floor with your legs extended in front of you. Loop a resistance band around a sturdy overhead anchor point and hold the ends of the band with both hands, palms facing each other. Keep your back straight and engage your core.
Pulling Phase
Begin by pulling the resistance band down towards your chest while leaning back slightly. Focus on squeezing your shoulder blades together as you pull. Keep your elbows close to your body and avoid using momentum.
Lowering Phase
Slowly release the tension in the band, allowing your arms to extend back to the starting position. Maintain control throughout the movement and avoid letting the band snap back quickly.
Finishing Position
Return to the starting position with your arms fully extended. Ensure your back remains straight and your core is engaged. Take a moment to reset before starting the next repetition.
Seated Commando Pull Ups Workout Plan for All Levels
- Beginner: 2 sets of 5-8 reps, 1 minute rest, 2 times per week
- Intermediate: 3 sets of 8-12 reps, 1 minute rest, 3 times per week
- Advanced: 4 sets of 12-15 reps, 30 seconds rest, 4 times per week
What Are The Benefits Of Seated Commando Pull Ups
- Builds upper body strength
- Targets back, shoulders, and arms
- Improves grip strength
- Enhances core stability
- Prepares for more advanced pull-up variations
Common Mistakes to Avoid
- Using momentum instead of controlled movement - Focus on slow, deliberate pulls.
- Letting the band snap back quickly - Control the release to maintain tension.
- Not engaging the core - Keep your core tight to support your back.
- Pulling too wide - Keep elbows close to your body for better form.
Similar Exercises To Try For Your Workout.
Assisted Pull UpsResistance Band RowsSeated Rows with Resistance BandLat Pulldowns with Resistance BandAustralian Pull Ups
How to Do Seated Commando Pull Ups
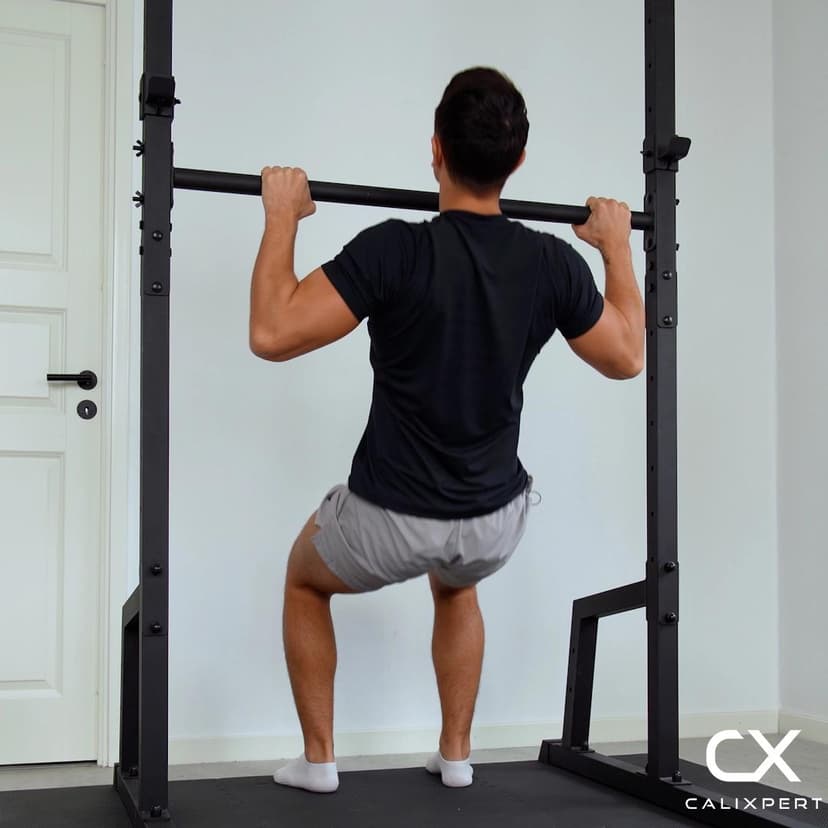
1. Find a Low Straight Bar
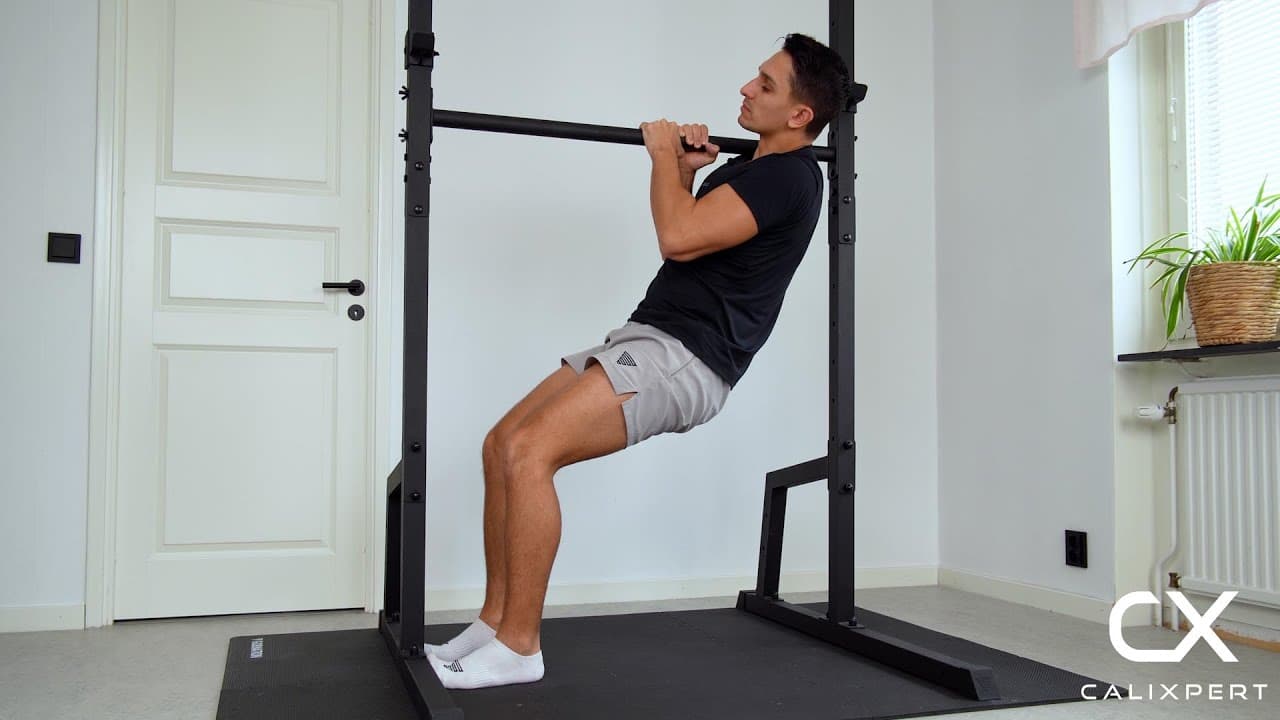
Position yourself under a straight bar set at roughly chest height when seated. A Smith machine bar, low pull-up bar, or squat rack bar all work. The bar needs to be low enough that you can reach it comfortably while sitting on the floor with your legs extended.
Bar at chest height when seated
2. Set Your Commando Grip
Grab the bar with both hands placed one directly in front of the other, palms facing each other in a neutral position. Use an overhand wrap with your knuckles pointing toward the ceiling and your thumbs locked around the bar. This staggered grip is what makes the movement a commando variation and forces each side of the back to work through a slightly different angle.
Hands stacked, knuckles to the ceiling
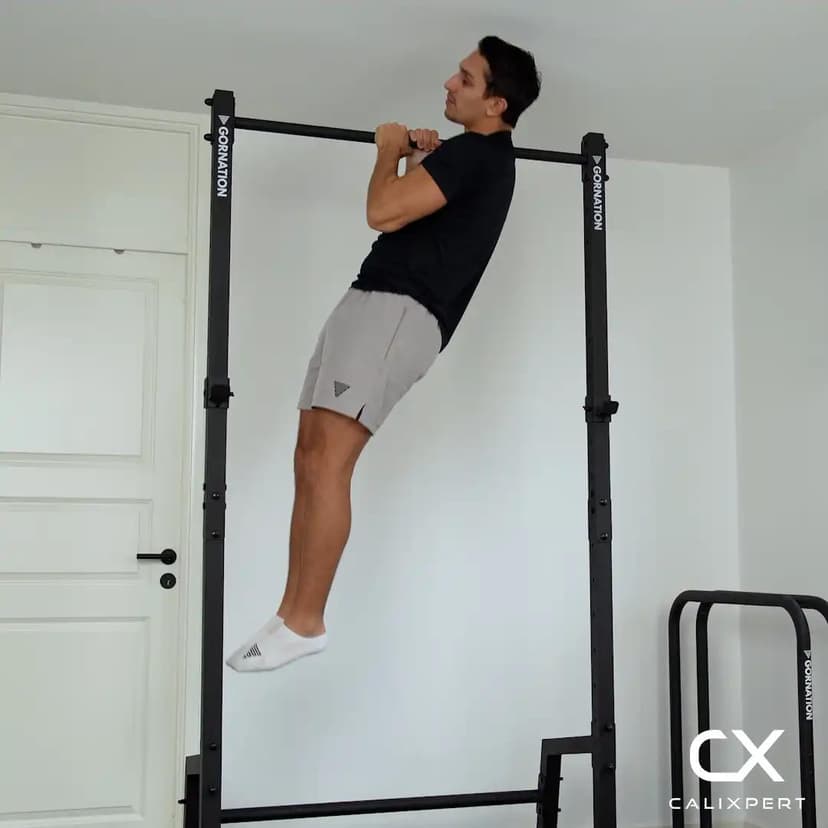
3. Set Your Seated Position
Sit on the floor directly beneath the bar with your legs extended in front of you or bent at the knees for added stability. Keep your back upright and your core braced. Your feet should stay flat on the ground to provide light assistance during the pull.
Sit tall, feet grounded for support
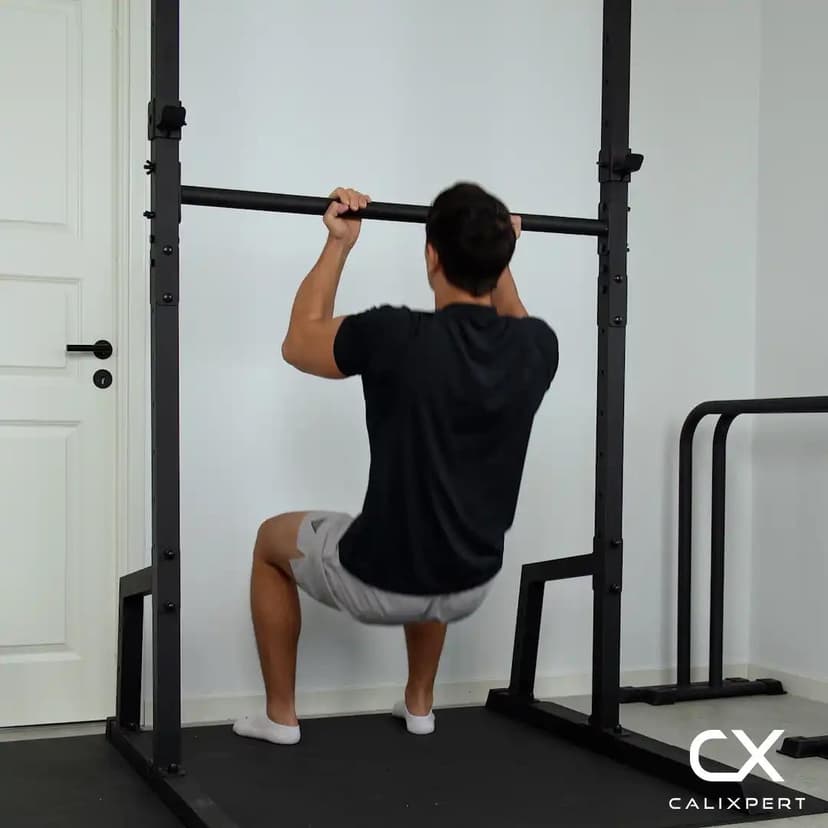
4. Pull to One Side of the Bar
Initiate the pull by depressing your shoulder blades, then drive your body upward and toward one side of the bar. Your head should pass to one side of the bar at the top of the movement. Use your legs for light assistance but keep the majority of the effort in your back and arms.
Head passes to one side of the bar
5. Lower Under Control
Slowly lower yourself back to the starting seated position, resisting gravity on the way down. Keep your grip locked and your shoulders engaged throughout the descent. Do not drop or release tension at the bottom.
Slow descent, no dropping
6. Pull to the Opposite Side
From the bottom position, pull yourself up again but this time direct your head to the opposite side of the bar. Alternate sides with each rep to ensure balanced development on both sides of the back. Each pair of reps, one to each side, counts as one full cycle.
Alternate sides every rep
Most people rush through these and let their legs do all the work. Slow it down and think about pulling your elbow back toward your hip on each rep. If you cannot feel your lat on the pulling side engage, you are pushing too hard with your legs. Cut the leg drive in half and you will immediately feel the difference in your back.
Muscles Worked During Seated Commando Pull Ups


Secondary Muscles:

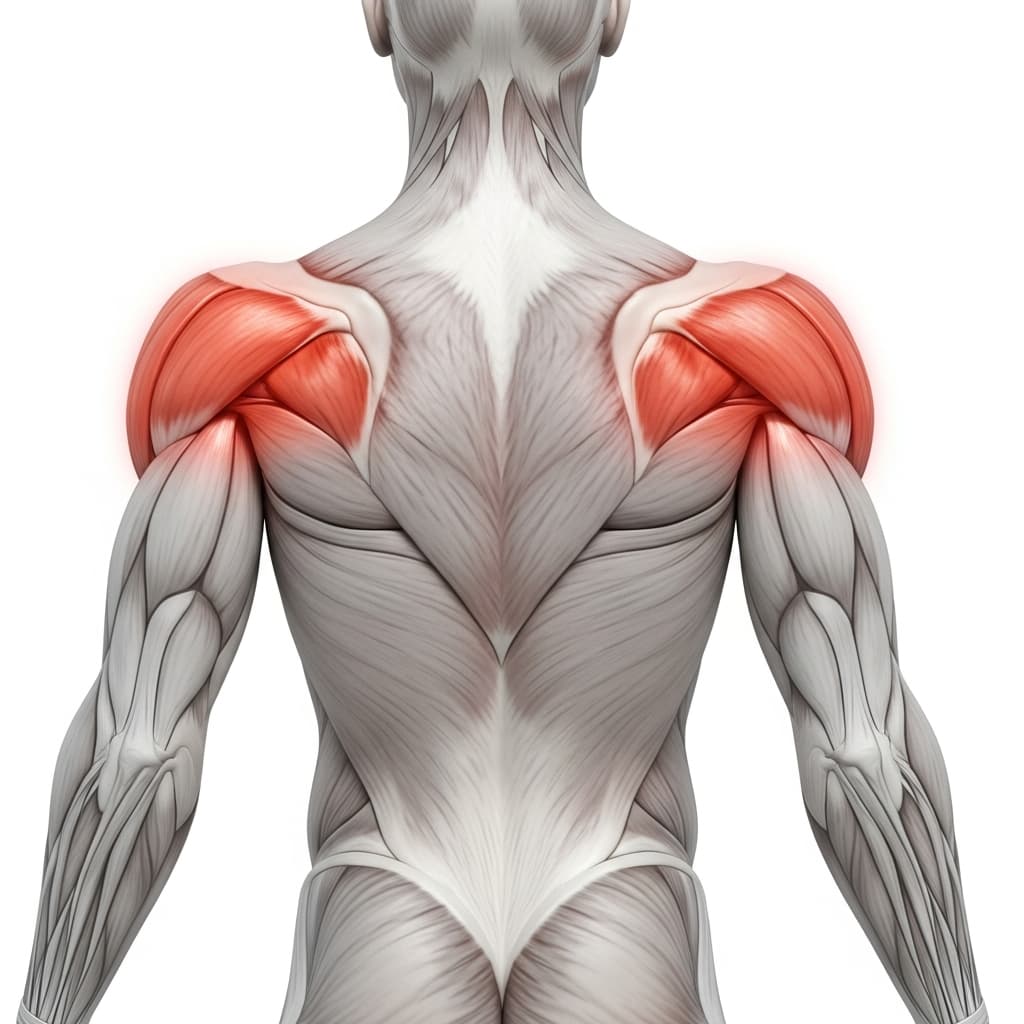


Primary Muscles
Latissimus Dorsi (Lats) - The lats drive the primary pulling force on each rep, shortening to pull the torso upward and laterally toward the bar on each alternating side.
Biceps Brachii (Biceps) - The biceps flex the elbow throughout the pulling phase, working alongside the lats to lift the body from the seated position to the bar.
Secondary Muscles
Rhomboids & Upper Trapezius (Upper Back) - The rhomboids and mid-traps retract the scapulae at the top of each rep, completing the full range of motion and stabilizing the shoulder blades under load.
Posterior Deltoid (Rear Deltoid) - The rear deltoids assist in pulling the upper arm backward during the ascent, particularly as the body shifts laterally to one side of the bar.
Forearm Flexors & Extensors (Forearms) - The forearm flexors maintain the staggered grip on the bar throughout each set, working constantly to prevent the hands from slipping on the narrow grip position.
Rectus Abdominis (Abs) - The abdominals brace the torso and prevent excessive arching or swinging during the pull, keeping the body path controlled as it moves side to side.
Benefits of Seated Commando Pull Ups
- Introduces the commando grip pulling pattern with reduced bodyweight load, building the motor pattern needed for full commando pull-ups
- Develops unilateral back strength by forcing each side of the lats and upper back to work through a slightly different angle on alternating reps
- Builds grip strength and forearm endurance through sustained staggered-hand holding under load
- Strengthens the scapular stabilizers and rear deltoids in a shoulder-friendly position, reducing injury risk during progression to harder pulling variations
Who Is This Exercise For?
You should be able to hold a dead hang on a bar for at least 10 seconds and perform basic Australian pull-ups with controlled form before attempting seated commando pull-ups. If maintaining a stable grip with hands stacked one in front of the other feels awkward or unstable, practice regular overhand dead hangs and inverted rows first. This exercise is designed as a regression, so most beginners can attempt it as long as basic grip and shoulder stability are in place.
Common Mistakes to Avoid
Relying too heavily on leg drive: Your legs should provide light stability and assistance, not power the entire movement. Focus on pulling with your back and arms first, using just enough leg push to complete the rep with good form.
Pulling straight up instead of to the side: The defining feature of a commando pull-up is pulling to alternating sides of the bar. If you pull straight up, your head hits the bar and the lateral back engagement is lost. Deliberately guide your head past one side on each rep.
Loose or shifting grip: Lock your hands firmly with knuckles pointing up and thumbs wrapped around the bar. A loose grip on a staggered hand position causes the hands to slide and puts unnecessary strain on the wrists.
Skipping the scapular set: Before bending your elbows, pull your shoulder blades down and together. Starting the pull with relaxed shoulders shifts the load entirely to the biceps and removes the back from the movement.