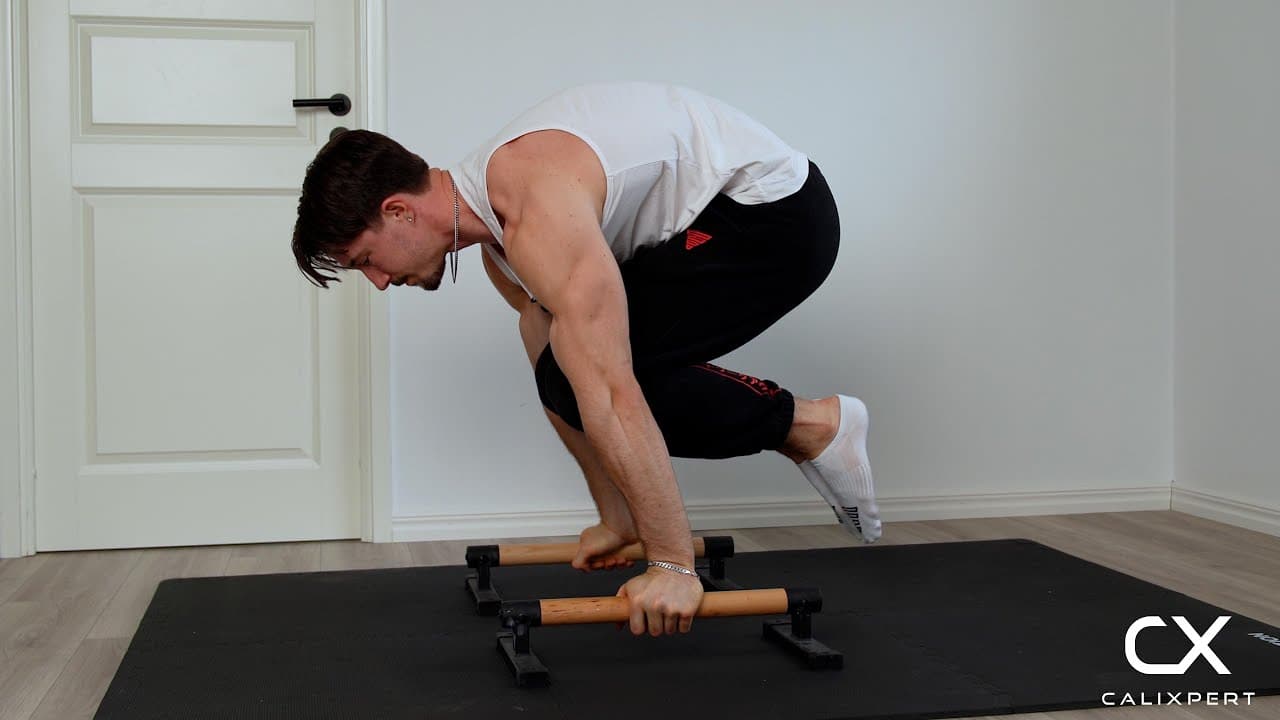
Tuck Planche
The tuck planche is a straight-arm isometric hold where you support your entire bodyweight on your hands with your knees tucked to your chest and your body parallel to the ground. It targets the anterior deltoids as the primary driver, with significant demand on the chest, triceps, serratus anterior, and core to maintain the protracted, forward-leaned position. Mastering the tuck planche builds the specific straight-arm pressing strength and scapular control that every advanced calisthenics pushing skill depends on.
The tuck planche is a straight-arm isometric hold where you support your entire bodyweight on your hands with your knees tucked to your chest and your body parallel to the ground. It targets the anterior deltoids as the primary driver, with significant demand on the chest, triceps, serratus anterior, and core to maintain the protracted, forward-leaned position. Mastering the tuck planche builds the specific straight-arm pressing strength and scapular control that every advanced calisthenics pushing skill depends on.
How to Do Tuck Planche
1. Set Up Your Hand Position
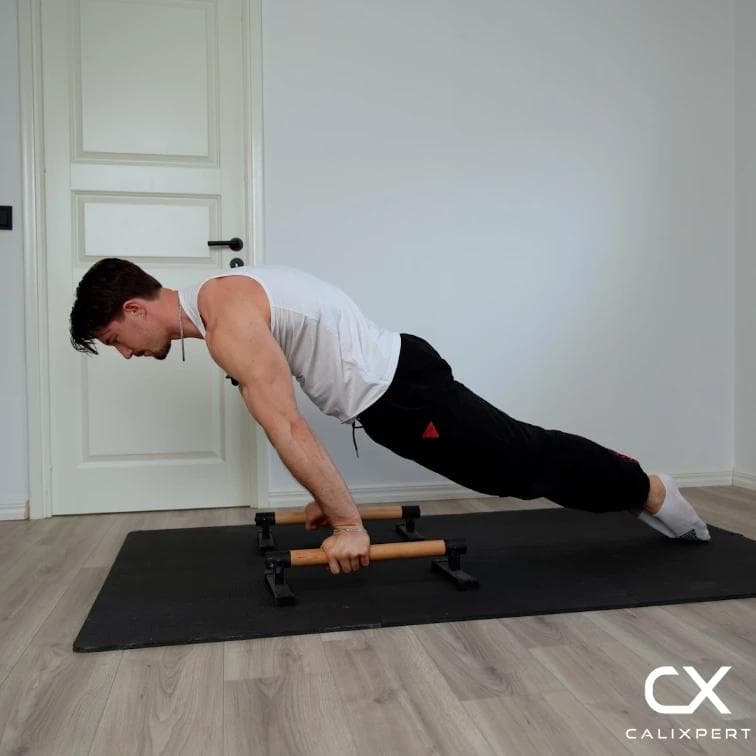
Place your hands or parallettes shoulder-width apart on the floor. Spread your fingers wide and press through the entire palm to distribute the load evenly across the wrist. If using parallettes, grip firmly with your thumbs wrapped around the handles. This position gives you a stable base and reduces wrist strain compared to a narrow or wide placement.
Shoulder width, fingers spread, full palm pressure
2. Lock Your Arms Completely Straight
Straighten your arms fully and engage the triceps to lock out the elbows. There should be zero bend at any point during the hold. Even a slight elbow bend shifts the load onto the biceps tendons and removes the straight-arm strength stimulus that makes this exercise valuable. Turn your elbow pits forward to reinforce the lockout.
Elbows locked, elbow pits forward
3. Protract and Depress Your Shoulders
Push your shoulders forward and downward, rounding the upper back slightly. This scapular protraction engages the serratus anterior and places the anterior deltoids in the strongest position to support your bodyweight. Your shoulders should sit well past your wrists, not directly above them. Without protraction, the hold collapses immediately.
Shoulders forward and down, round the upper back
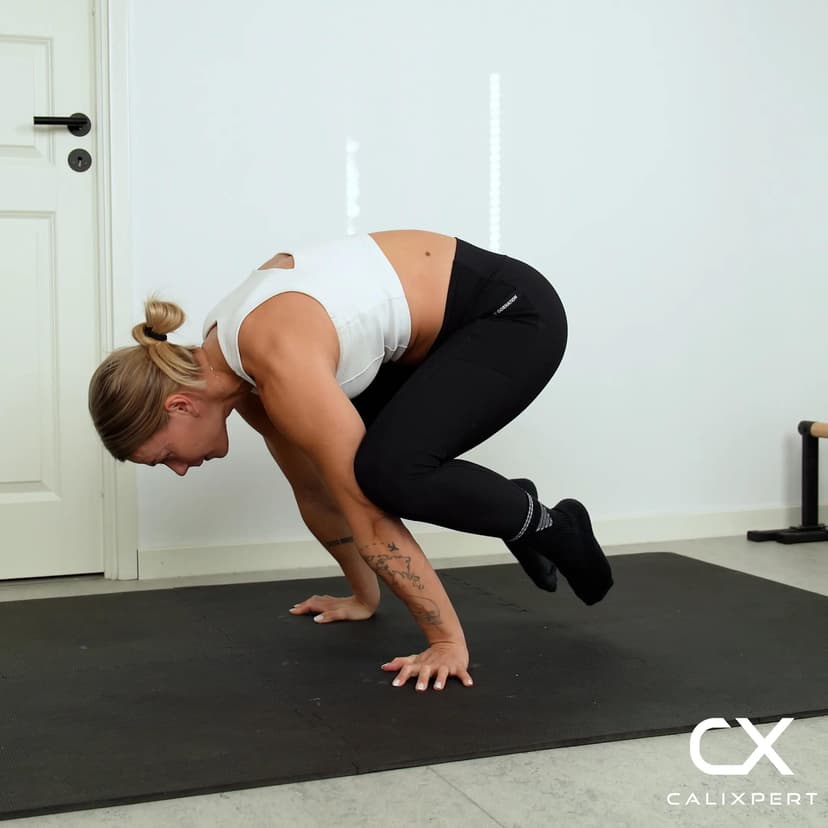
4. Lean Forward and Lift Your Feet
Shift your weight forward by leaning past your hands until your feet feel light on the ground. The further you lean, the easier it becomes to lift your feet. This forward lean is what most people underestimate. Your center of gravity needs to move far enough forward that your hands become the balance point for your entire body.
Lean until your feet float off the ground
5. Tuck Your Knees to Your Chest
Bring your knees up toward your chest while maintaining the forward lean and locked arms. Keep your knees pulled in tightly to shorten the lever arm and reduce the load on the shoulders. Your hips should rise to roughly the same height as your shoulders, creating a body position that is close to parallel with the ground.
Knees tight to chest, hips level with shoulders
6. Hold and Lower With Control
Maintain the position by keeping constant tension through your arms, shoulders, and core. Breathe in short, controlled breaths without letting your protraction collapse. When you finish the hold, slowly shift your weight back and lower your feet to the ground rather than dropping out of the position. Controlled exits protect your wrists and shoulders.
Stay tight, lower slowly, never drop
The number one reason people stall on tuck planche is they are not leaning forward enough. It feels counterintuitive to push your shoulders that far past your wrists, but that forward lean is what makes the hold possible. Spend weeks drilling deep planche leans with locked arms and protracted shoulders before you ever try to lift your feet, and the tuck planche will come together much faster than if you keep forcing it from a vertical position.
Muscles Worked During Tuck Planche
Primary Muscles:
Secondary Muscles:
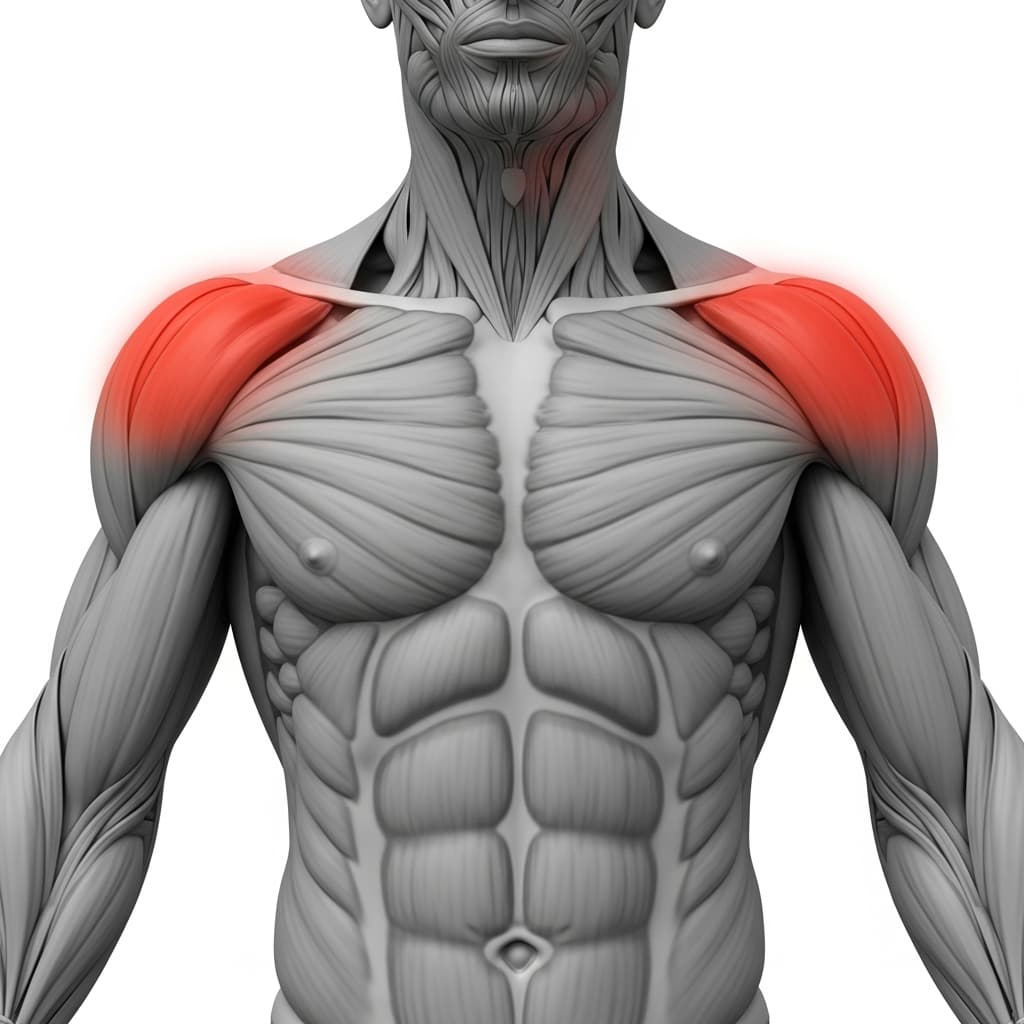
Primary Muscles
Anterior Deltoid (Front Deltoid) - The anterior deltoids bear the majority of your bodyweight in the forward-leaned position, working isometrically to prevent your shoulders from collapsing under load.
Secondary Muscles
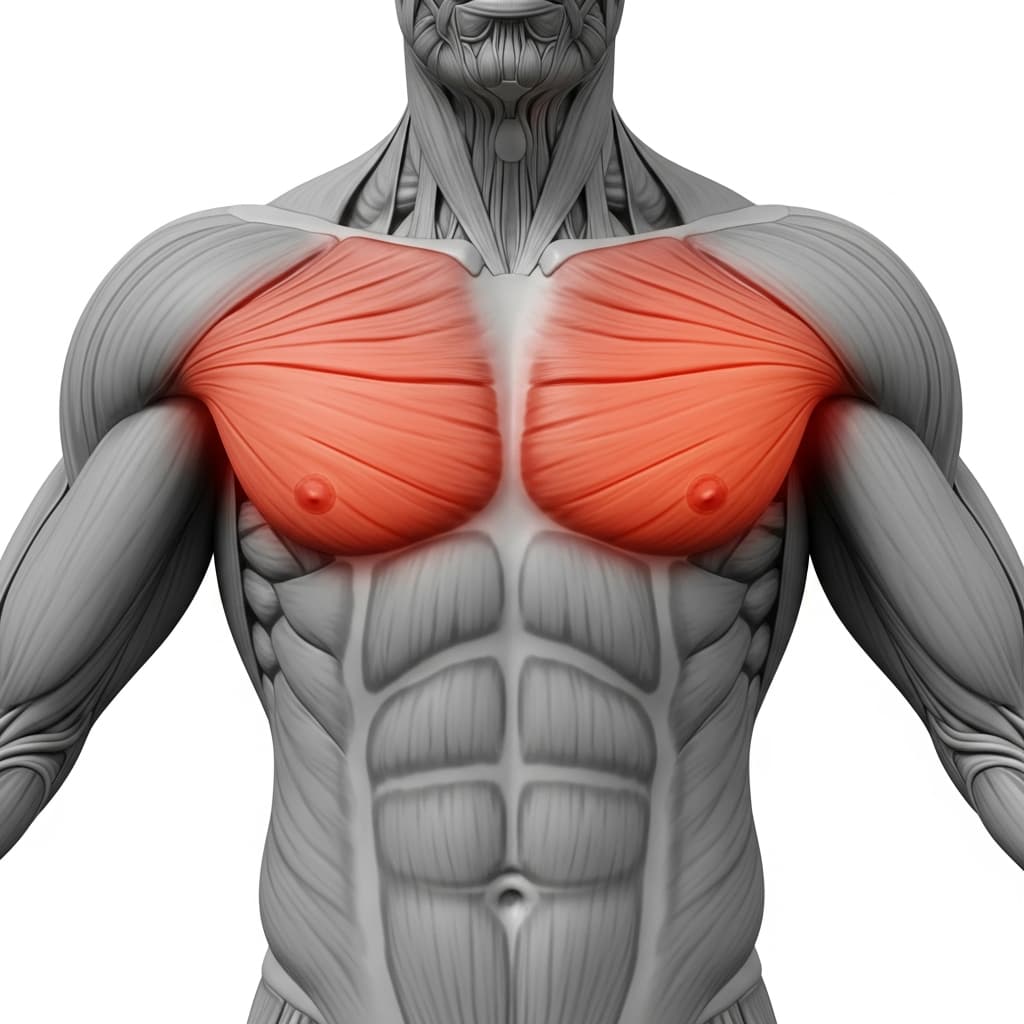
Pectoralis Major (Chest) - The pectorals assist the anterior deltoids in maintaining the forward lean and help stabilize the shoulder joint in its horizontally flexed position.
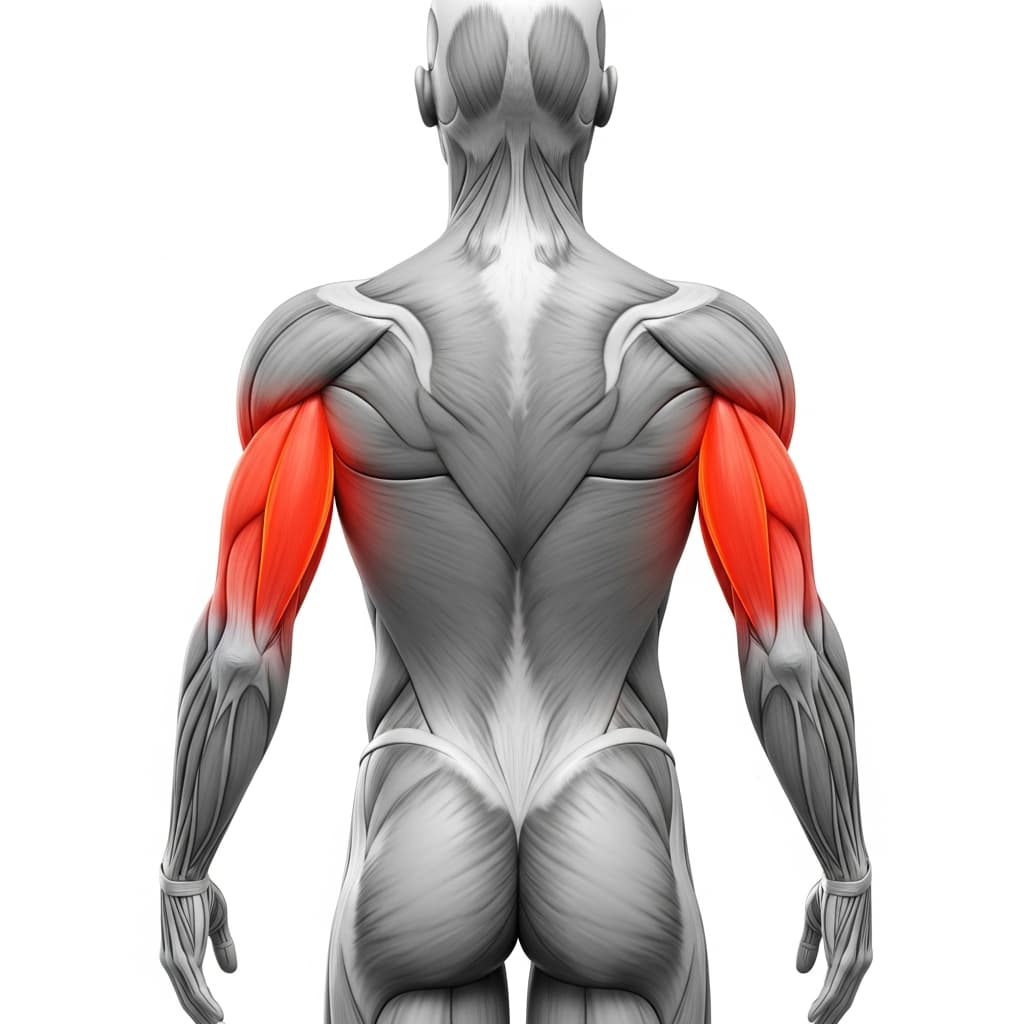
Triceps Brachii (Triceps) - The triceps lock the elbows into full extension throughout the hold, maintaining the straight-arm position that defines the exercise.
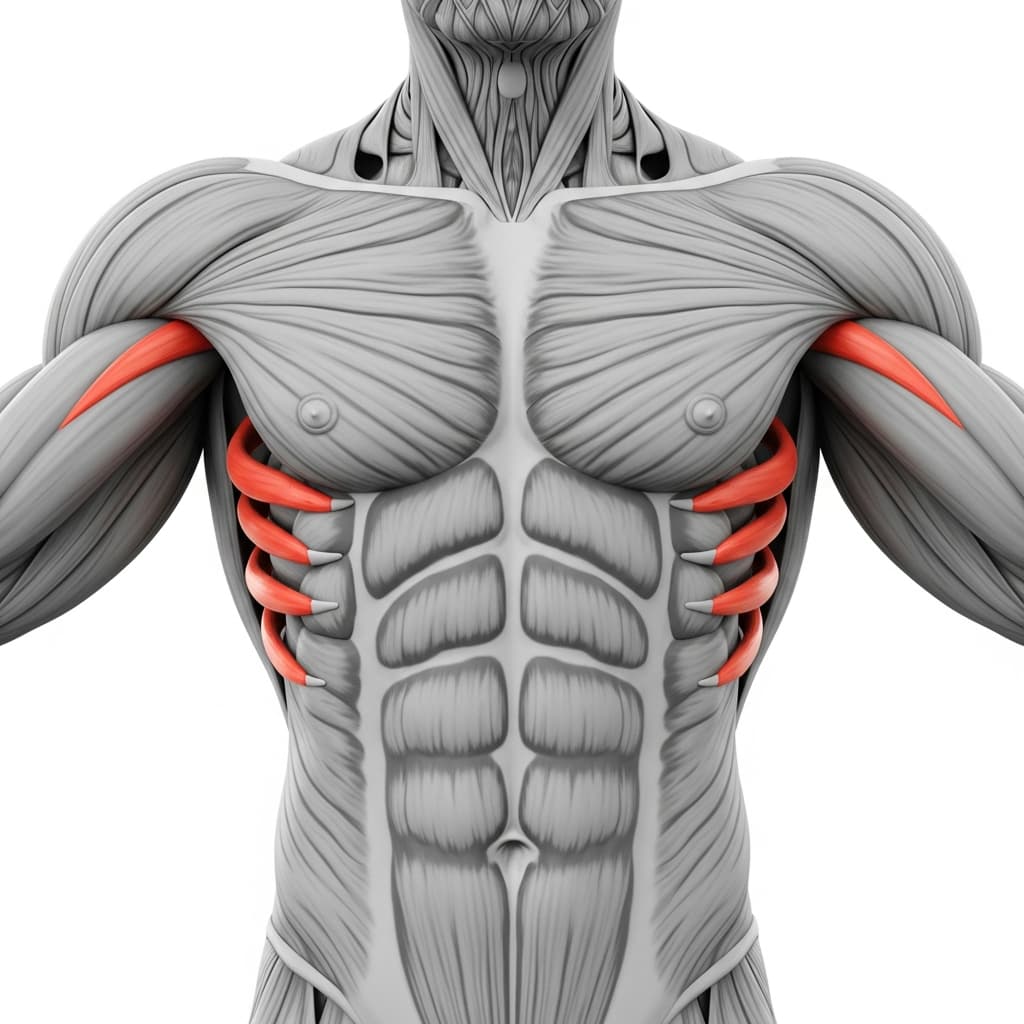
Serratus Anterior (Serratus Anterior) - The serratus anterior protracts the scapulae forward and downward, creating the rounded upper back position that keeps the shoulders stable under load.
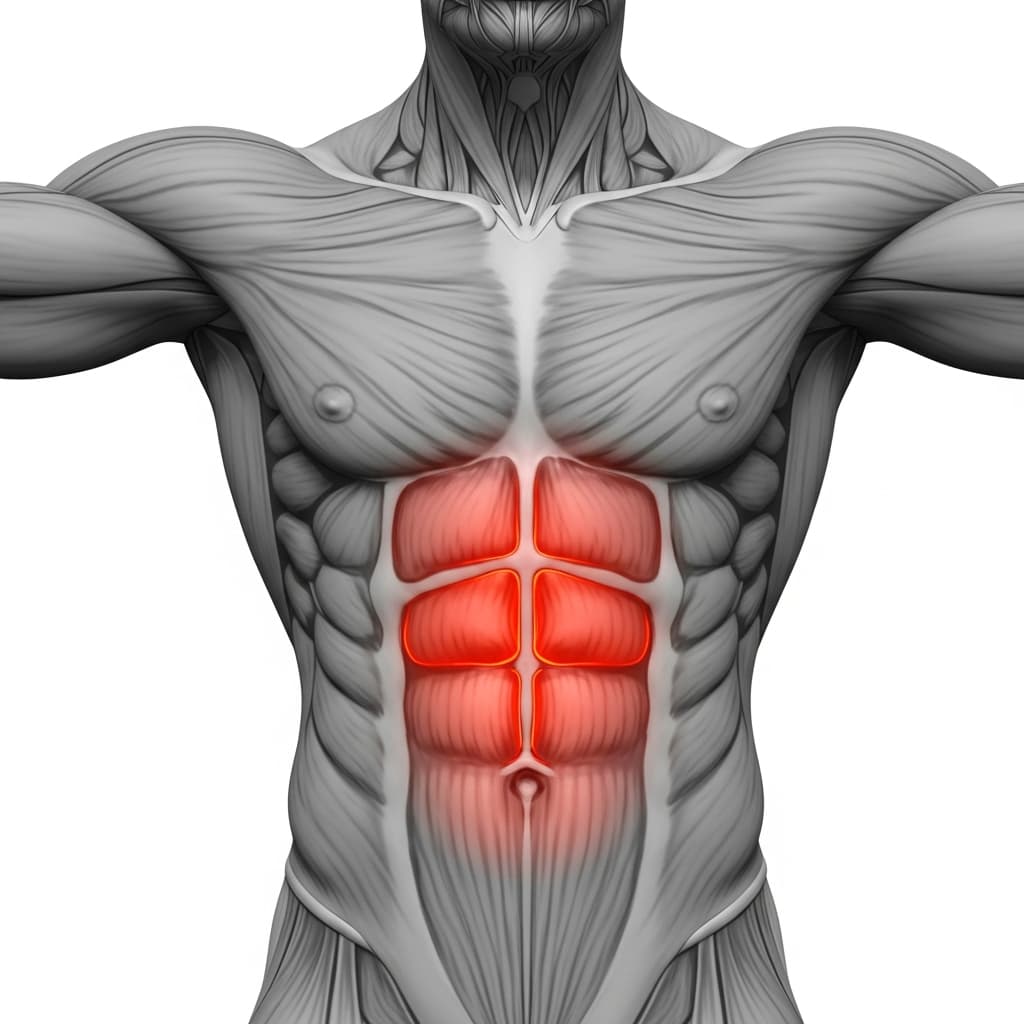
Rectus Abdominis (Abs) - The rectus abdominis contracts to hold the knees tucked toward the chest and prevents the hips from sagging below shoulder level.
Forearm Flexors & Extensors (Forearms) - The forearm flexors and extensors grip the floor or parallettes and stabilize the wrists under extreme extension and three to four times bodyweight load.
Benefits of Tuck Planche
- Builds the straight-arm pressing strength that is the direct prerequisite for straddle planche, full planche, and maltese progressions
- Develops anterior deltoid strength and endurance under sustained isometric load, which no standard pressing exercise replicates
- Strengthens the serratus anterior and trains active scapular protraction, improving shoulder stability in all overhead and pressing movements
- Conditions the wrists and forearms to handle heavy loads at full extension, reducing injury risk in handstands, planches, and floor work
- Builds core compression strength by requiring the abs and hip flexors to hold the tuck position against gravity
Who Is This Exercise For?
You should be able to hold a planche lean with your shoulders well past your wrists for at least 15 seconds and perform a controlled frog stand for 10 seconds before attempting the tuck planche. Wrist conditioning is non-negotiable, as this hold places three to four times your bodyweight through the wrists under extreme extension. If holding a planche lean causes wrist pain or your arms bend under load, spend four to six weeks on wrist mobility and planche lean progressions first.
Common Mistakes to Avoid
Bending the arms during the hold: Lock your elbows completely and turn the elbow pits forward before you lift. Any bend at the elbow turns this into a pseudo push-up hold and removes the straight-arm strength stimulus entirely.
Not leaning forward enough: Your shoulders need to travel well past your wrists for your feet to leave the ground. If your feet will not lift, the problem is almost always insufficient forward lean, not lack of strength. Practice deeper planche leans until the position feels natural.
Letting the shoulders shrug up toward the ears: Actively depress your shoulders downward and push them forward into full protraction. Shrugged shoulders shift the load onto the traps and neck, making the hold weaker and straining the wrong structures.
Hips dropping below shoulder level: Tuck your knees tighter to your chest and engage your lower abs to lift the hips. When the hips sag, the hold loses its horizontal line and the shoulders take the load at a disadvantageous angle.
Variations & Progressions
Advanced Tuck Planche
Extend your knees further away from your chest while keeping the legs bent, increasing the lever arm significantly. This progression adds considerable load to the shoulders and core and bridges the gap between tuck planche and straddle planche.