Tuck Hollow Body To Arch
The Tuck Hollow Body to Arch is a foundational core exercise that trains both the anterior and posterior chain by transitioning between two opposing positions on the floor. It targets the abs and hip flexors during the hollow body phase and the lower back, glutes, and spinal erectors during the arch phase. This exercise builds the body tension and positional awareness required for handstands, levers, and nearly every advanced calisthenics skill.

The Tuck Hollow Body to Arch is a foundational core exercise that trains both the anterior and posterior chain by transitioning between two opposing positions on the floor. It targets the abs and hip flexors during the hollow body phase and the lower back, glutes, and spinal erectors during the arch phase. This exercise builds the body tension and positional awareness required for handstands, levers, and nearly every advanced calisthenics skill.
How to Do Tuck Hollow Body To Arch
1. Set Up the Tuck Hollow Body
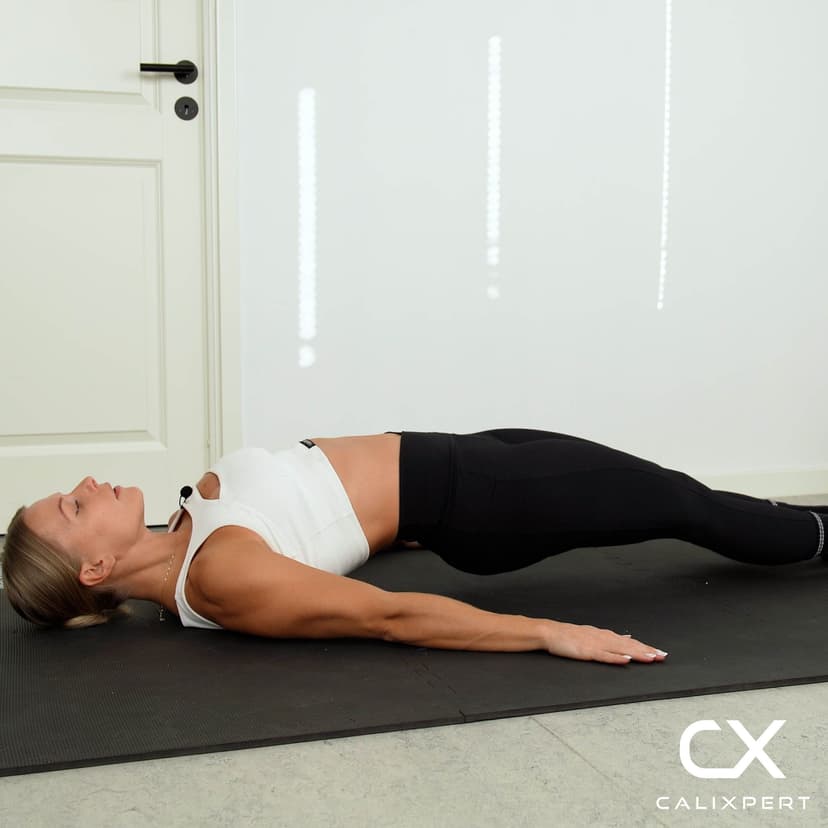
Lie flat on your back and press your lower back firmly into the floor by pushing your belly down. Tuck your knees toward your chest with bent legs and lift your upper body slightly off the ground. Keep your arms extended by your sides or alongside your body. Your lower back must stay in full contact with the floor throughout this position.
Flatten your lower back into the floor
2. Lower Your Legs Slowly
With your knees still bent, slowly lower your feet toward the floor while keeping your lower back pressed down. Go only as low as you can without your lower back peeling off the ground. If your back lifts, you have gone too far. This is the hardest part of the hollow phase and the most important to control.
Lower only as far as your back stays flat
3. Hold the Tuck Hollow Position
Hold this bottom tuck hollow position for 2 to 3 seconds with full tension through your core. Keep your shoulders slightly elevated and your abs fully engaged. Breathe steadily without letting your ribcage flare open.
Hold and squeeze, do not relax
4. Transition to the Arch Position
Place your heels on the ground, bring your hands down to the floor beside your hips, and lower your head to the ground. Roll over onto your stomach or simply flip to a prone position with your arms extended in front of you and your legs straight behind you. This transition should be smooth and controlled, not rushed.
Heels down, hands down, head down
5. Lift Into the Arch Hold
With your body prone, lift your chest, arms, and straight legs off the floor simultaneously. Squeeze your glutes hard to drive the lift through your posterior chain. Keep your neck neutral and your arms extended. Hold this arch position for 2 to 3 seconds before returning to the start.
Squeeze your glutes to lift everything
6. Return and Repeat
Lower back to the ground with control, then roll back to the supine position and reset into the tuck hollow body. Re-establish your lower back contact with the floor before beginning the next rep. Each transition counts as one full rep.
Reset fully before each rep
Most people treat this as two separate exercises glued together, but the real value is in the transition. When you move from hollow to arch, your body has to reorganize tension from the front chain to the back chain without losing control. Slow that transition down to 3 seconds each way and you will feel muscles activate that you did not know you had.
Muscles Worked During Tuck Hollow Body To Arch
Primary Muscles:
Secondary Muscles:
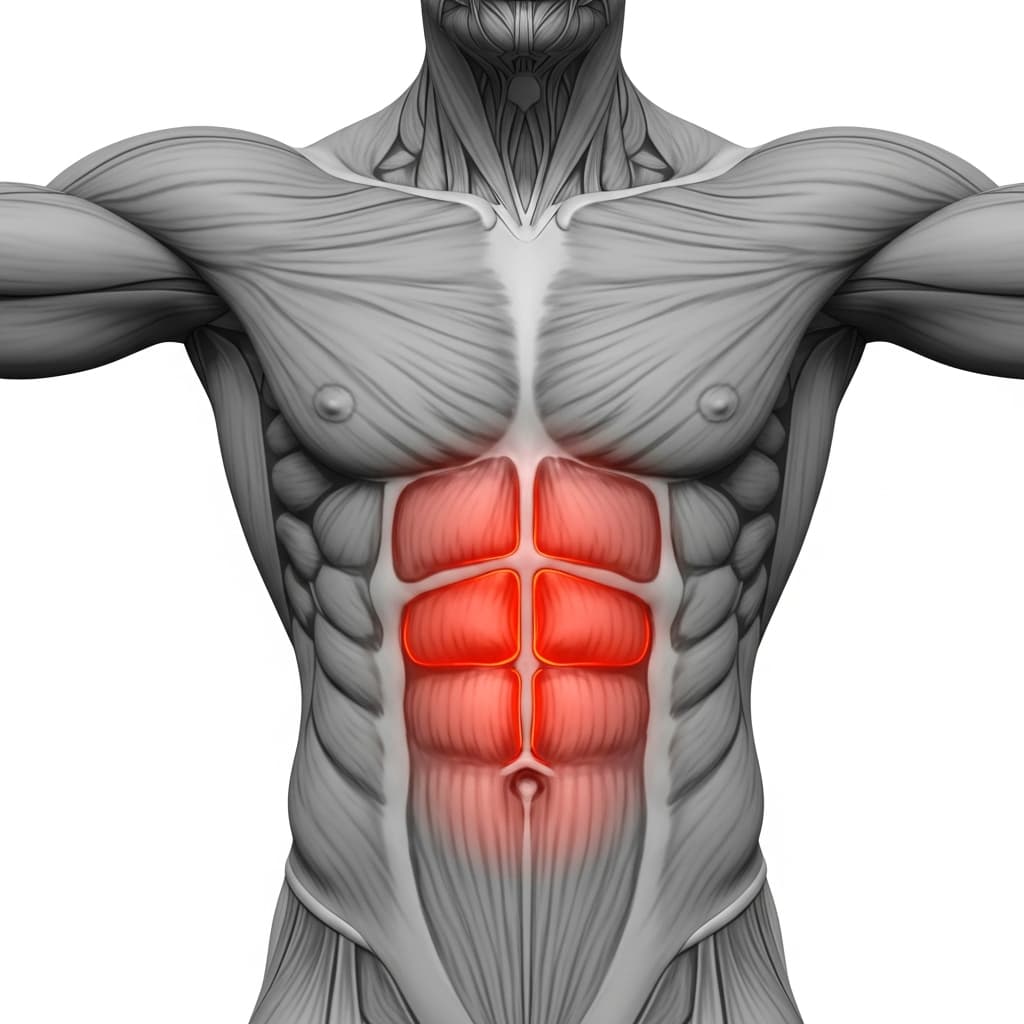
Primary Muscles
Rectus Abdominis (Abs) - The rectus abdominis contracts isometrically to hold the tuck hollow position, pressing the lower back into the floor and keeping the torso curled while the legs are extended away from the body.
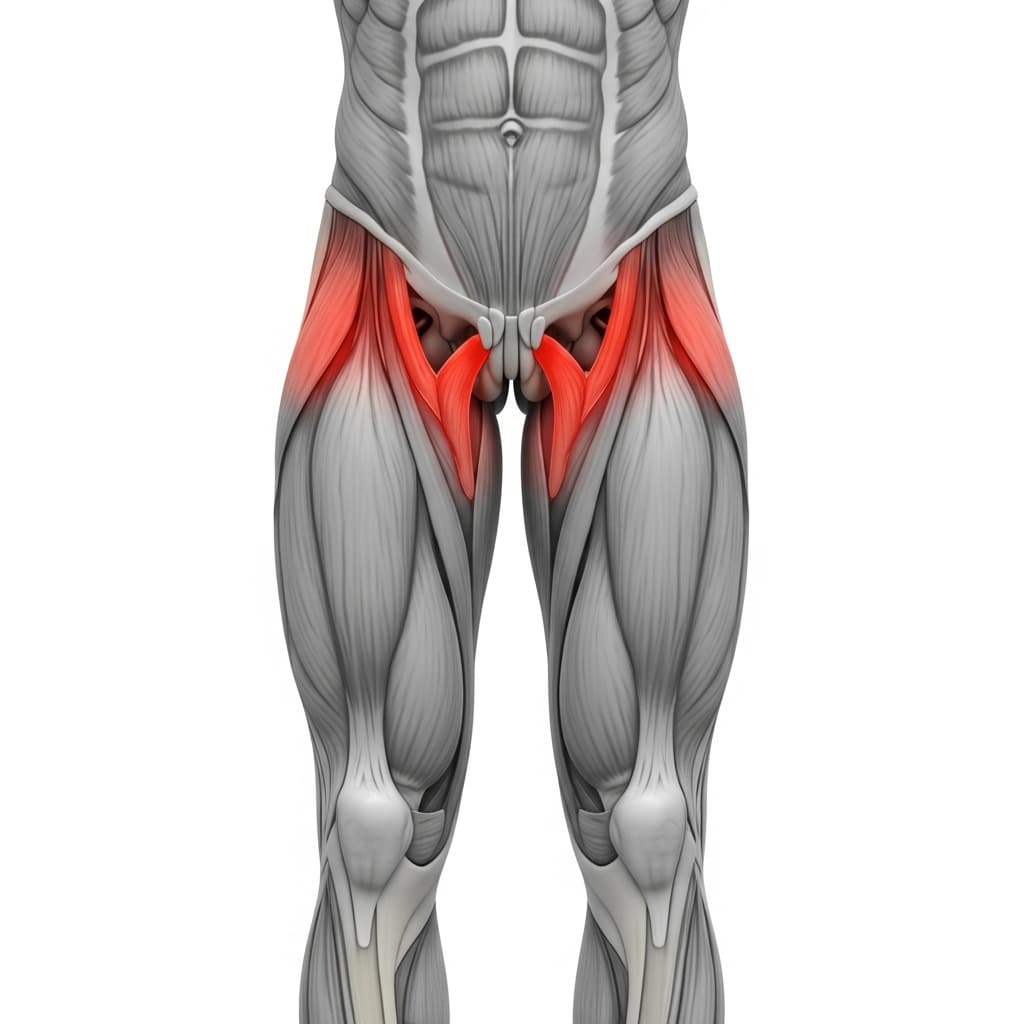
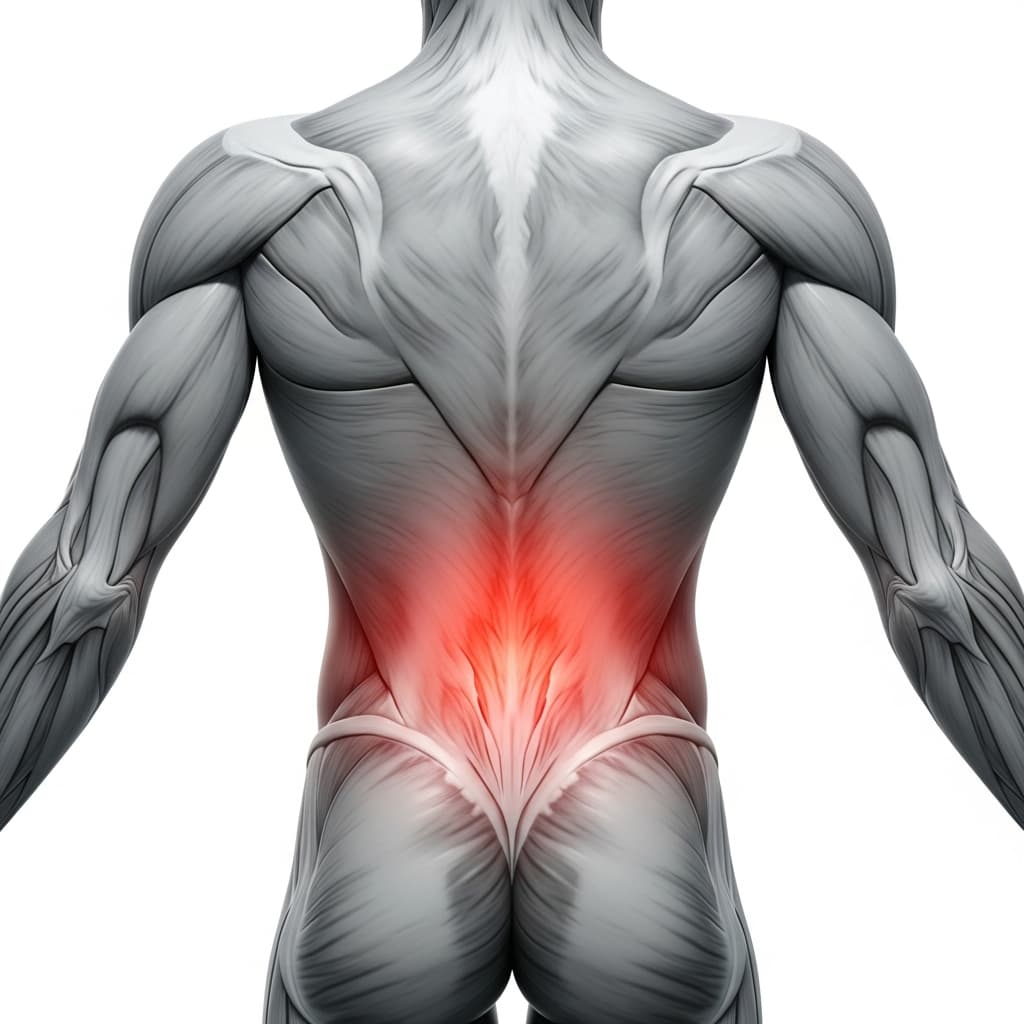
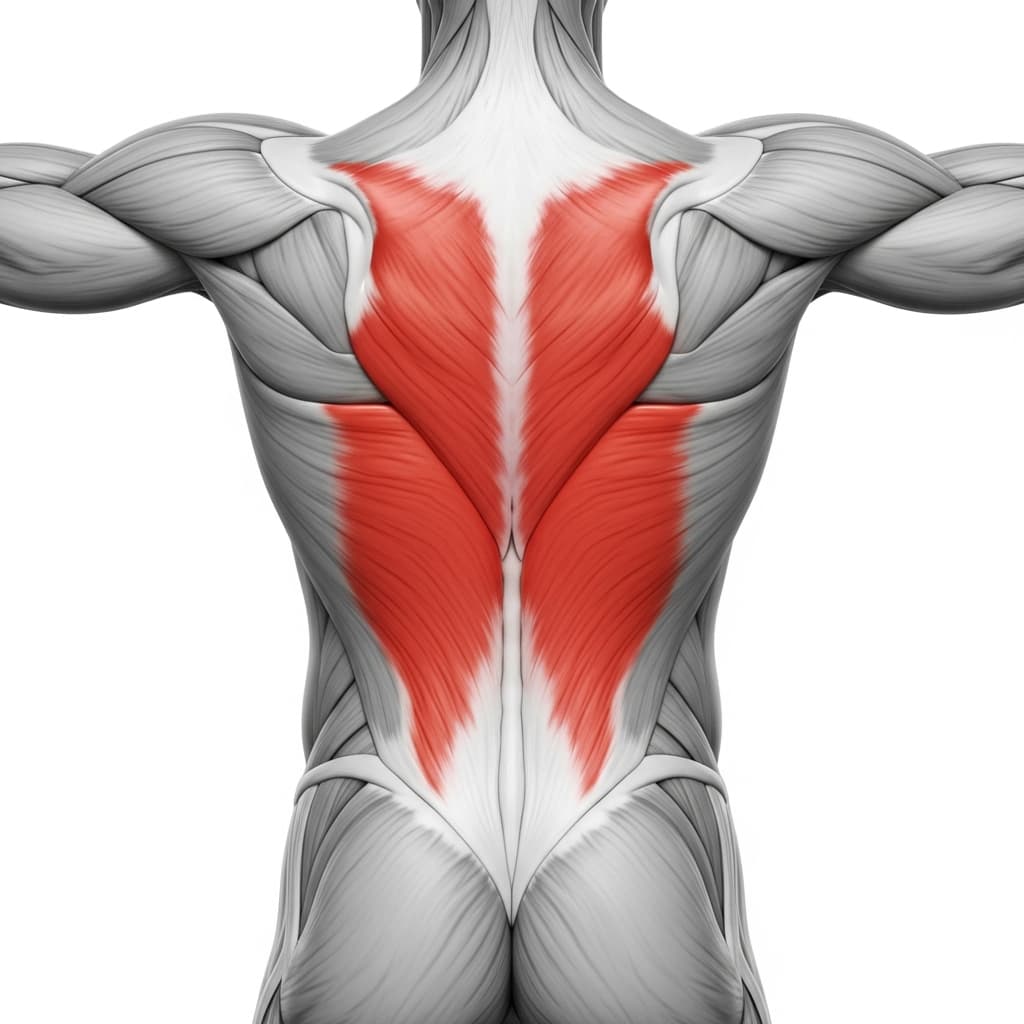
Secondary Muscles
Iliopsoas (Hip Flexors) - The hip flexors hold the bent legs in position during the hollow phase and work to keep the thighs elevated as the legs lower toward the ground.
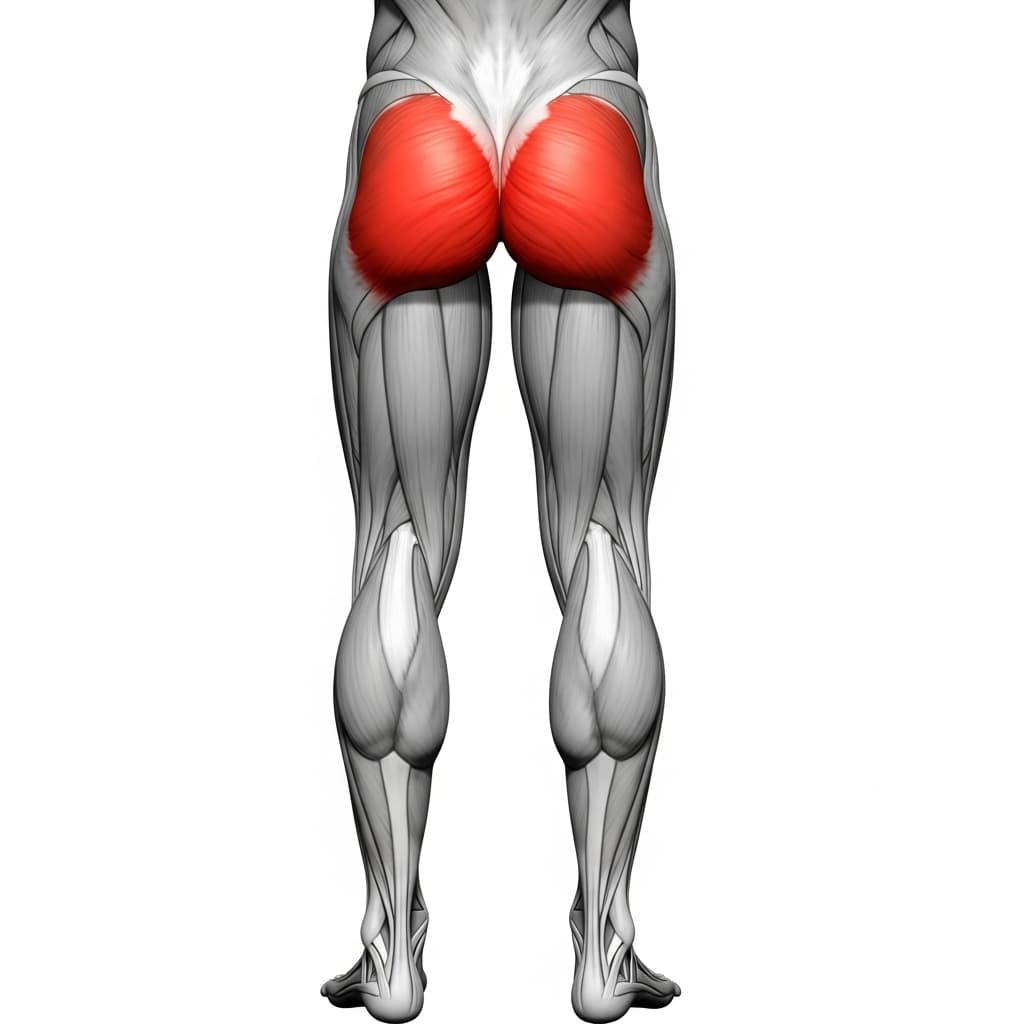
Erector Spinae (Lower Back) - The lower back muscles contract concentrically during the arch phase to lift the chest and upper body off the floor while maintaining spinal extension.
Erector Spinae (Spinal Erectors) - The spinal erectors work alongside the lower back to extend the spine during the arch hold, keeping the torso elevated against gravity.
Gluteus Maximus (Glutes) - The glutes drive hip extension during the arch phase, lifting the straight legs off the floor and providing the primary force for the posterior hold.
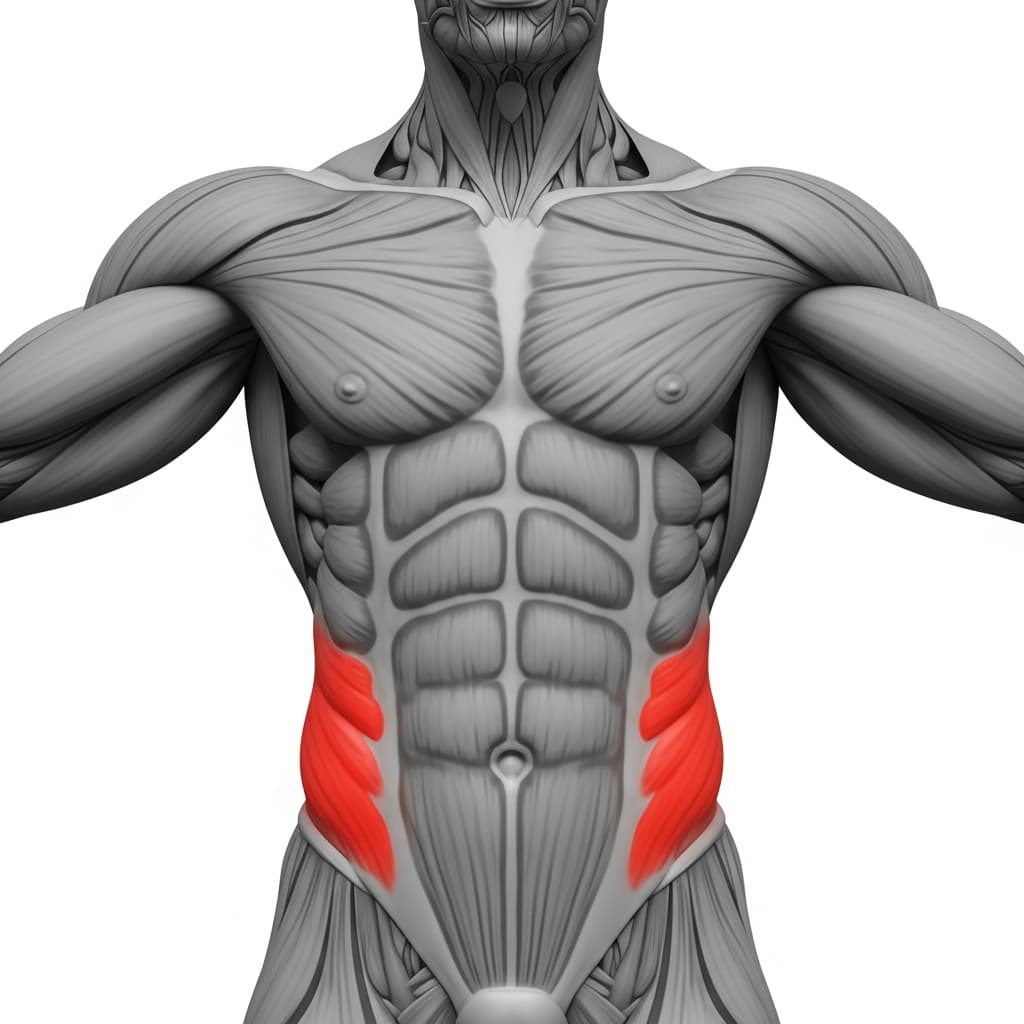
Obliques (Obliques) - The obliques stabilize the torso during the transition between hollow and arch, preventing lateral rotation and keeping the body aligned throughout the movement.
Benefits of Tuck Hollow Body To Arch
- Develops balanced core strength across both the anterior and posterior chain, preventing the front-dominant imbalance common in athletes who only train planks and crunches
- Builds the specific body tension patterns required for handstands, front levers, and back levers
- Strengthens the lower back and glutes through the arch position, which directly transfers to better hip extension in movements like muscle-ups and skin-the-cats
- Improves proprioception and positional awareness on the floor, teaching you to feel and control spinal position without visual feedback
Who Is This Exercise For?
You should be able to hold a basic tuck hollow body for at least 10 seconds with your lower back pressed firmly into the floor before attempting this exercise. If your lower back lifts off the ground during the hollow hold, spend more time building anterior core strength with dead bugs and tuck hollow holds first. You should also be comfortable with a prone arch hold for at least 5 seconds.
Common Mistakes to Avoid
Lower back lifting during the hollow phase: If your lower back peels off the floor, your legs are too low for your current core strength. Bring your knees higher toward your chest until you can maintain full contact, then gradually work toward a lower leg position over time.
Rushing the transition between positions: The transition is where most people lose tension and cheat the exercise. Move deliberately between the hollow and arch positions, pausing briefly in each one before switching.
Lifting with the arms instead of the glutes in the arch: Your glutes and spinal erectors should drive the arch, not your arms pulling off the floor. Focus on squeezing the glutes first, and let the upper body rise as a result of posterior chain engagement.
Holding breath throughout the exercise: Breathe out during the holds and in during the transitions. Holding your breath creates unnecessary pressure and limits how long you can maintain quality positions.
Variations & Progressions
Tuck Hollow Hold Only
Remove the arch portion entirely and practice holding the tuck hollow body for sets of 10 to 20 seconds. This builds the anterior core strength needed before adding the transition.