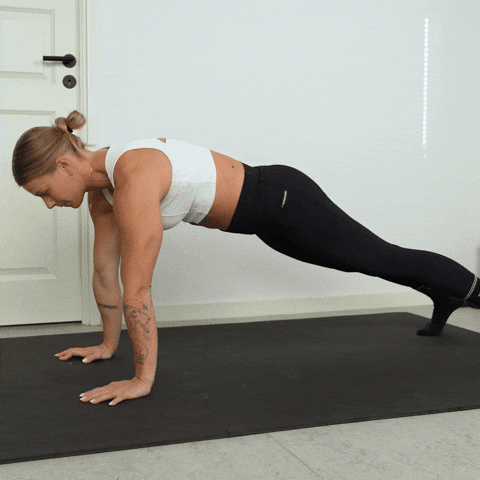
Push up Hold With Shoulder Taps
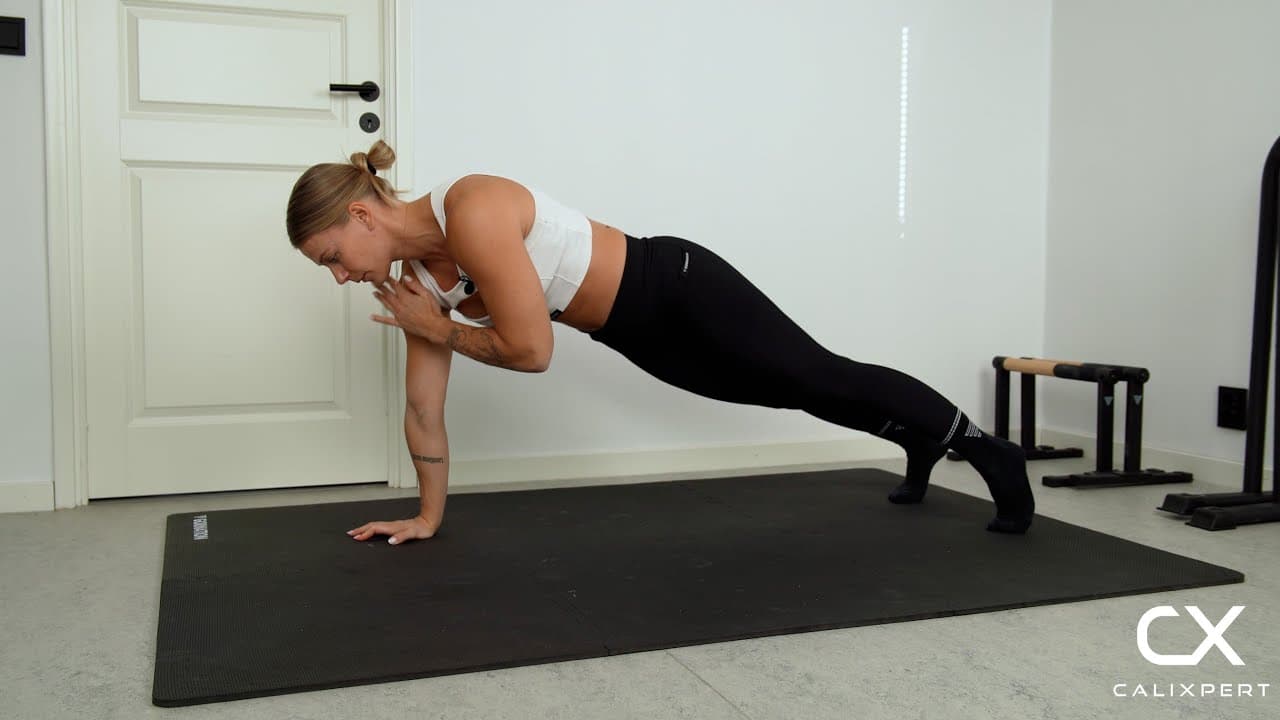
The push-up hold with shoulder taps is an anti-rotation core exercise performed from the top of a push-up position, targeting the abs, obliques, and front deltoids through sustained isometric tension and controlled weight shifts. The defining challenge is maintaining a rigid, level torso while lifting one hand to tap the opposite shoulder, forcing the entire core to resist rotation under an asymmetric load. This exercise builds the anti-rotation stability and shoulder endurance that directly transfer to plank holds, push-up progressions, and any calisthenics skill requiring a locked-out support position.
The push-up hold with shoulder taps is an anti-rotation core exercise performed from the top of a push-up position, targeting the abs, obliques, and front deltoids through sustained isometric tension and controlled weight shifts. The defining challenge is maintaining a rigid, level torso while lifting one hand to tap the opposite shoulder, forcing the entire core to resist rotation under an asymmetric load. This exercise builds the anti-rotation stability and shoulder endurance that directly transfer to plank holds, push-up progressions, and any calisthenics skill requiring a locked-out support position.
How to Do Push up Hold With Shoulder Taps
1. Set Up in High Plank
Place your hands directly under your shoulders with your arms fully locked out. Your body should form a straight line from the crown of your head to your heels. Engage your core by pulling your belly button toward your spine and squeezing your glutes to prevent any lower back sag.
Straight line from head to heels
2. Widen Your Feet for Stability
Spread your feet slightly wider than shoulder width to create a more stable base of support. A wider stance reduces the amount of lateral sway when you lift one hand off the ground. You can bring the feet closer together as you get stronger, but start wide.
Wider feet, more stable base
3. Shift Weight to One Hand
Lean your weight slightly toward your left hand without letting your hips tilt or rotate. The shift should be subtle, just enough to unload the right hand. Keep your shoulders as square to the ground as possible throughout the transfer.
Lean, do not twist
4. Tap the Opposite Shoulder
Lift your right hand off the ground and tap your left shoulder with a controlled, deliberate motion. Do not rush the tap or slap the shoulder. Keep the movement compact and return your hand to the floor before any rotation sets in.
Tap light, hips stay level
5. Reset and Switch Sides
Place your right hand firmly back under your shoulder and re-establish a solid plank position. Then shift your weight to the right hand and tap your right shoulder with your left hand using the same controlled technique. Each side counts as one rep.
Reset fully before switching
6. Maintain Tension Throughout
Keep your core braced and your glutes squeezed for the entire set, not just during the taps. Breathe steadily through your nose and avoid holding your breath. The quality of every rep depends on how well you maintain full-body tension between taps.
Core tight, breathe steady
Most people treat shoulder taps like a speed drill and wonder why they never feel it in their core. The trick is to slow everything down and think about pressing the floor away with your supporting hand while you tap. When you do that, your entire trunk has to lock down to prevent rotation, and that is where the real training stimulus comes from. If your hips are swaying, you are going too fast.
Muscles Worked During Push up Hold With Shoulder Taps
Primary Muscles:
Secondary Muscles:
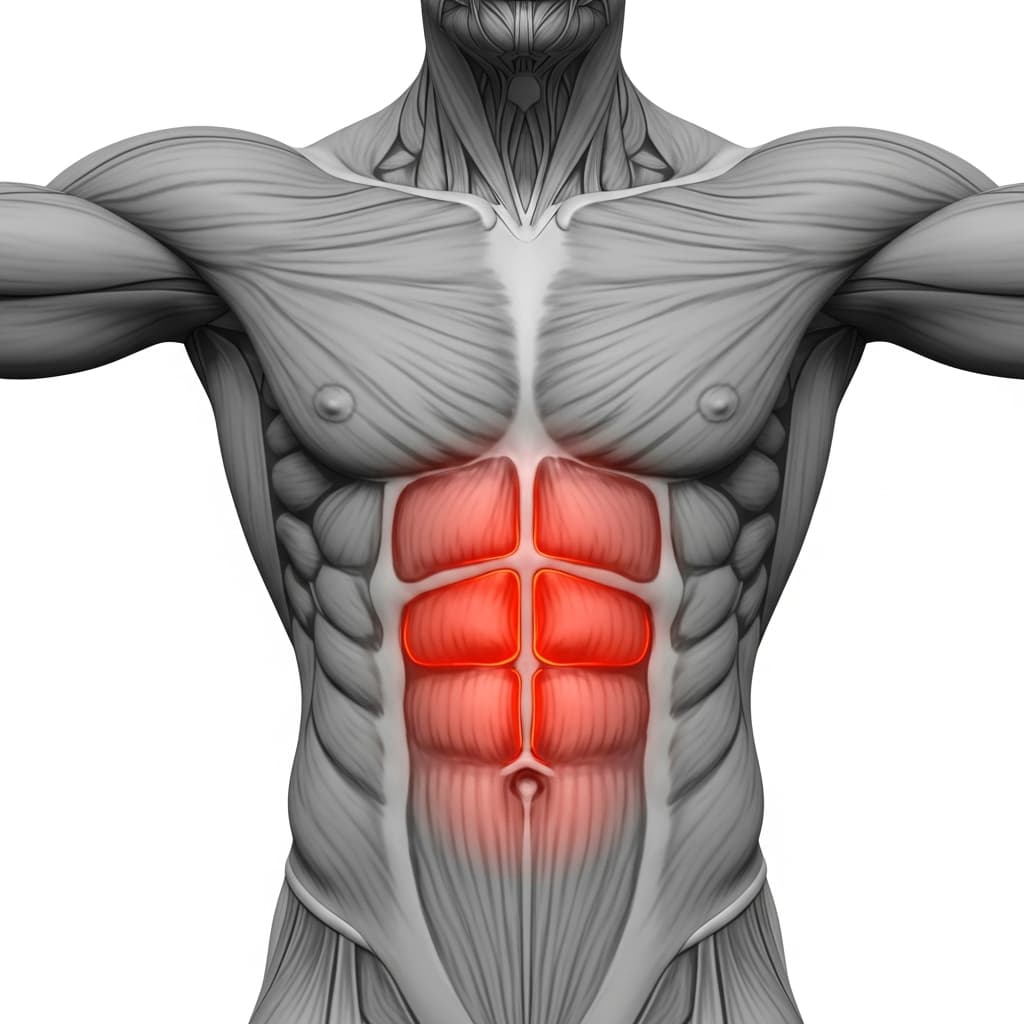
Primary Muscles
Rectus Abdominis (Abs) - The rectus abdominis braces the trunk against both extension and rotation throughout the hold, working isometrically to keep the torso rigid while each hand lifts off the ground.
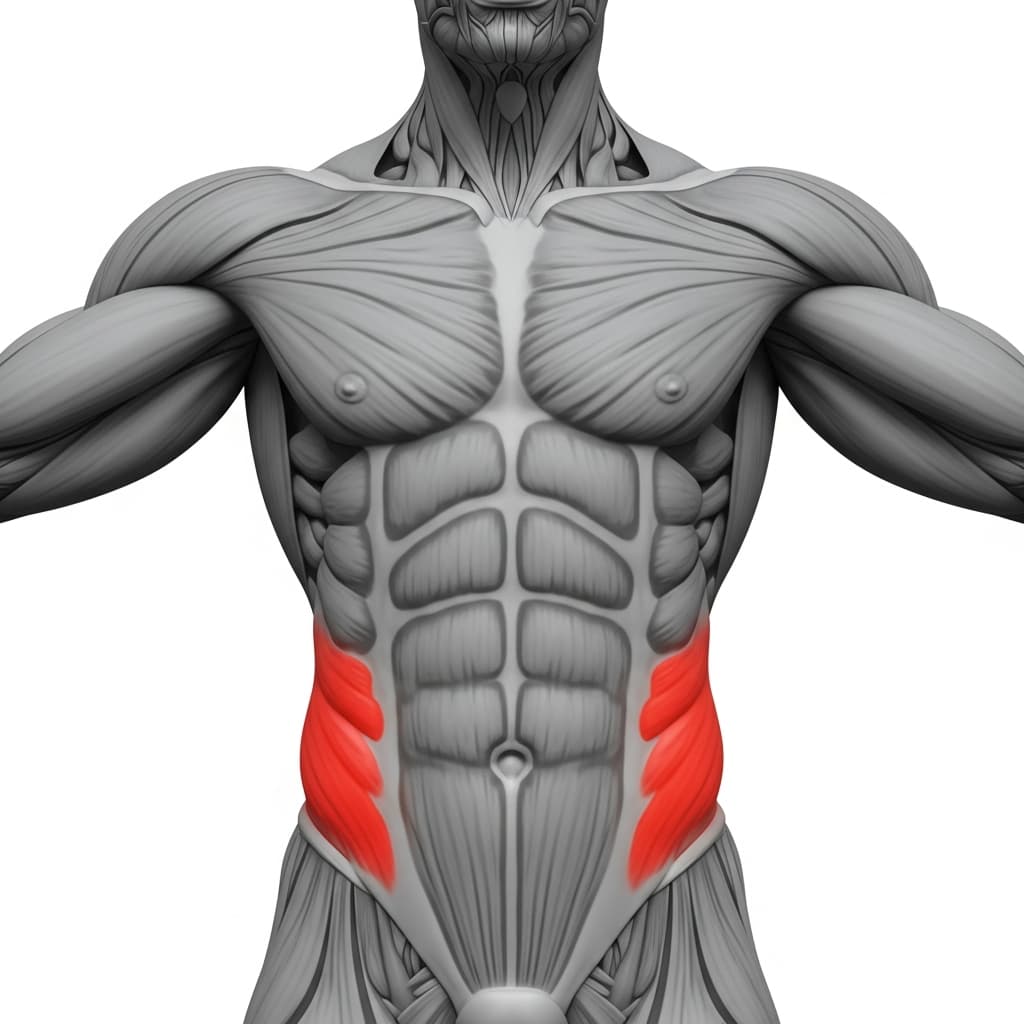
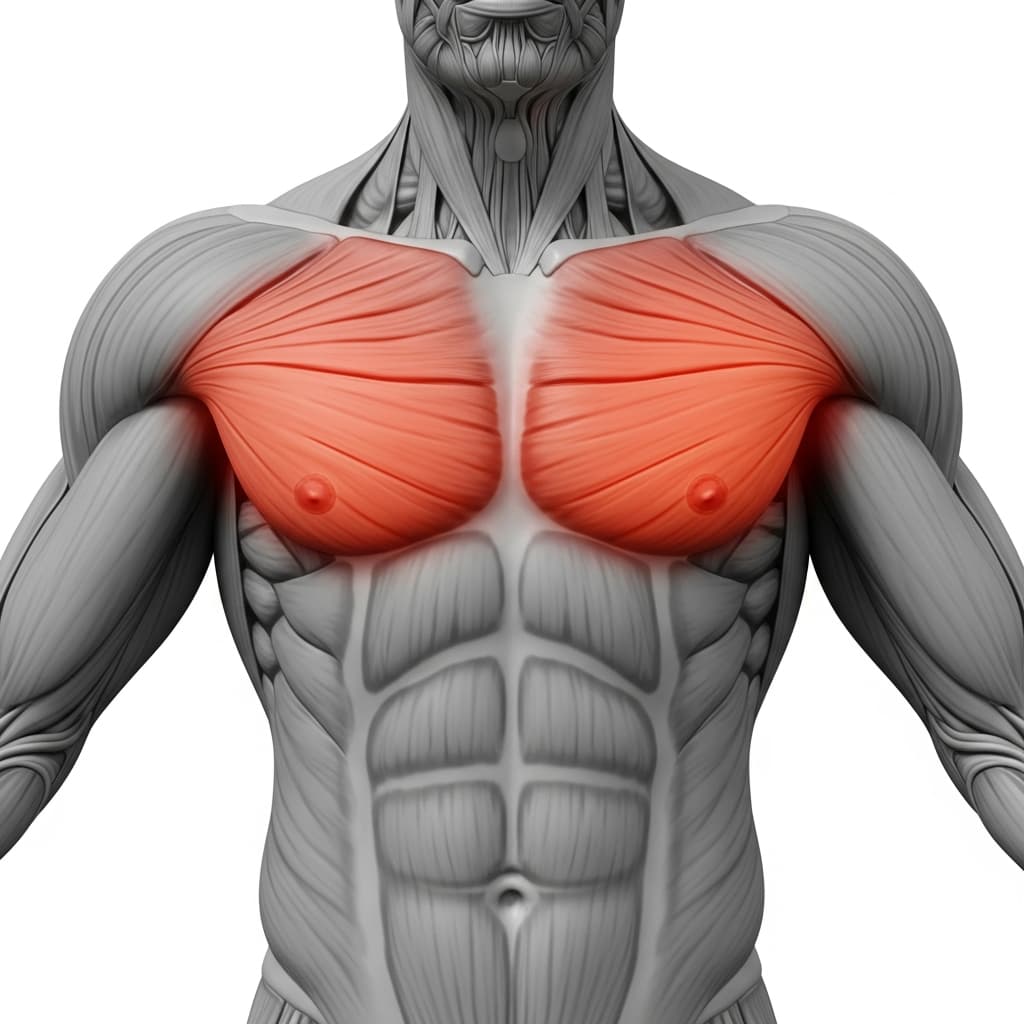
Secondary Muscles
Obliques (Obliques) - The internal and external obliques resist the rotational force created each time one hand leaves the floor, firing hard on the supporting side to keep the hips square.
Pectoralis Major (Chest) - The pectorals hold the body in the top push-up position isometrically and bear increased load on the supporting side during each shoulder tap.
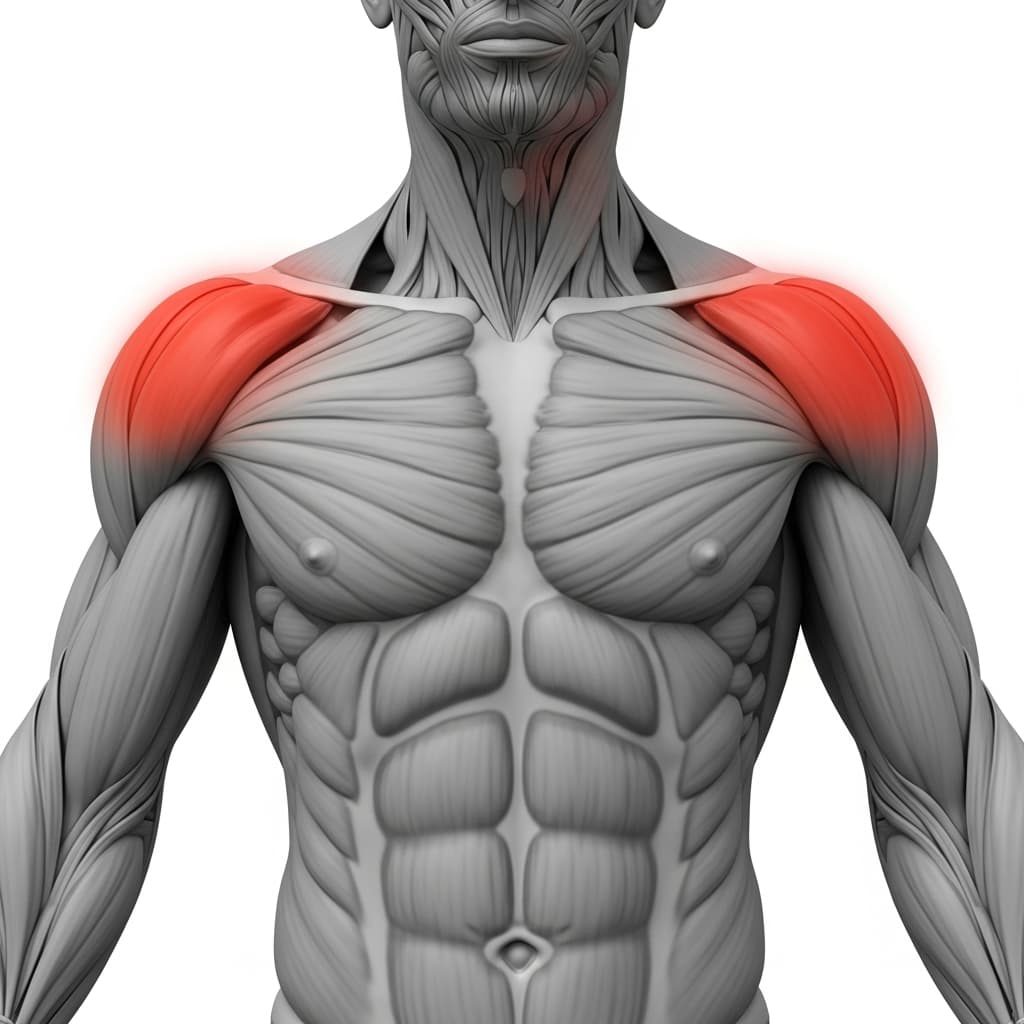
Anterior Deltoid (Front Deltoid) - The anterior deltoid stabilizes the shoulder joint of the supporting arm under full bodyweight while the opposite hand lifts to perform the tap.
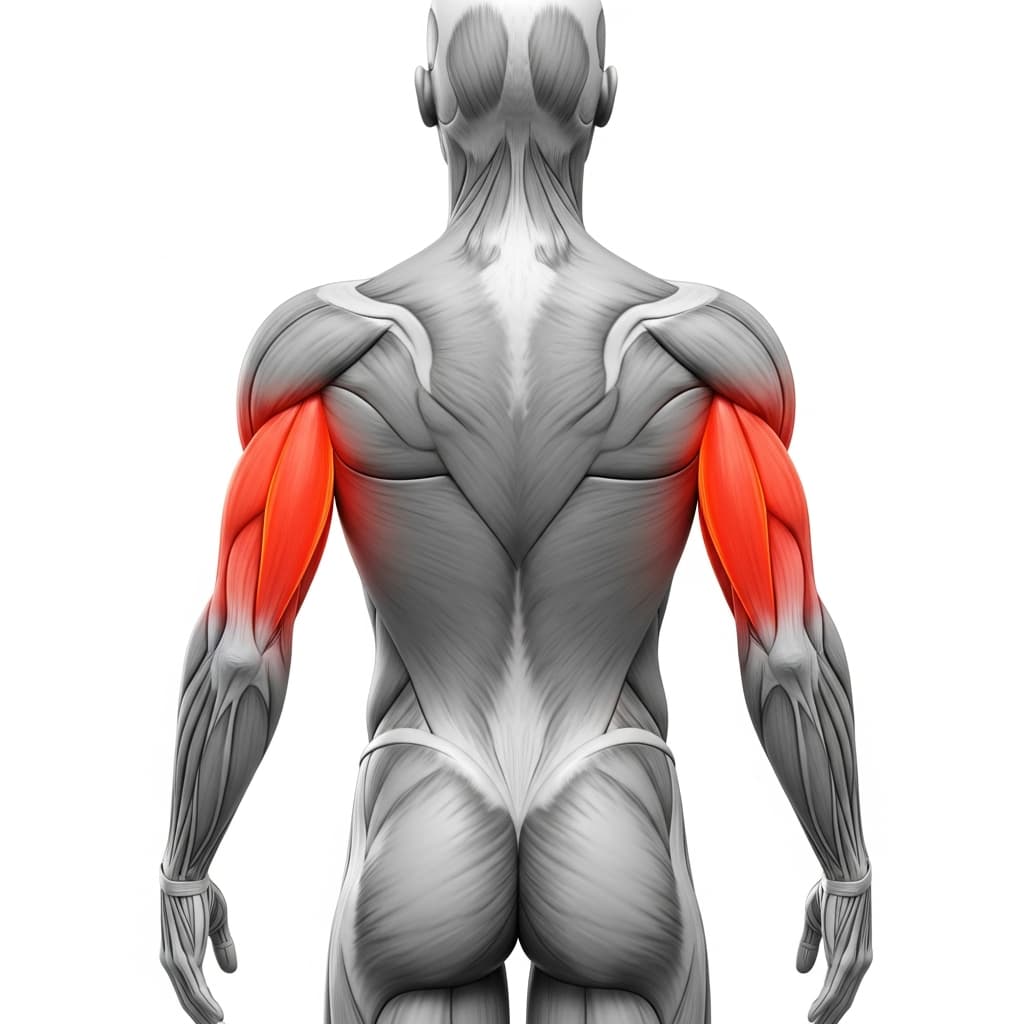
Triceps Brachii (Triceps) - The triceps maintain elbow lockout in the supporting arm throughout the hold, preventing the arm from collapsing under the shifted load.
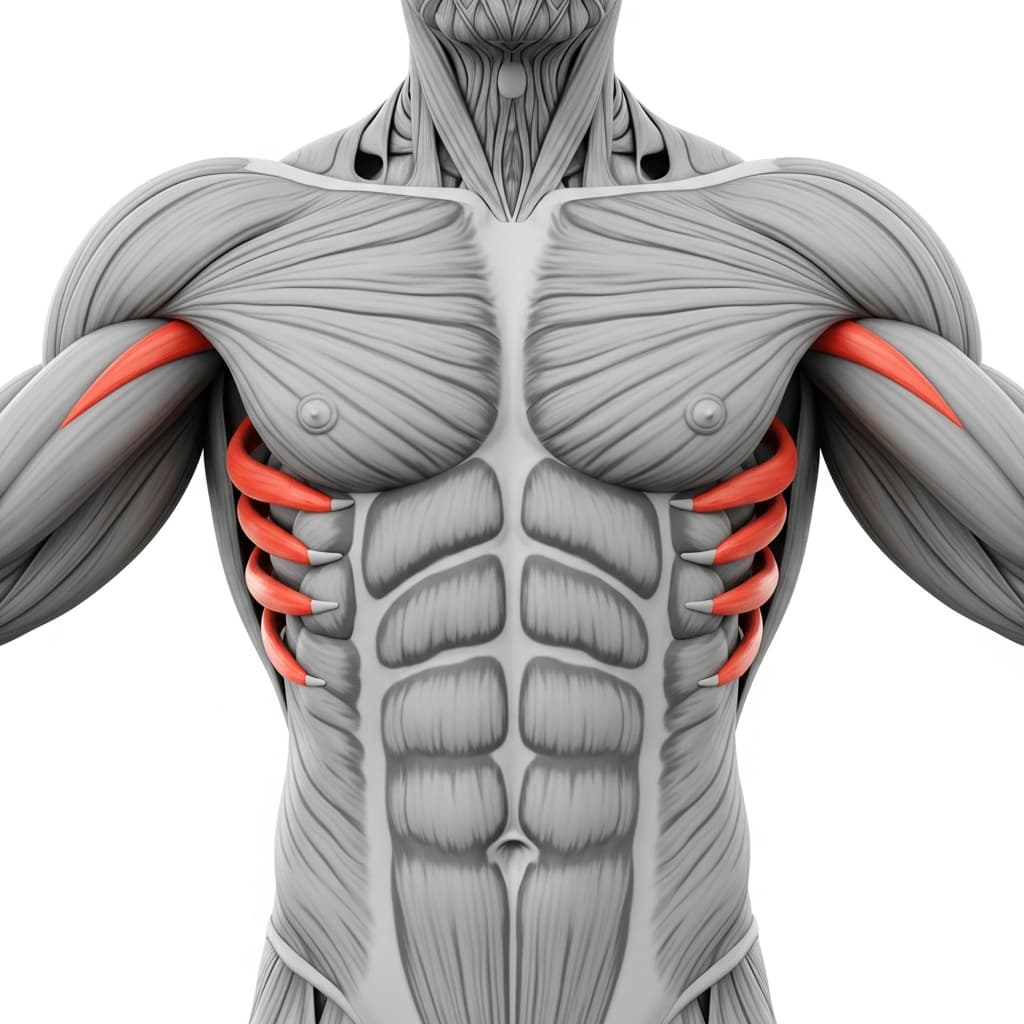
Serratus Anterior (Serratus Anterior) - The serratus anterior protracts and stabilizes the scapula of the supporting arm, preventing the shoulder blade from winging under asymmetric loading.
Benefits of Push up Hold With Shoulder Taps
- Develops anti-rotation core strength, the specific type of stability required for handstands, L-sits, and planche progressions in calisthenics
- Builds single-arm shoulder stability under load, directly preparing the joint for one-arm push-up and plank variations
- Strengthens the serratus anterior through sustained protraction, which improves scapular control in all pressing movements
- Improves proprioception and body awareness by forcing you to detect and correct subtle weight shifts in real time
Who Is This Exercise For?
You should be able to hold a high plank for at least 30 seconds with a flat back and level hips before attempting shoulder taps. If your hips sag, twist, or your lower back dips during a standard plank, focus on building that static hold first with dead bugs and forearm planks.
Common Mistakes to Avoid
Rotating the hips during each tap: The most common error is letting the hips swing side to side as you lift each hand. Widen your stance and slow down the movement. If your hips still rotate, reduce the tempo until you can keep them completely square to the ground.
Rushing through the taps: Speed kills the purpose of this exercise. Each tap should take two to three seconds, not a fraction of a second. Slowing down forces the core to stabilize for longer, which is where all the training benefit comes from.
Letting the lower back sag: A sagging lower back means your core has disengaged. Squeeze your glutes and actively press the ground away through your supporting hand. If you cannot maintain a flat back, drop to your knees and rebuild from there.
Placing hands too far forward: Hands should be stacked directly under the shoulders, not out in front of them. When the hands drift forward, the shoulders bear excessive load and the core loses its bracing advantage.
Variations & Progressions
Kneeling shoulder taps
Perform the same movement from a kneeling plank position instead of full plank. This shortens the lever arm and reduces the anti-rotation demand, making it accessible for anyone still building plank endurance.
Narrow-stance shoulder taps
Bring your feet together or even stack them on top of each other. The narrower base dramatically increases the rotational challenge on the core, requiring significantly more anti-rotation strength to keep the hips level.
Weighted vest shoulder taps
Add a weight vest to increase the load on the supporting arm and core. This variation forces greater isometric effort from the chest, shoulders, and abs during every tap.