Ring Support Hold
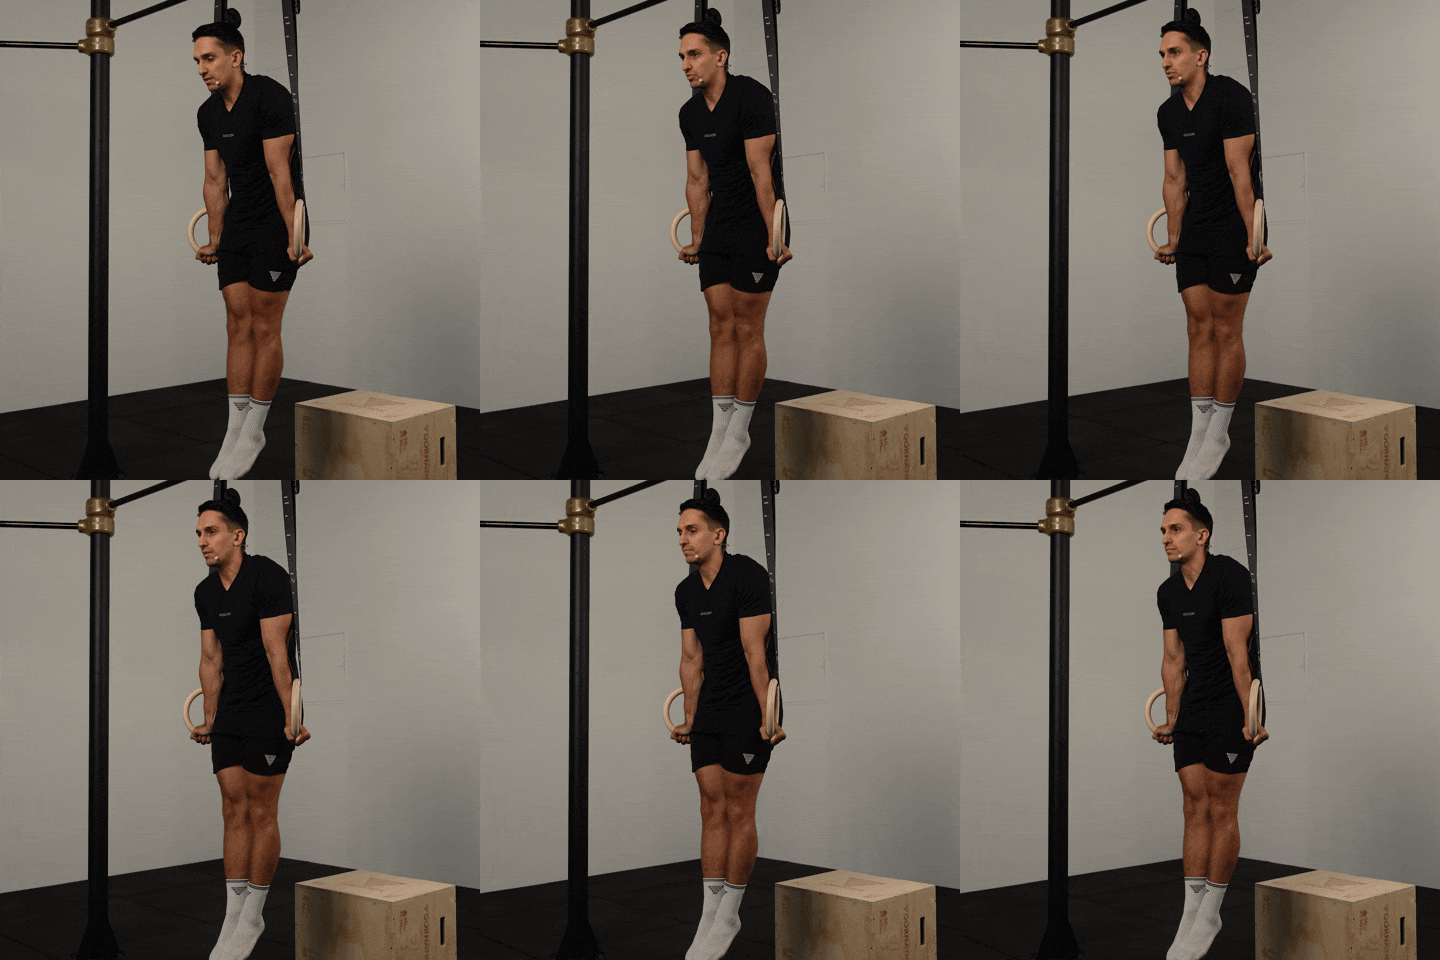
The ring support hold is the static top position on gymnastic rings, arms locked straight at your sides, rings turned outward so your palms and biceps face forward, and your whole body held tight. That turnout is the position you are aiming at, not an extra: the goal is rings close to the body, rotated outward with the biceps exposed forward. The chest and triceps do most of the work keeping you locked out and the rings pulled in, while the front deltoids, biceps, lats, traps, abs and forearms fight the constant wobble that fixed bars never give you, and the glutes and quads hold the lower body in one straight line. It is the position every other ring skill sits on top of, so the time you spend holding it cleanly shows up later in ring dips and muscle-up work.

The ring support hold is the static top position on gymnastic rings, arms locked straight at your sides, rings turned outward so your palms and biceps face forward, and your whole body held tight. That turnout is the position you are aiming at, not an extra: the goal is rings close to the body, rotated outward with the biceps exposed forward. The chest and triceps do most of the work keeping you locked out and the rings pulled in, while the front deltoids, biceps, lats, traps, abs and forearms fight the constant wobble that fixed bars never give you, and the glutes and quads hold the lower body in one straight line. It is the position every other ring skill sits on top of, so the time you spend holding it cleanly shows up later in ring dips and muscle-up work.
How to Do Ring Support Hold
1. Hang the Rings and Set Your Height
Attach the rings to a secure anchor above you. A box underneath is not needed, but it is worth using, because it lets you keep your legs fully straight at the top when the rings hang low to the floor.
Legs fully straight at the top
2. Lock Your Arms
Press down into the rings and lock your elbows straight. In the beginning you will not be able to hold that, and your arms will sit slightly bent, which is what most people have at the start. That is okay. Hold what you can control and work yourself up to straight arms over time.
Press down, elbows locked
3. Depress the Shoulders
Push your shoulders down and away from your ears so your neck stays long. Setting the shoulders down before you start the clock is what keeps the position stable rather than sinking into a shrug.
Shoulders down, neck long
4. Turn the Rings Out
Rotate your hands outward so your palms and biceps are exposed forward. That rotation is the target of the whole position, not an optional extra, and it is where you want to end up. Until you can hold it, rotate as far as you can control without the rings caving back in and work out of the un-rotated start the same way you work up to straight arms, letting the rotation improve with practice over time.
Biceps facing forward
5. Keep the Rings Close
Pull the rings in toward your body as if you were finishing a chest fly, then hold that squeeze. The rings should end up slightly in front of you and pressed against your sides, never drifting out wide or sitting behind you.
Rings close, slightly in front
6. Tension the Whole Body
Brace your abs into a hollow body position, squeeze your glutes and press your legs together with the knees straight. The hold is not just an arm position, everything from your hands to your toes should be switched on.
Tight from hands to toes
7. Hold Still and Breathe
Keep the tension and stay completely still, breathing in and out through your nose rather than holding your breath. End the set when the position starts to break down, not when you fall off the rings.
Breathe through the nose, keep the tension
In the beginning you will not be able to do this. You will sit there with the arms slightly bent, and that is okay, you will work yourself up to straight arms. Straight and rotated out with the biceps exposed forward is where you want to end up, so keep adding rotation as it comes rather than settling for palms turned in. While you get there, keep the rings close to you, keep the shoulders depressed and keep the whole body tight, legs included. Breathe through your nose and hold the tension instead of fighting the rings.
Muscles Worked During Ring Support Hold
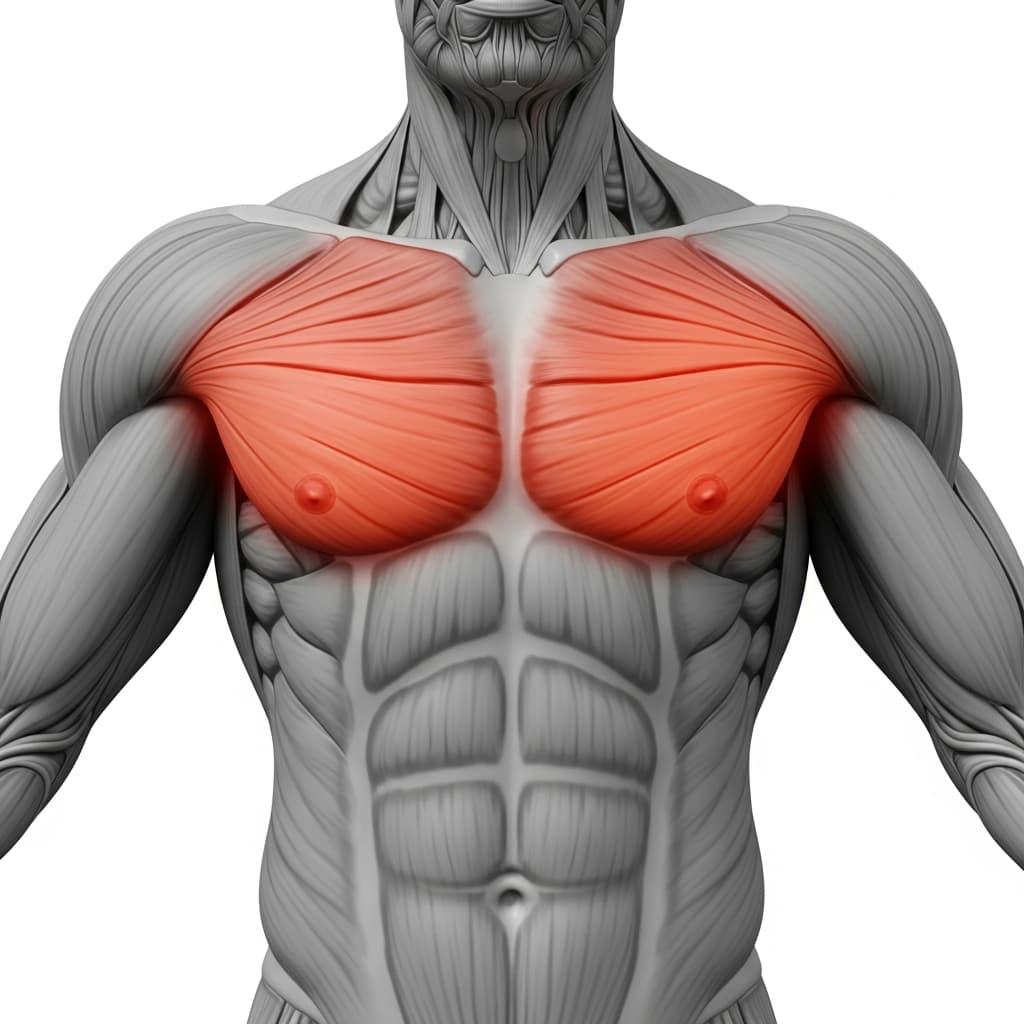
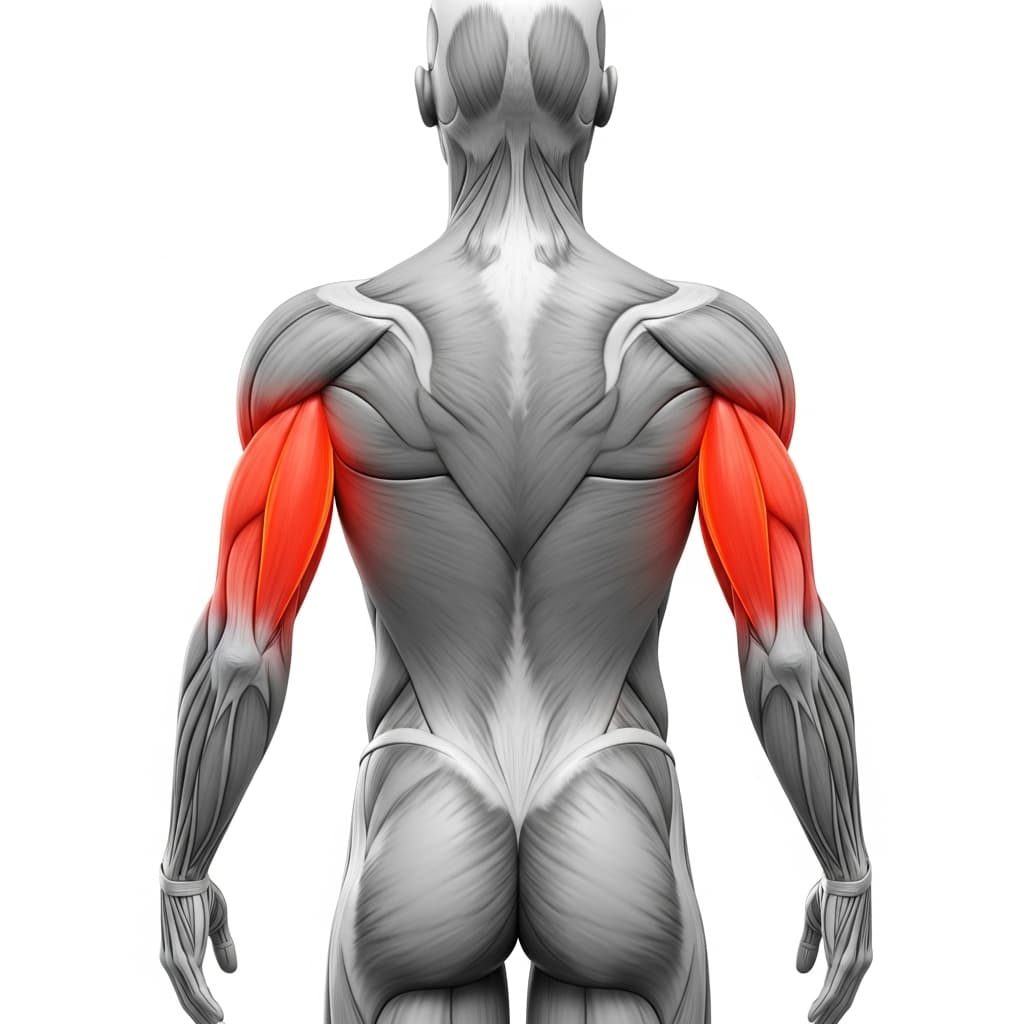
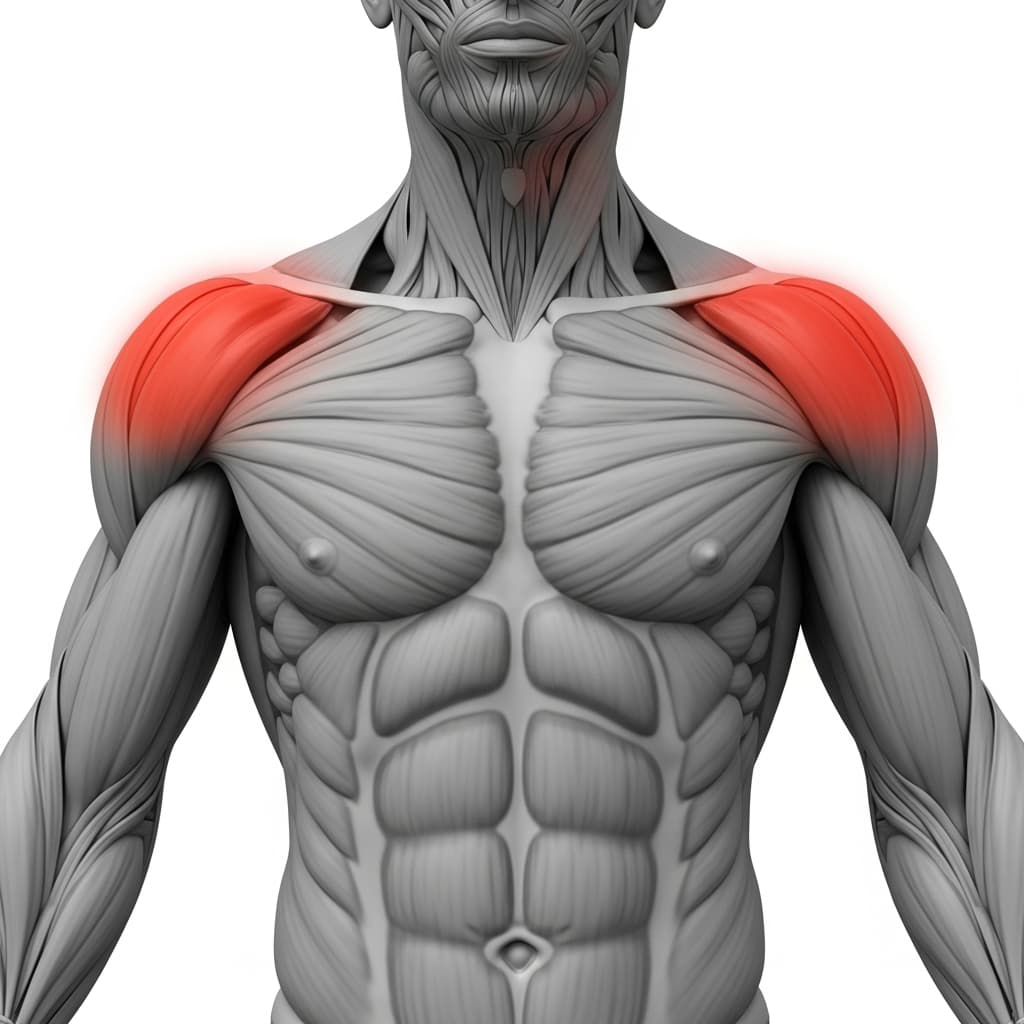
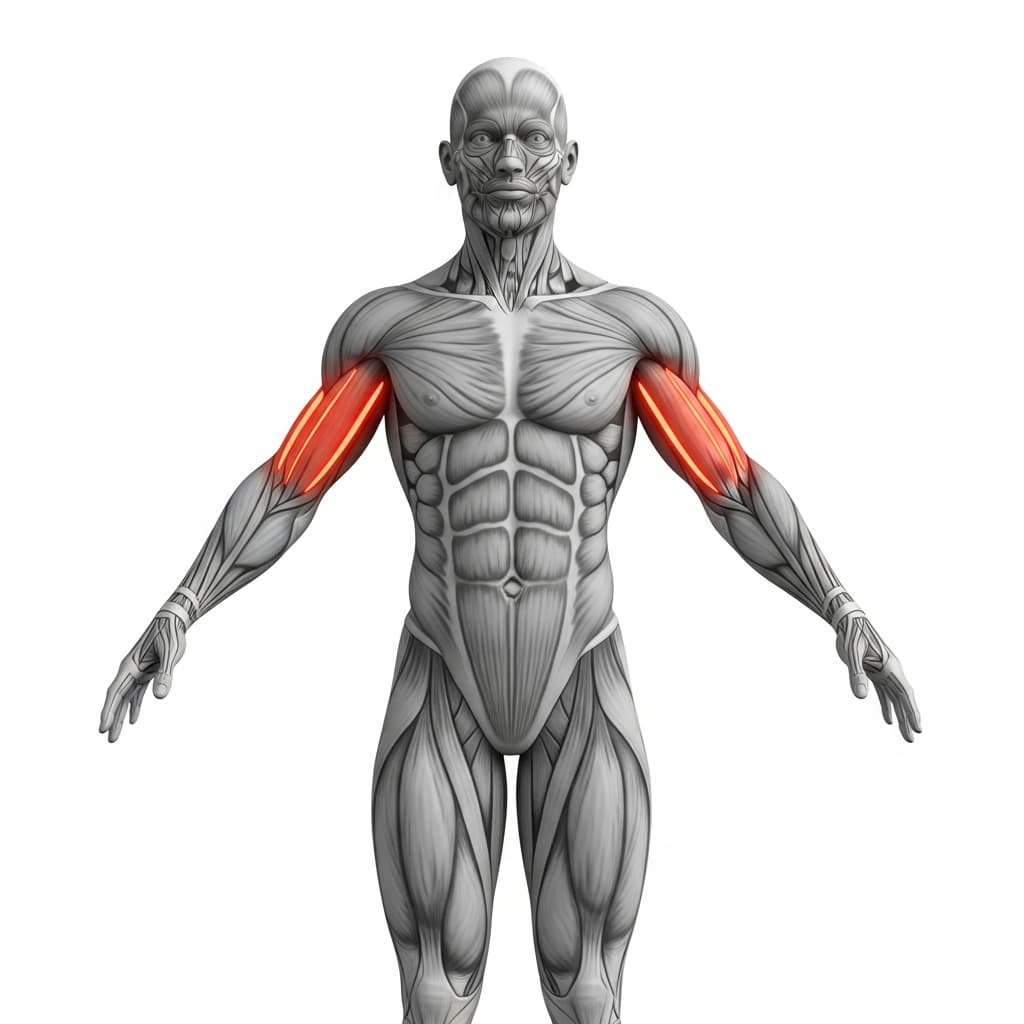
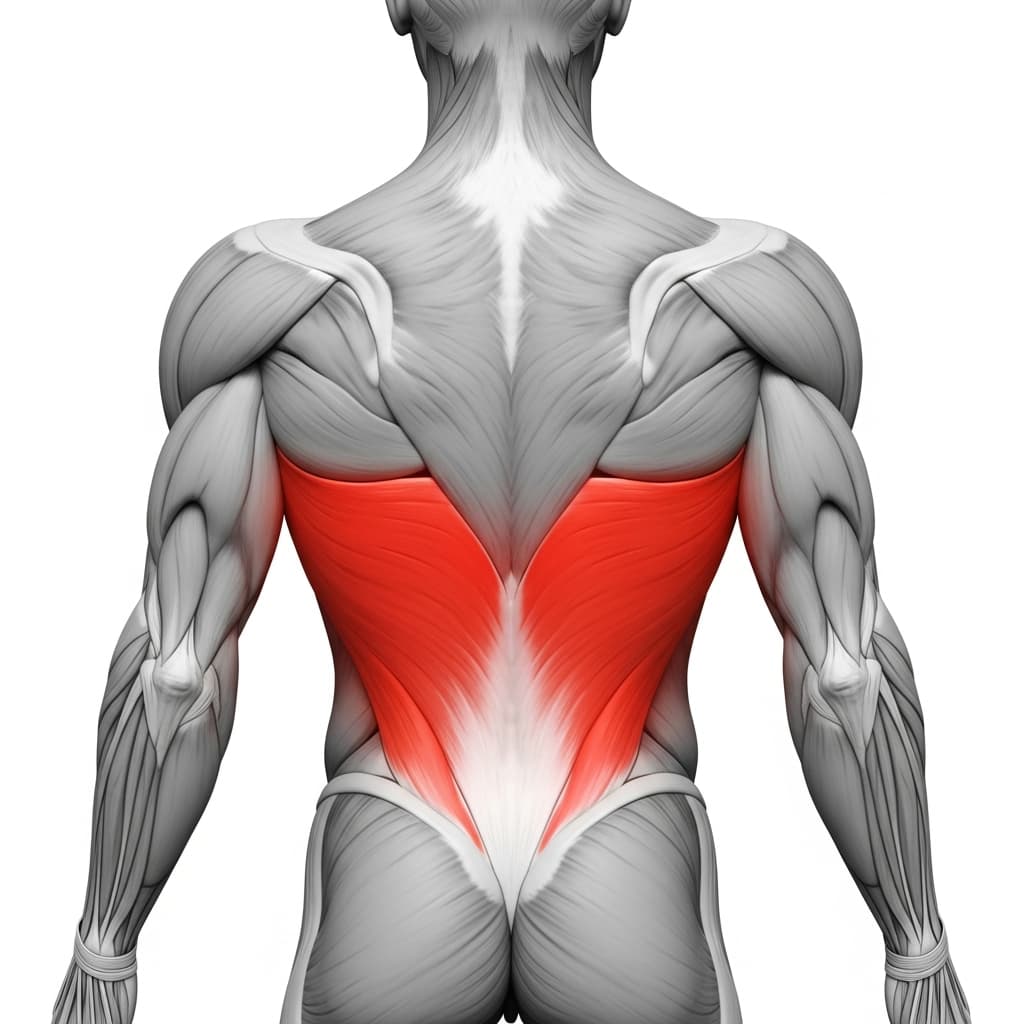
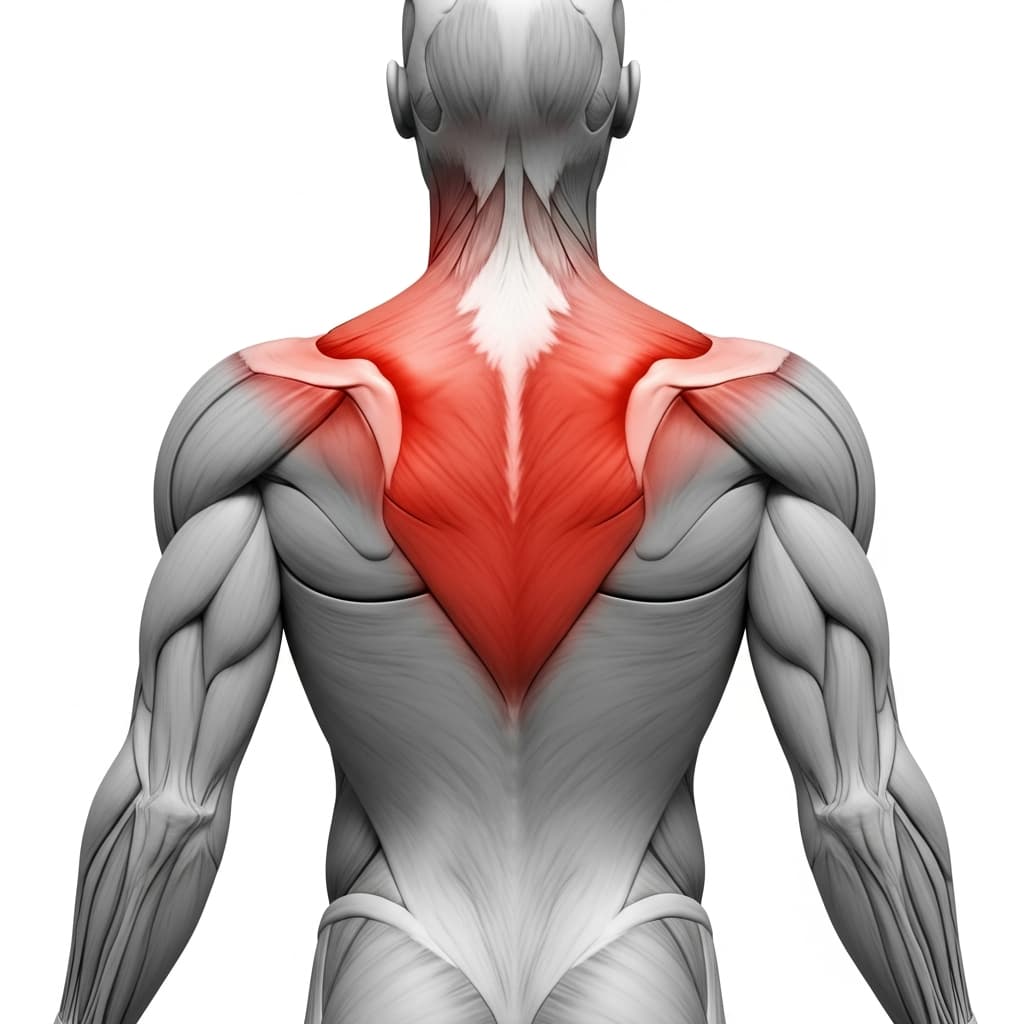
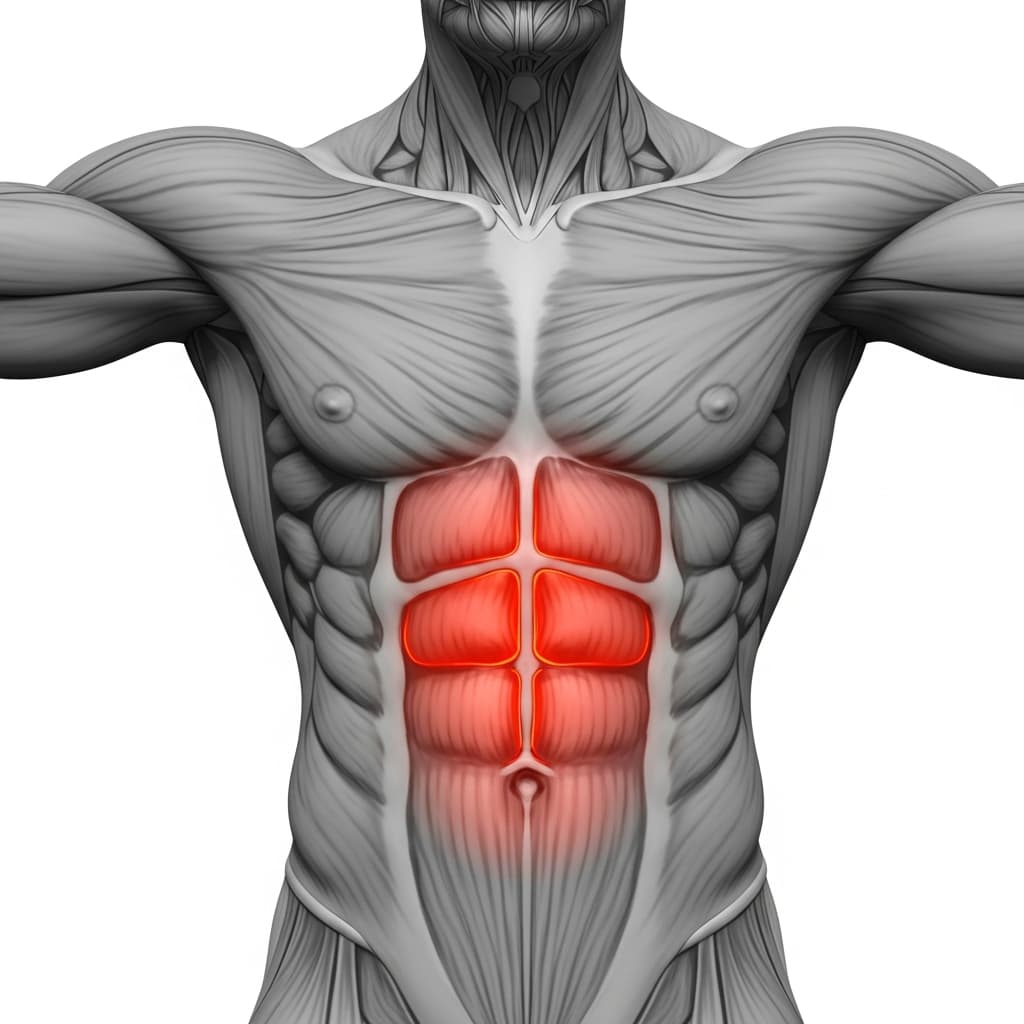
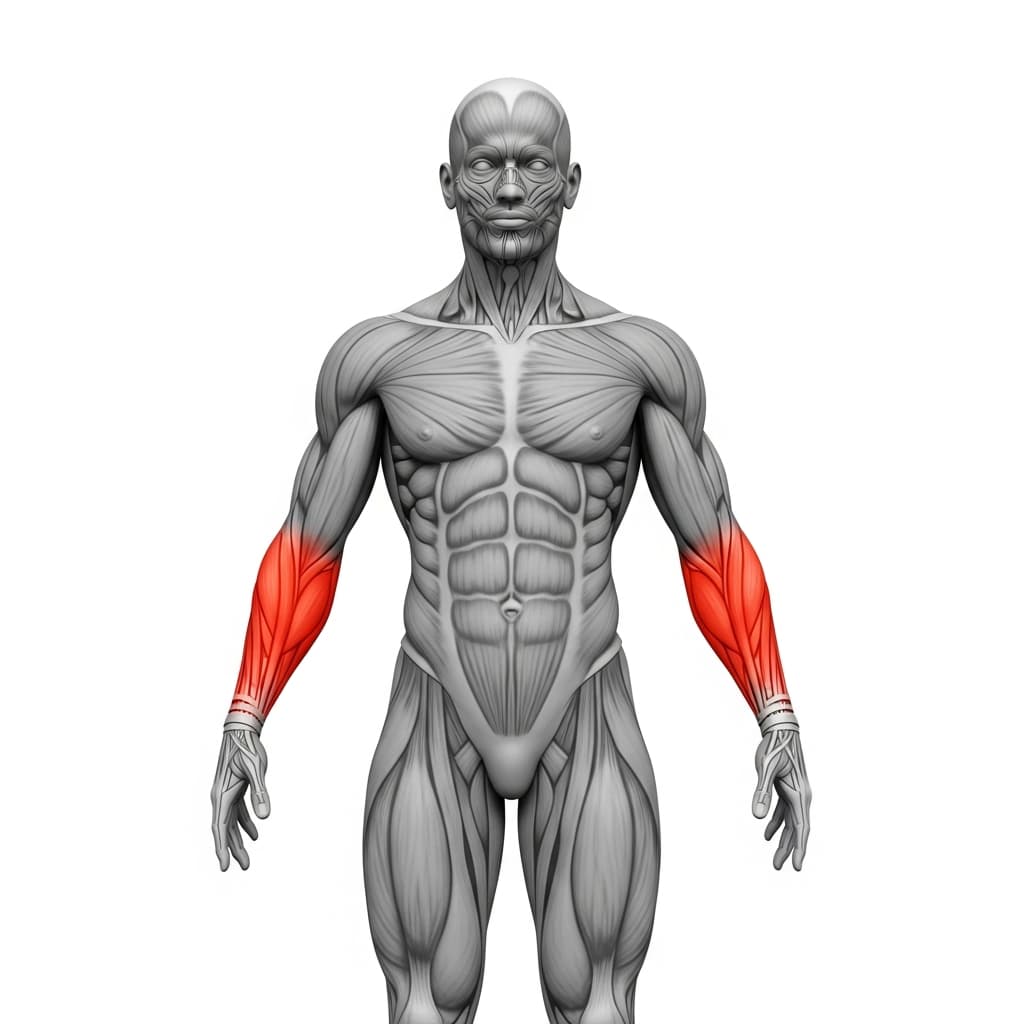
Primary Muscles
Pectoralis Major (Chest) - The chest works isometrically to pull the rings in toward your body, the same squeeze you would feel finishing a chest fly, and it is what stops the rings drifting apart.
Triceps Brachii (Triceps) - The triceps hold the elbows locked out for the whole hold, and they keep working the entire time because the position never gives you a rest at the top.
Secondary Muscles
Anterior Deltoid (Front Deltoid) - The front deltoids stabilize the shoulder at the top of the rings and resist the torso tipping forward over the hands.
Biceps Brachii (Biceps) - Once the rings are rotated outward, the biceps sit in a lengthened position and work to hold that rotation so the rings do not twist back inward, which a fixed dip bar never asks of them.
Latissimus Dorsi (Lats) - The lats help draw the rings in and down against your sides, keeping them close rather than letting them float away from the body.
Trapezius (Trapezius) - The lower traps depress the shoulder blades so the shoulders stay down and away from the ears instead of shrugging up around your neck.
Rectus Abdominis (Abs) - The abs hold the hollow body position, stopping the hips from piking and the lower back from arching while you hold.
Forearm Flexors & Extensors (Forearms) - The forearms grip two moving handles for the length of the hold and resist the rings twisting back inward once you have turned them out.
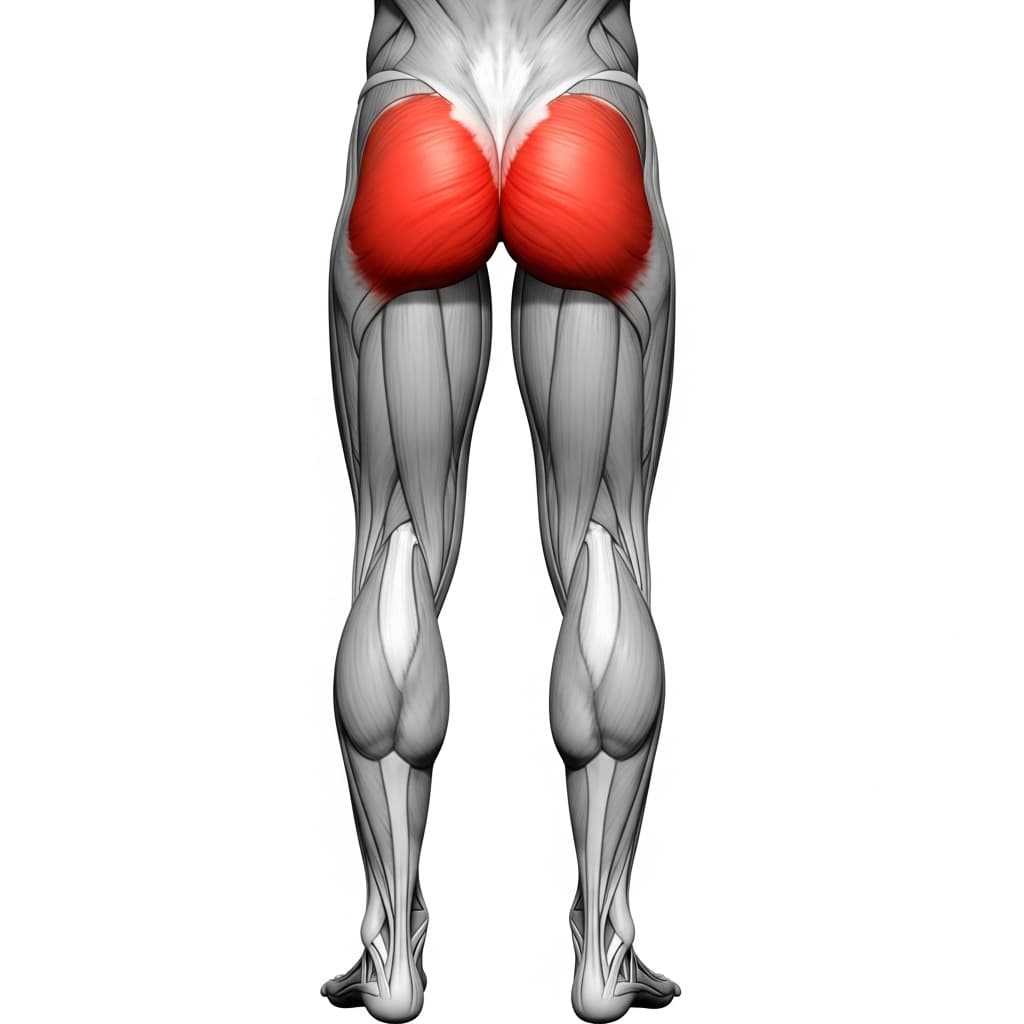
Gluteus Maximus (Glutes) - The glutes stay squeezed so the hips stay extended and the body holds one straight line, instead of the lower half hanging loose and swinging under the rings.
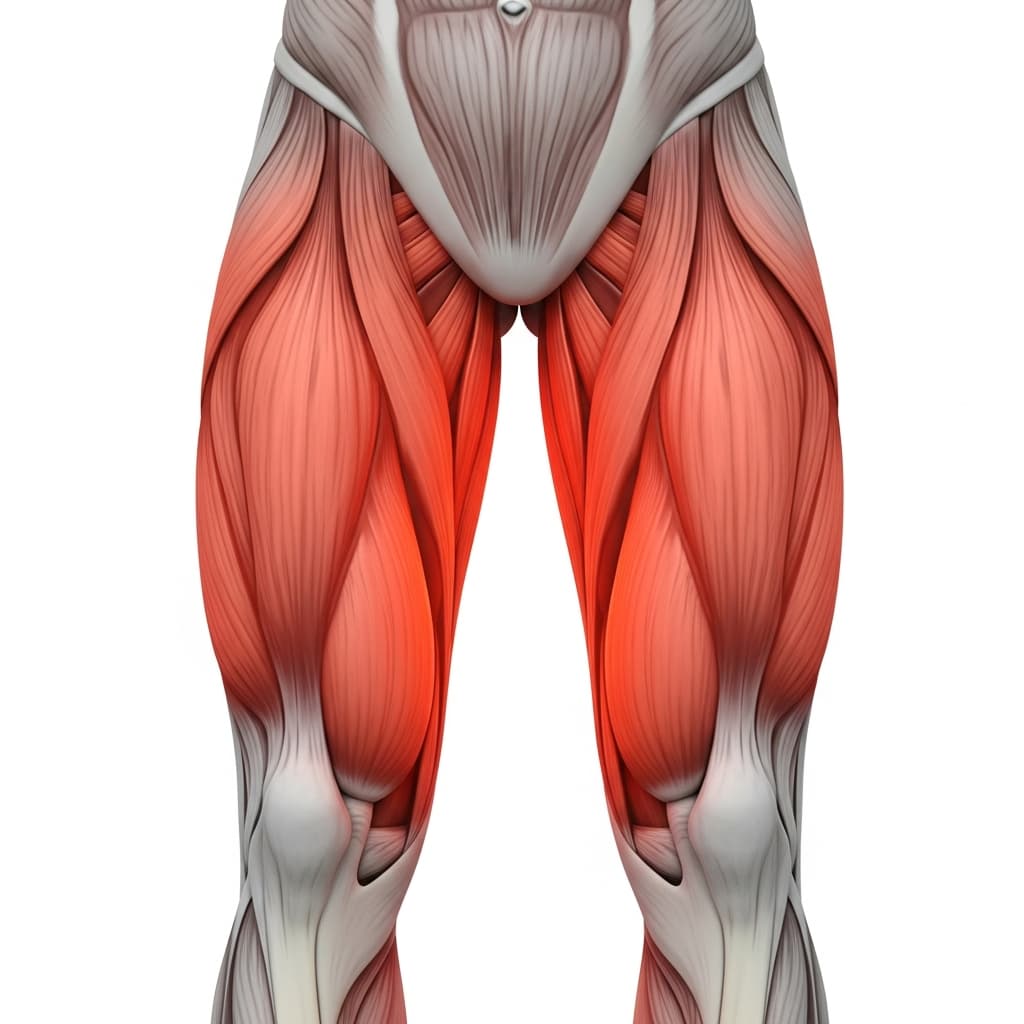
Quadriceps (Quads) - The quads keep the knees straight and the legs pressed together, which is what turns everything below the waist into one rigid piece rather than dead weight you have to chase.
Benefits of Ring Support Hold
- Builds the locked-out support position that ring dips and ring muscle-up work are built on, so every clean second you hold here shows up directly in those skills
- Trains straight-arm pushing strength and shoulder stability under a load that moves, which asks far more of the stabilizers than a fixed dip bar does
- Turning the rings out trains the biceps, chest and forearms through a range of shoulder rotation that fixed bars never reach
- Teaches full body tension and the hollow body position under load, a skill that carries over to almost every other ring and calisthenics exercise
- Builds grip and forearm endurance, since you hold your full bodyweight on two moving handles for the length of every set
Who Is This Exercise For?
You need a set of rings attached to a secure anchor above you. A box underneath is not needed, but it lets you keep your legs fully straight at the top when the rings hang low. On the rings themselves, expect your arms to sit slightly bent in the beginning and the turnout to be partial, that is a normal starting point and you work yourself up to straight arms with the rings rotated out. If the rings feel like too much on day one, holding the same locked-out support on fixed dip bars or parallel bars is useful general preparation, since fixed bars remove the wobble and let you build the basic support shape first.
Common Mistakes to Avoid
Letting the rings drift out or behind you: The further the rings travel from your body the harder the position gets and the faster it collapses. Pull them in against your sides like the end of a chest fly and keep them slightly in front of you for the whole hold.
Shrugging up into the shoulders: Sinking into the shoulders makes the hold feel unstable and hides how much support strength you actually have. Push the shoulders down and away from the ears before you start counting, and reset the hold if they creep back up.
Going soft below the waist: Loose legs and an arched lower back turn the rings into a swing you have to chase. Set a hollow body, squeeze the legs together and keep them straight so the whole body moves as one piece.
Settling for palms turned in and calling the hold finished: Rotating the rings outward so the biceps face forward is the position you are working toward, so treat palms turned in as the stage you are passing through. Add a little more rotation as soon as you can hold it without the rings caving back in.
Grinding out one long sloppy hold: A single shaky set held to failure teaches your body the broken position. Six clean holds of 10 seconds build the shape far better than two ragged 30 second attempts, so stop each set while the form is still good.
Variations & Progressions
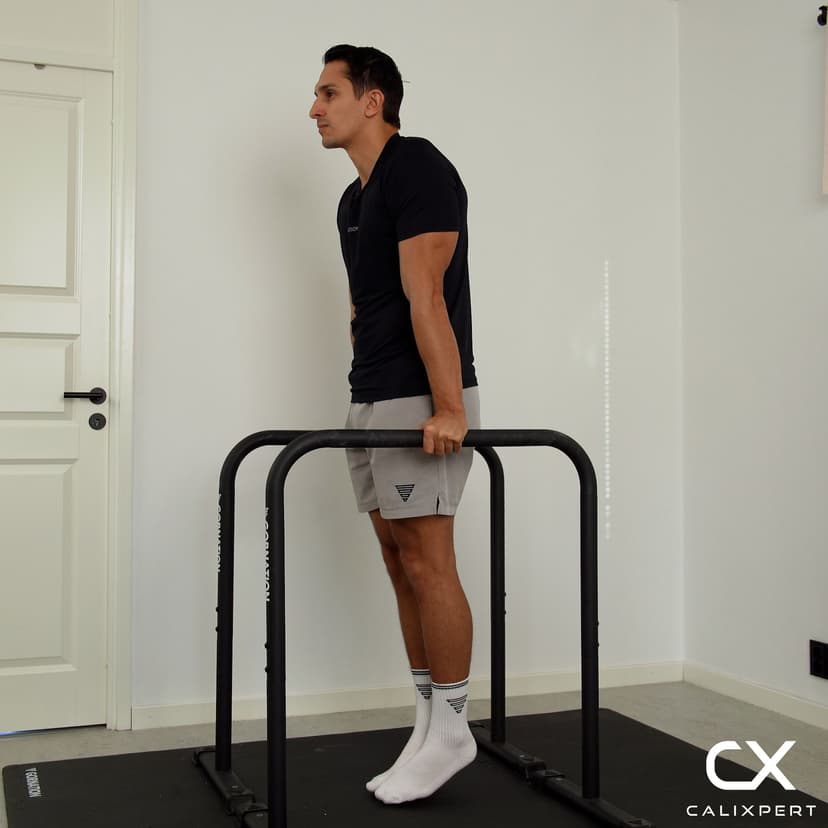
Neutral Grip Ring Support Hold
Same position on the rings but with the palms facing in toward each other instead of turned out. Treat it as the stage you pass through rather than the finished hold, using it to build hold time while you keep adding rotation toward the full turnout.
Ring L-Sit Support Hold
Lifting the straight legs to hip height in the support adds a heavy core and hip flexor demand on top of an already unstable position, and it is a natural next hold once a clean minute in the turned-out support feels solid.