Negative Ring Dips
Negative ring dips are an eccentric-only version of the ring dip: you step up from a box into the top support position, lower yourself slowly to at least 90 degrees if you can and lower than that when you have the control for it, then step back up to reset instead of pressing out of the bottom. On the ring dip ladder it sits between floor assisted ring dips, where the floor still carries part of your weight, and the full ring dip, where you press back out of the bottom under your own power. The descent is controlled mainly by the chest and triceps, while the front deltoids, biceps, upper back and abs work to keep the rings in and your body still. Because the rings move in every direction, the lowering phase is where you build the depth and control that a full ring dip demands.

Negative ring dips are an eccentric-only version of the ring dip: you step up from a box into the top support position, lower yourself slowly to at least 90 degrees if you can and lower than that when you have the control for it, then step back up to reset instead of pressing out of the bottom. On the ring dip ladder it sits between floor assisted ring dips, where the floor still carries part of your weight, and the full ring dip, where you press back out of the bottom under your own power. The descent is controlled mainly by the chest and triceps, while the front deltoids, biceps, upper back and abs work to keep the rings in and your body still. Because the rings move in every direction, the lowering phase is where you build the depth and control that a full ring dip demands.
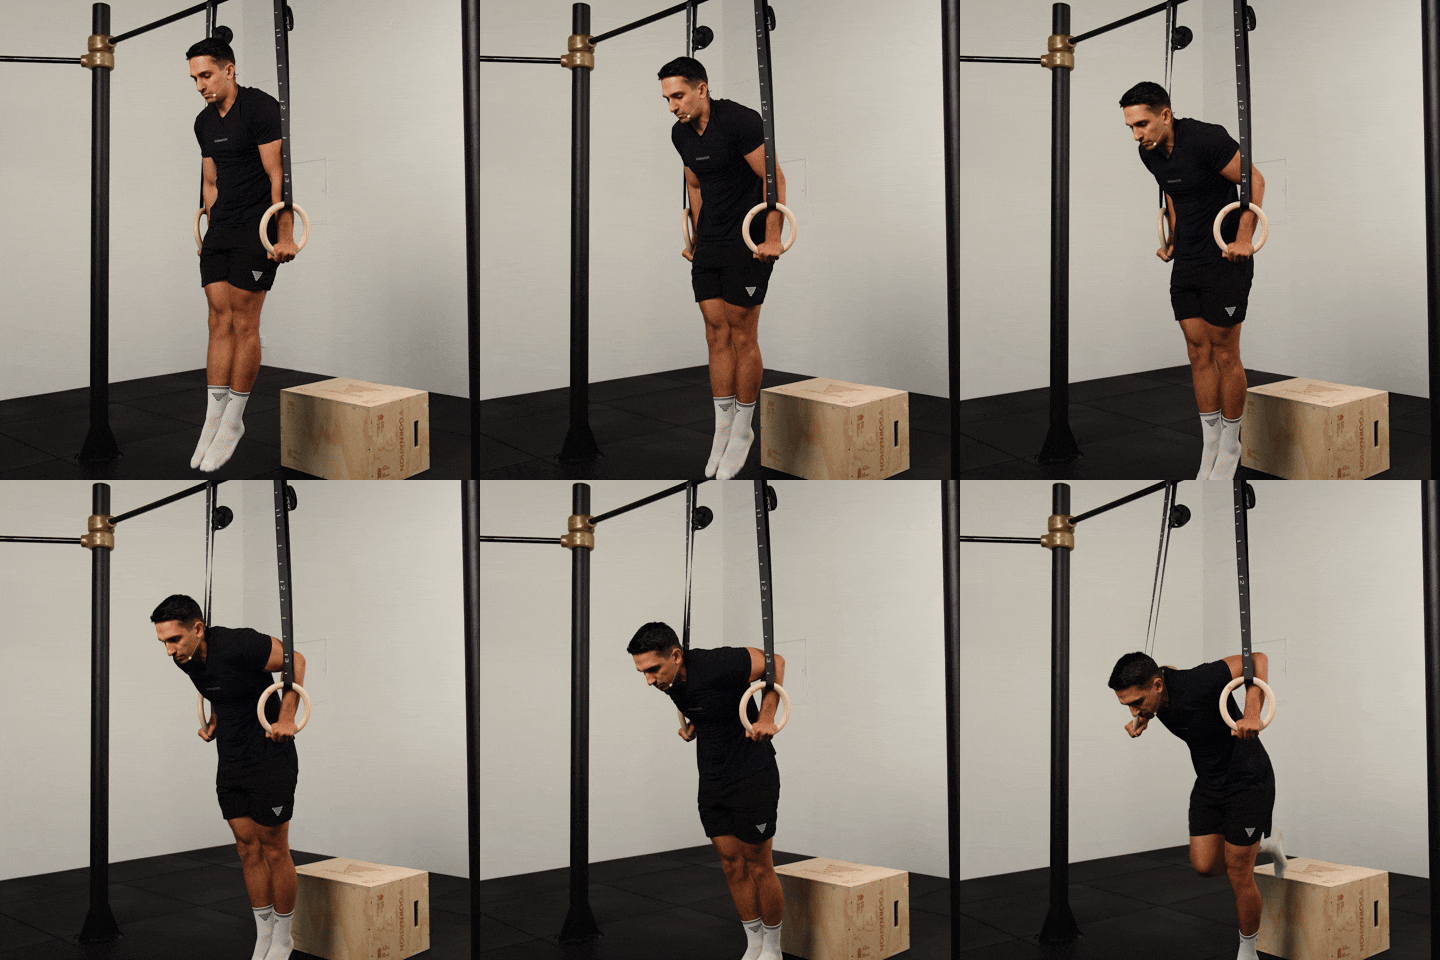
How to Do Negative Ring Dips
1. Set Up the Rings and the Box
Attach the rings to a bar or rig with enough height that you can go deep without your feet reaching the floor. Place a stable box where you can step straight into the top position, and chalk your hands before you start.
Enough height to go deep, box to step in
2. Take a Deep Grip on the Rings
Where you hold the ring makes a real difference. Take a full, deep grip so the ring sits deep in your hand rather than hanging out in your fingers, which is what keeps the grip from slipping as the set goes on.
Ring deep in the hand, not in the fingers
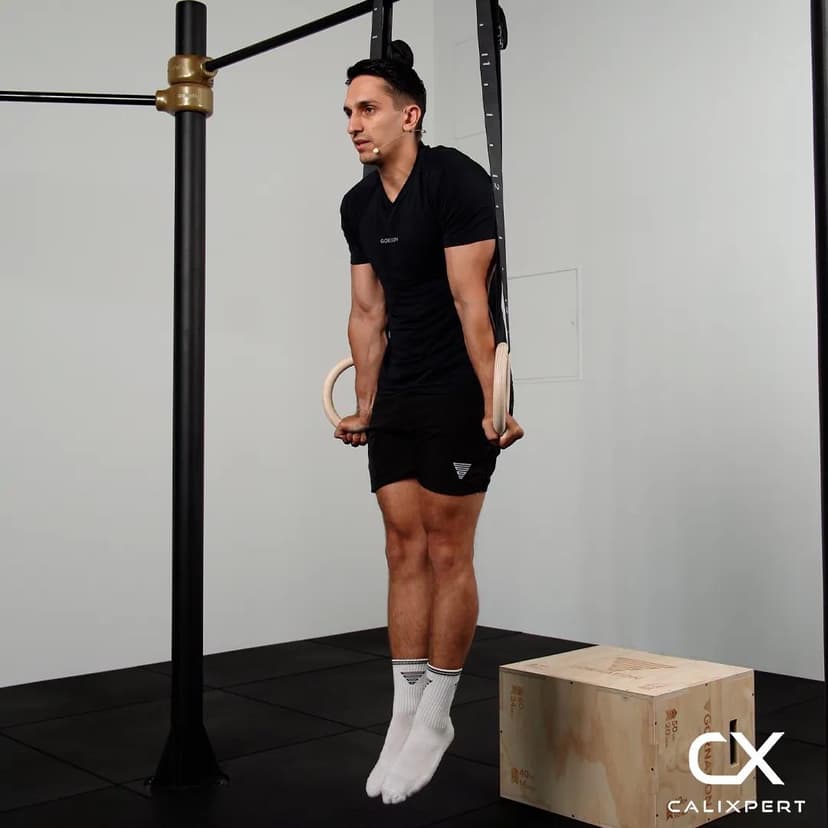
3. Step Up Into the Top Position
Use the box to step up into the top support with your arms locked out and the rings pressed in against your sides. Step in rather than jumping in, so you begin every rep from a still position with the rings under control.
Step in, arms locked, rings tight to your sides
4. Depress the Shoulders and Bring Them Together
Before you move, pull your shoulders down away from your ears and bring them together in front as if you were doing a chest fly, drawing the arms and the rings in toward each other instead of letting them sit wide. That is the position you hold for the entire descent, and it is what stops the rings drifting apart.
Shoulders down, bring them together like a chest fly
5. Set a Hollow Body and Tension Your Legs
Keep your ribs down and your abs braced in a hollow body position from the moment you leave the box. Squeeze your legs together and keep them tense, so nothing below the waist is free to swing.
Hollow body, legs squeezed and tense
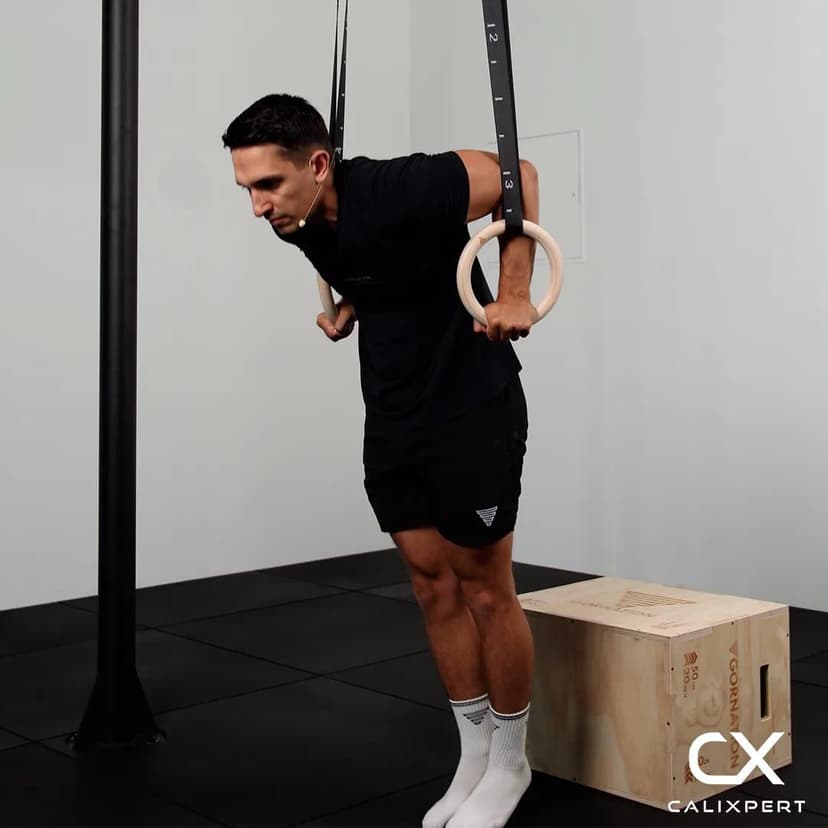
6. Lower Slowly to at Least 90 Degrees
Bend at the elbows and lower yourself slowly and under control until you reach at least 90 degrees if you can, going lower than that when you have the control for it. Keep the rings in and the shoulders down the whole way, because both want to escape as you fatigue.
Slow all the way, 90 degrees or lower
7. Step Back Up and Reset
There is no pressing back up in this version. Once you reach the bottom, put your feet back on the box, step up into the top support and reset your shoulders and hollow body before the next rep.
Step back up, reset, then repeat
The rings expose a lazy shoulder position immediately. Before you start lowering, pull your shoulders down and bring them together like you are doing a chest fly, then hold exactly that all the way to the bottom. Keep the hollow body and keep your legs tense too, because the moment your lower body goes loose the rings start to move and the rep turns into a balance problem instead of a strength exercise.
Muscles Worked During Negative Ring Dips
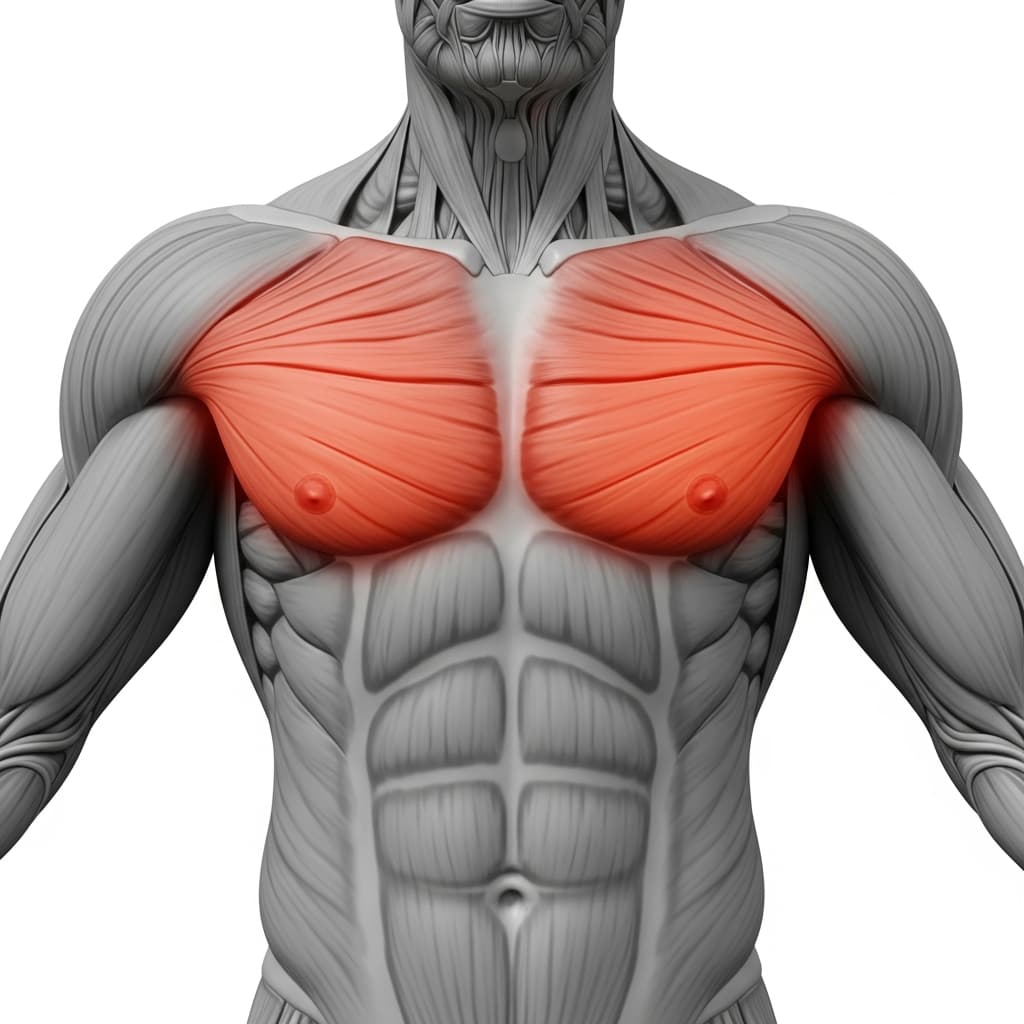
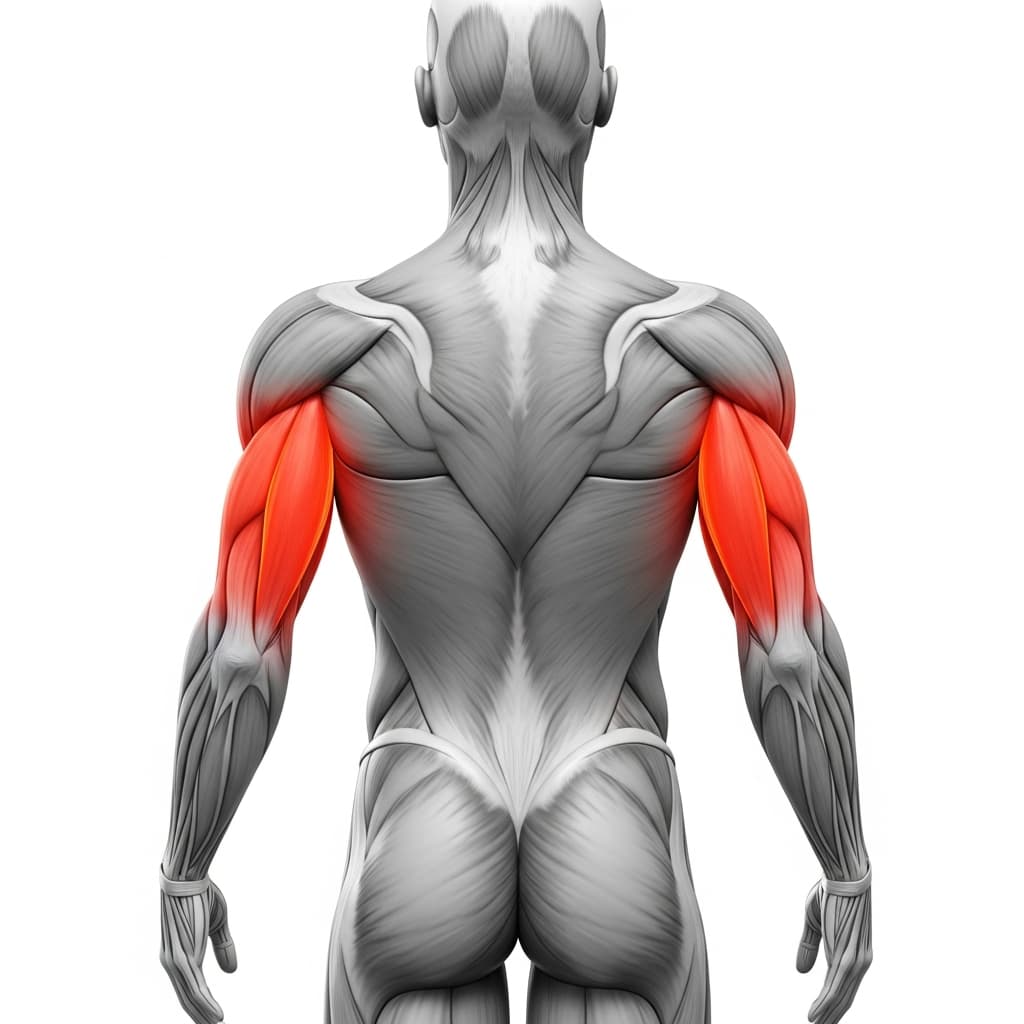
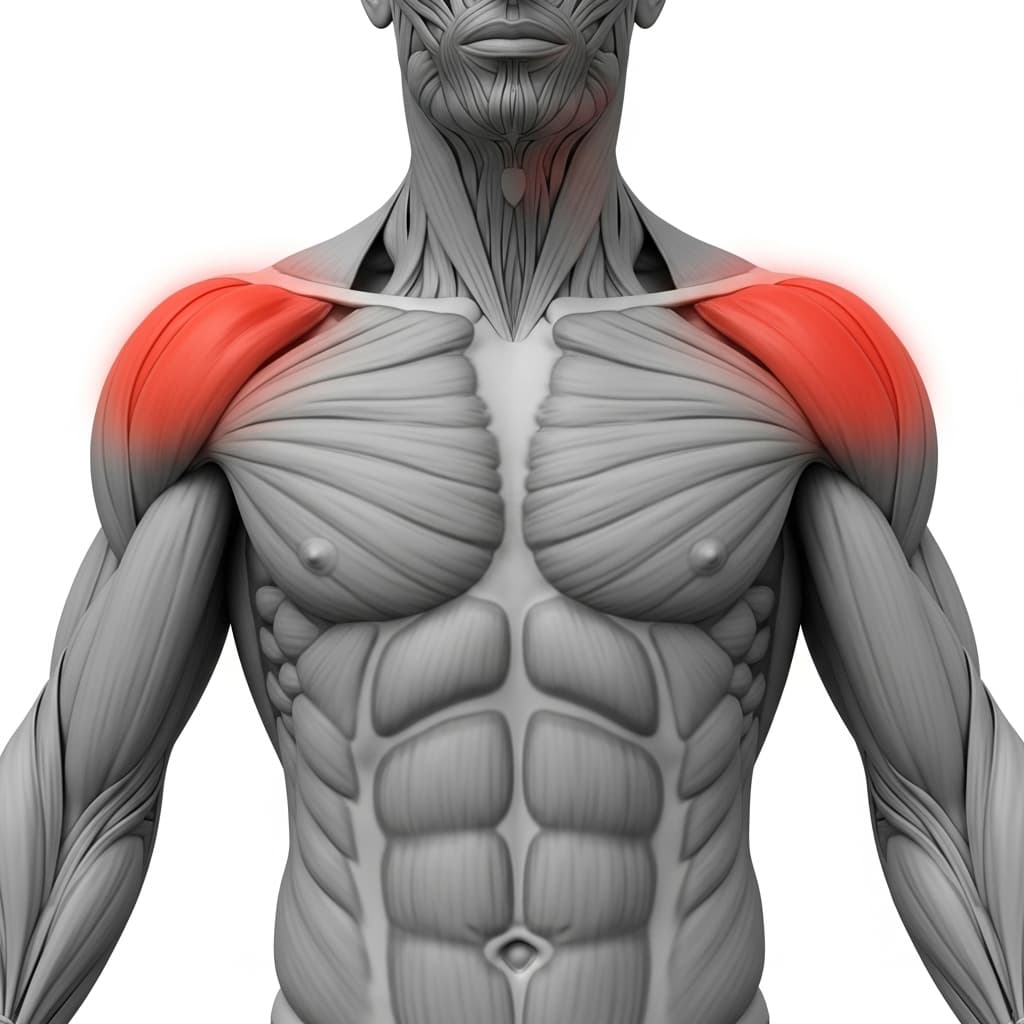
Secondary Muscles:
Primary Muscles
Pectoralis Major (Chest) - The chest lengthens under load as you lower and does most of the work controlling the descent, especially once you pass 90 degrees.
Triceps Brachii (Triceps) - The triceps resist the elbows bending, deciding how fast you travel down from the locked-out top position.
Secondary Muscles
Anterior Deltoid (Front Deltoid) - The front deltoids take a growing share of the load through the bottom half of the descent, where the shoulder is at its most open position.
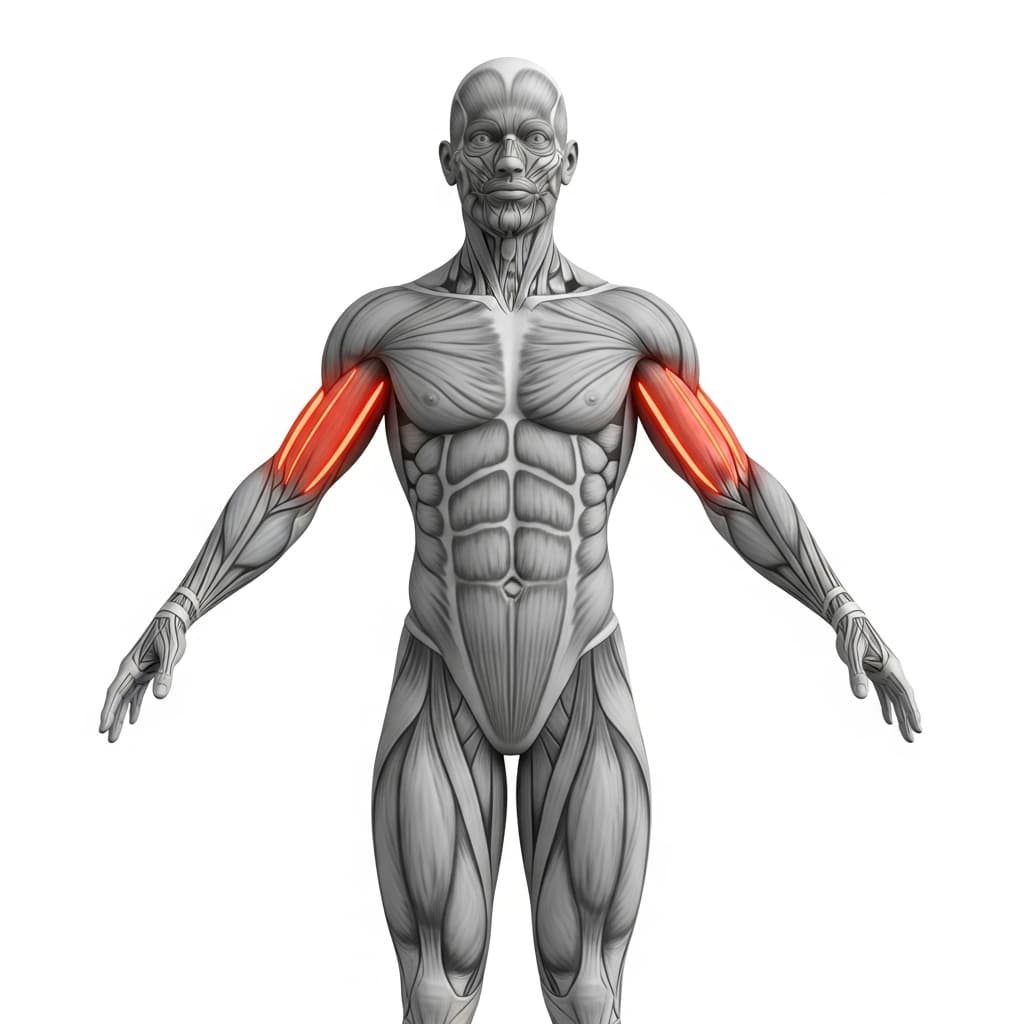
Biceps Brachii (Biceps) - The biceps work through the whole descent rather than in a static hold, lengthening under load as the shoulder opens while they help keep the rings drawn in against your sides.
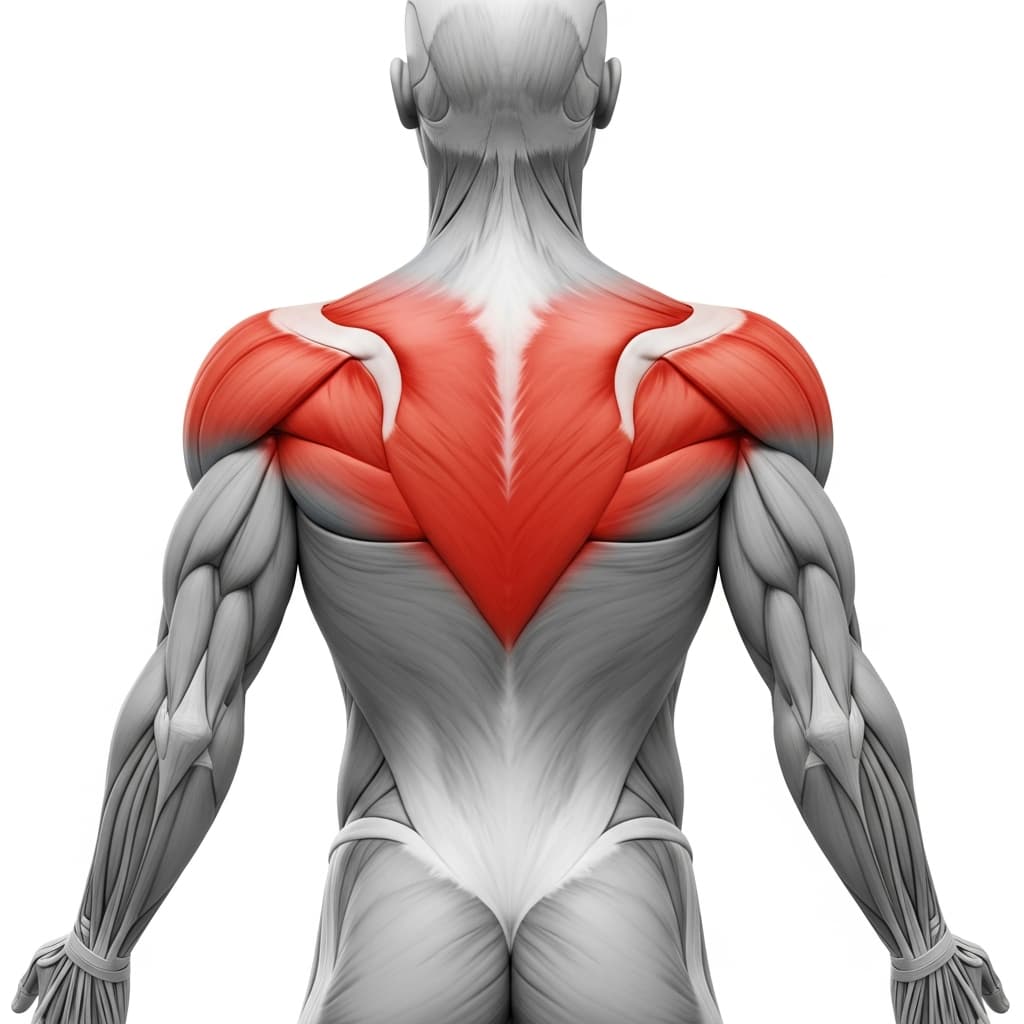
Rhomboids & Upper Trapezius (Upper Back) - The upper back holds your shoulders pulled down away from your ears and works with the chest to draw the arms in toward each other, which is what stops the rings drifting apart as you lower.
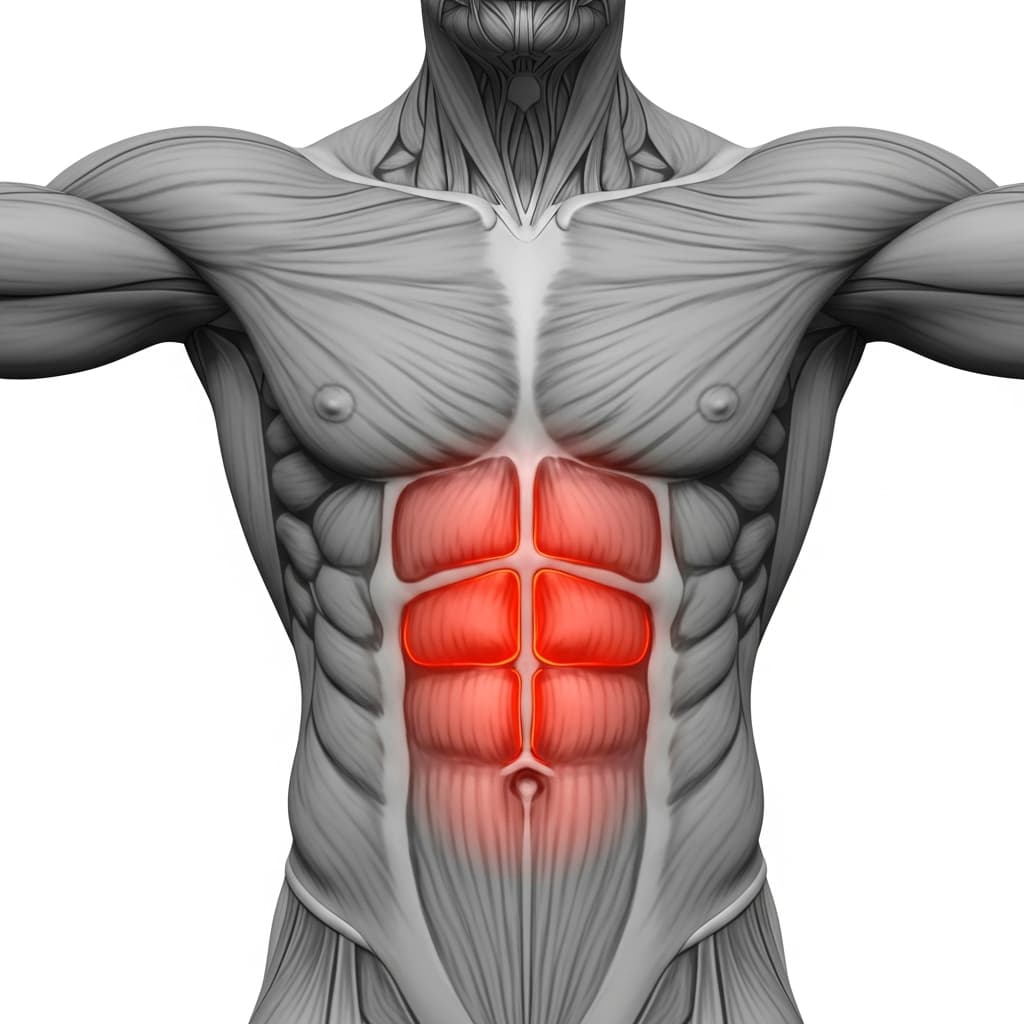
Rectus Abdominis (Abs) - The abs hold the hollow body position, keeping the ribs down and stopping the lower body swinging underneath the rings.
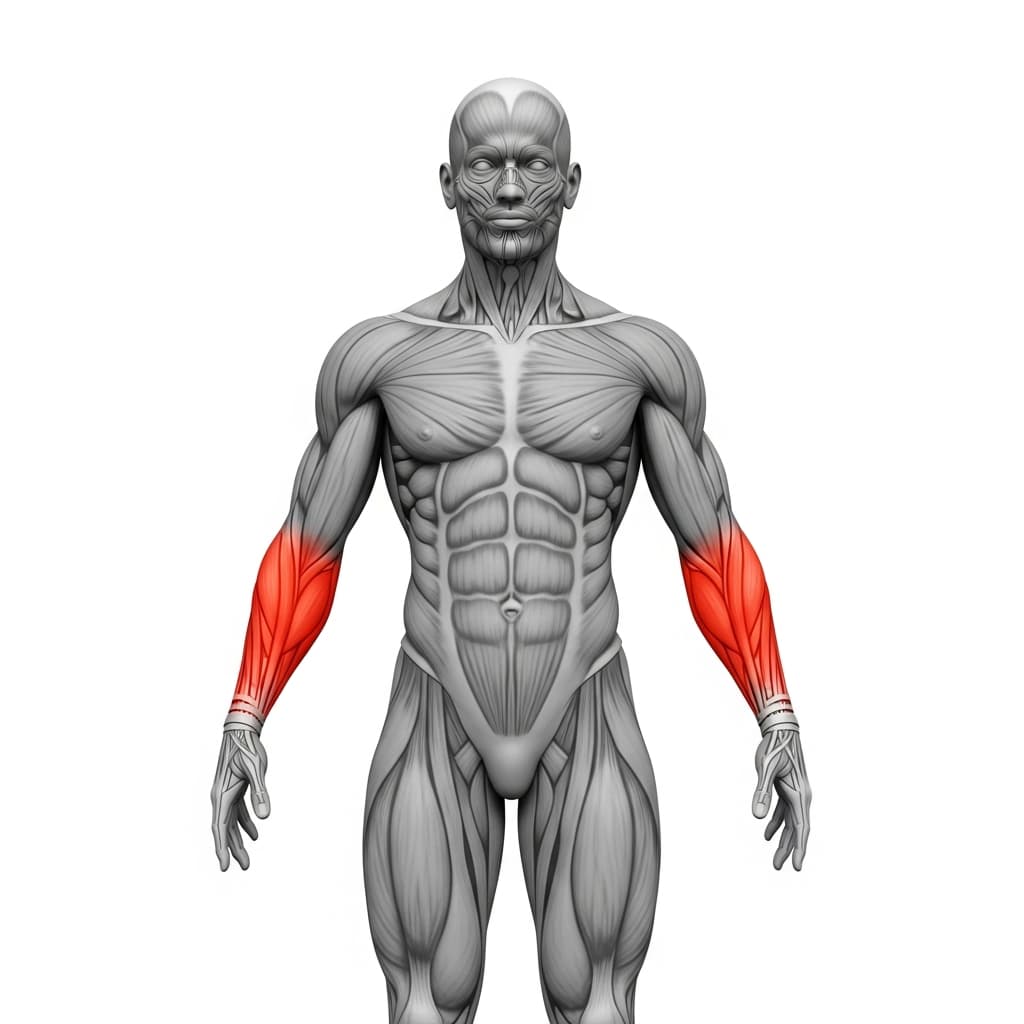
Forearm Flexors & Extensors (Forearms) - The forearms grip the rings for the whole set and are usually the first thing to complain, which is why chalk earns its place here.
Benefits of Negative Ring Dips
- Builds the eccentric chest and triceps strength a full ring dip demands, long before you are strong enough to press out of the bottom
- Trains the depth a ring dip actually needs, at least 90 degrees if you can and lower when you have the control, so range does not have to be added back later
- Teaches the shoulder position rings demand, pulled down and brought together like a chest fly, under real load rather than in an empty hold
- Develops the stabilizer work a fixed bar never asks for, since the chest, biceps and upper back have to hold the rings in place the entire descent
- Gives far more time under tension per rep than a fast dip, since the slow descent is the only part of the rep you actually perform
Who Is This Exercise For?
The kit list is short and it is the part Daniel is specific about: rings you can attach to a bar or rig, enough height that you can go deep without your feet reaching the floor, a stable box to step in from, and chalk, since the rings ask a lot of your grip. There is no test to pass before you start. As general guidance, the movement is far easier to control if you are already comfortable holding the top of a ring support with your arms locked and your shoulders pulled down, and if you have some dipping experience on parallel bars. If the top position still feels unstable, floor assisted ring dips are the step to spend time on first.
Common Mistakes to Avoid
Letting the shoulders ride up toward the ears: Pull the shoulders down before you start lowering and keep pulling them down through the whole descent. If you cannot hold that position for the full range yet, work to the depth you can control and extend it as the position holds.
Free-falling instead of lowering: Dropping to the bottom skips the part of the rep that builds the strength. Slow the descent until you control the whole range, and reduce the depth rather than the speed if you need to make it manageable.
Settling for a shallow rep once you can already go lower: The target is at least 90 degrees if you can, and lower than that when you have the control. Short reps feel easier but leave the hardest part of the ring dip untrained, so hang the rings high enough that the floor is never what stops you, and add depth as your control improves rather than parking at the height that feels comfortable.
Going loose below the waist: Relaxed legs let the rings swing and pull you off balance. Hold the hollow body and keep your legs squeezed together and tense from the top of the rep all the way to the bottom.
Variations & Progressions
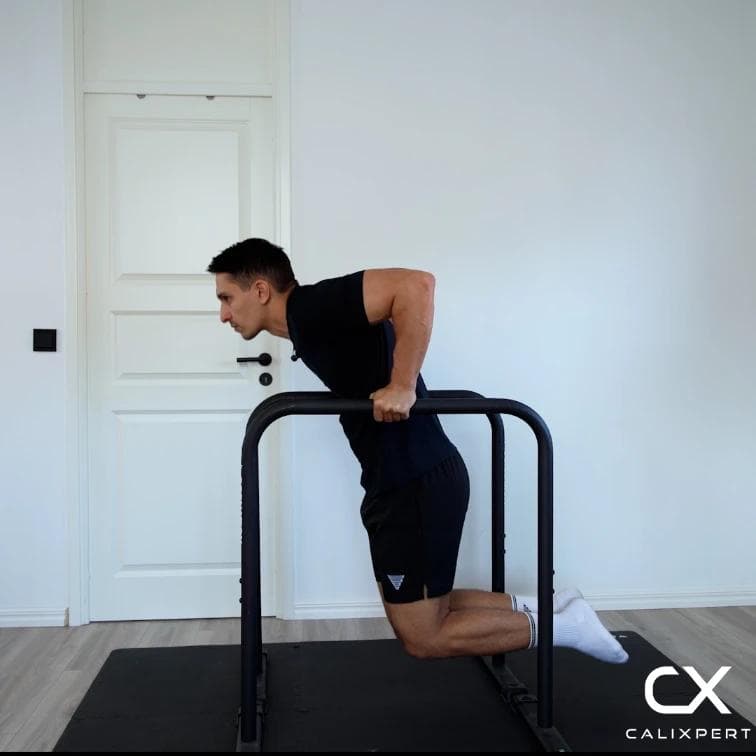
Floor Assisted Ring Dips
Keeping your feet on the floor takes some of your weight off the rings, so you can train the lowering and the press back up in the same rep. It is the step that comes before negatives on the ring dip ladder, and the place to go back to if the top support position still feels unstable.