90 Degree Handstand Push Ups
90 degree handstand push-ups are one of the most demanding pressing exercises in calisthenics, combining a freestanding handstand with a controlled descent into a horizontal body position parallel to the floor. This movement heavily targets the front deltoids and triceps while demanding serious activation from the chest, traps, and core throughout every phase. Mastering this exercise develops elite-level pressing strength and overhead stability that transfers directly to planche, maltese, and other high-level calisthenics skills.
90 degree handstand push-ups are one of the most demanding pressing exercises in calisthenics, combining a freestanding handstand with a controlled descent into a horizontal body position parallel to the floor. This movement heavily targets the front deltoids and triceps while demanding serious activation from the chest, traps, and core throughout every phase. Mastering this exercise develops elite-level pressing strength and overhead stability that transfers directly to planche, maltese, and other high-level calisthenics skills.
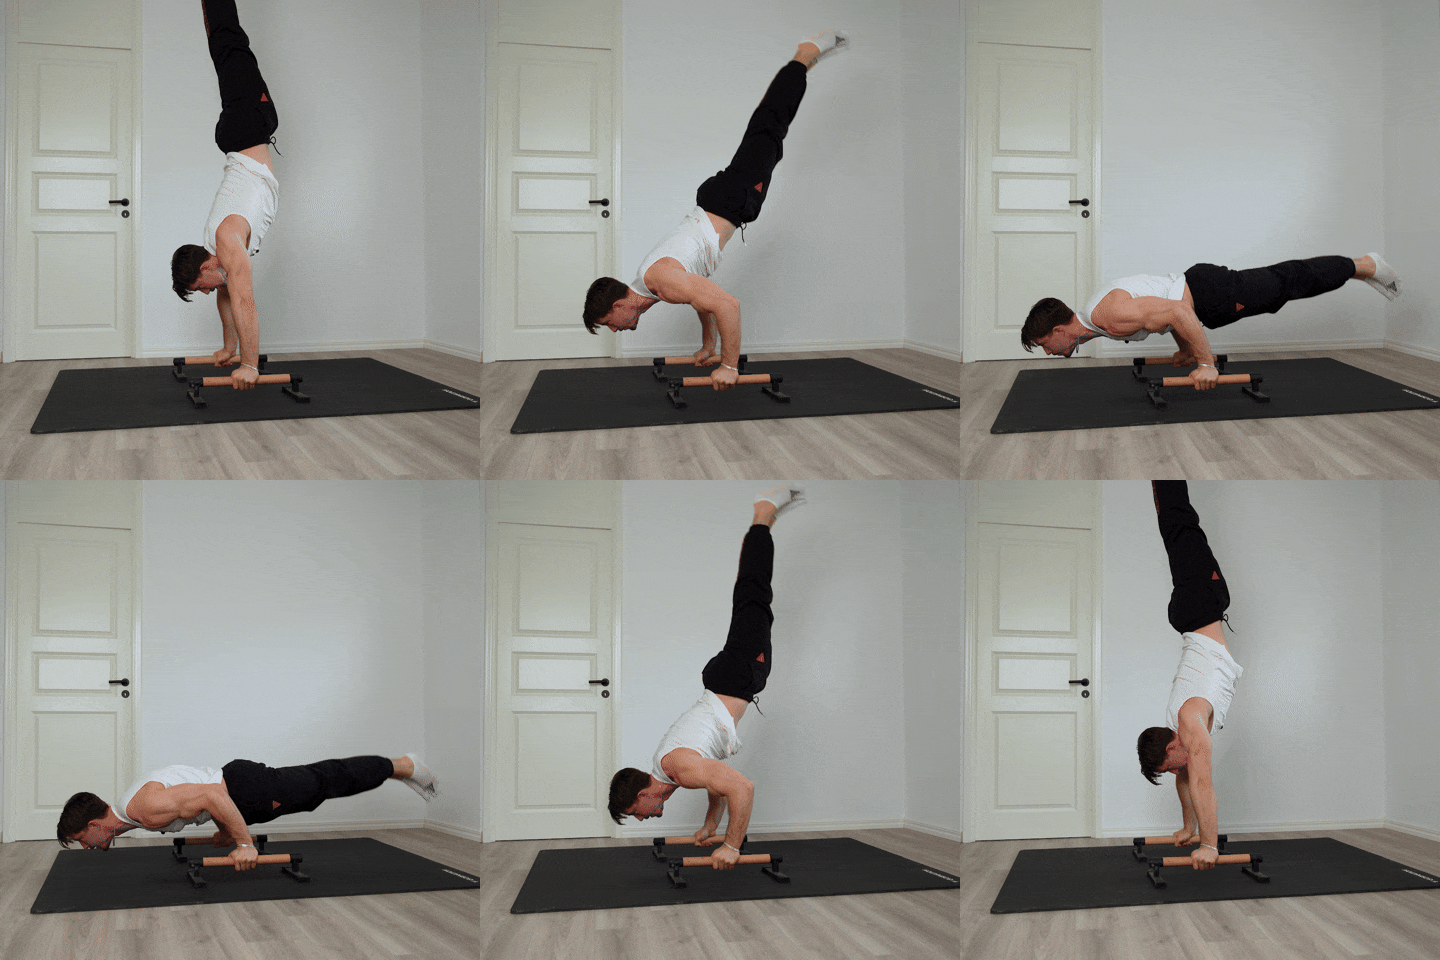
How to Do 90 Degree Handstand Push Ups
1. Set Up in a Freestanding Handstand
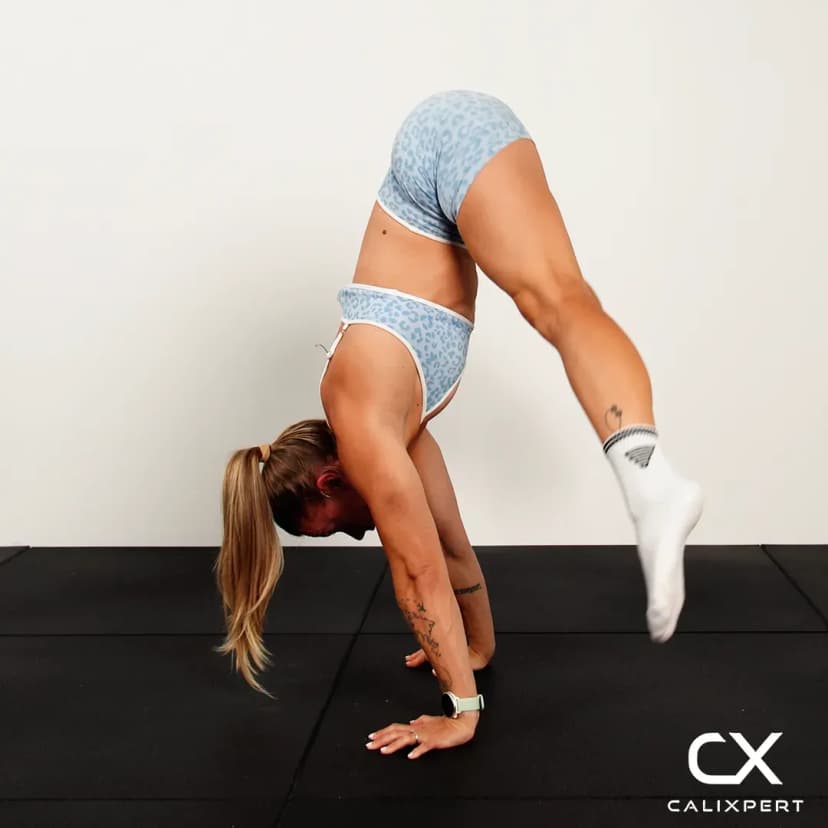
Kick up into a controlled freestanding handstand with your hands placed slightly wider than shoulder width. Spread your fingers wide and press firmly through the entire palm to create a stable base. Lock out your elbows fully, stack your hips over your shoulders, and squeeze your legs together. Your body should form a straight vertical line before you begin the descent.
Locked arms, stacked hips, fingers spread
2. Lean Forward as You Begin to Lower
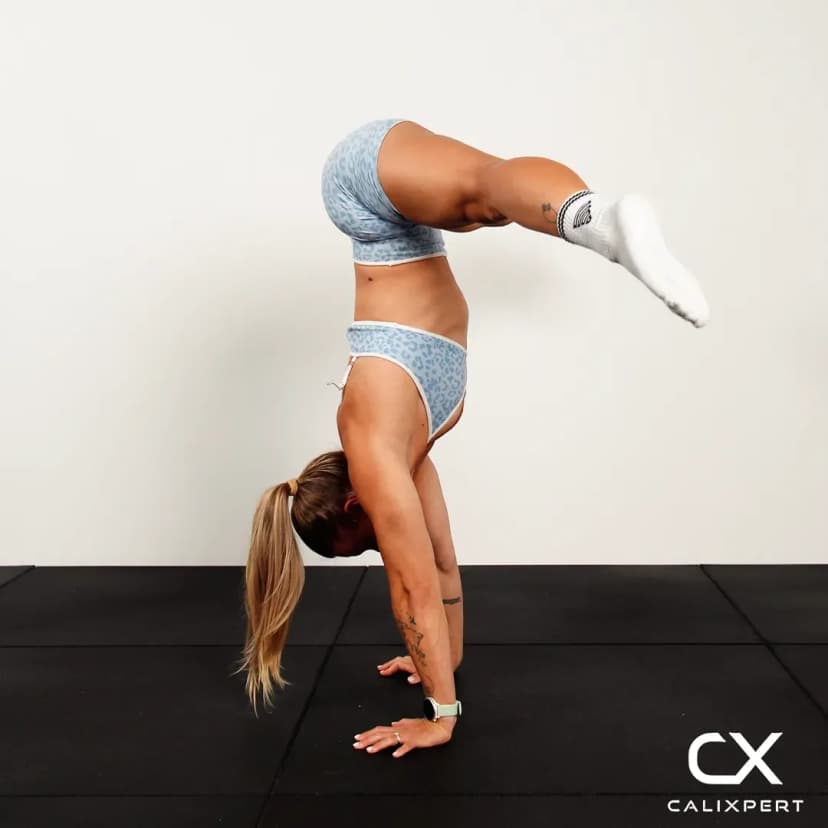
Start bending your elbows and simultaneously shift your weight forward by leaning your shoulders well past your hands. This forward lean is the defining element of the 90 degree handstand push-up and cannot be skipped. Without it, you will simply drop into a regular handstand push-up instead of transitioning into the horizontal pressing position.
Lean forward aggressively as you descend
3. Continue Lowering Until Parallel
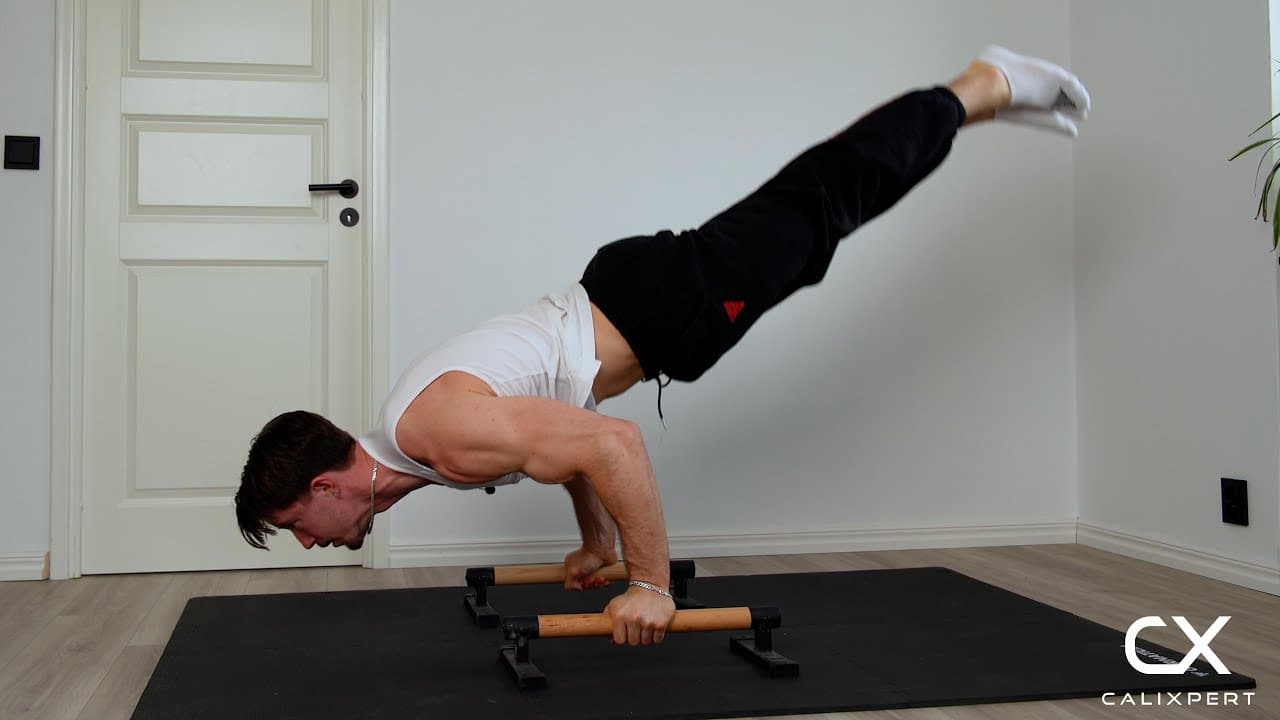
Keep lowering your body while maintaining the forward lean until your torso reaches a position roughly parallel to the floor. Your elbows should bend to approximately 90 degrees at this point, with your upper arms close to parallel with the ground. Keep your core tight and your legs squeezed together throughout the descent to prevent your hips from sagging or piking.
Torso parallel, core locked, legs tight
4. Hold Briefly at the Bottom Position
Pause for a brief moment in the bottom position to eliminate any momentum and confirm your alignment. Your body should be close to horizontal with your weight distributed evenly across both hands. This pause is where most athletes lose control, so focus on maintaining tension through the shoulders, core, and glutes.
Pause, feel the tension, stay tight
5. Press Back Up to Handstand
Drive forcefully through your palms and extend your elbows to push your body back up toward the vertical handstand position. As you press up, gradually shift your weight back over your hands so that your shoulders re-stack above your wrists. The transition from horizontal back to vertical is the hardest part of the rep and requires coordinated pressing power and balance at the same time.
Press hard, shift weight back over hands
6. Stabilize Before the Next Rep
Return to a fully locked-out handstand and hold for one to two seconds before starting the next repetition. Re-establish your balance and confirm that your body is stacked in a straight line. Rushing into the next rep without stabilizing is a common reason athletes lose the handstand and bail out of the set early.
Lock out, stabilize, then go again
The entire movement lives or dies on the forward lean. Most people lower straight down because it feels safer, but that just turns it into a regular handstand push-up. Think about pushing your shoulders forward past your fingertips as you descend, almost like you are trying to fall forward in slow motion. Once you commit to that lean and trust your balance, the pressing pattern clicks into place.
Muscles Worked During 90 Degree Handstand Push Ups
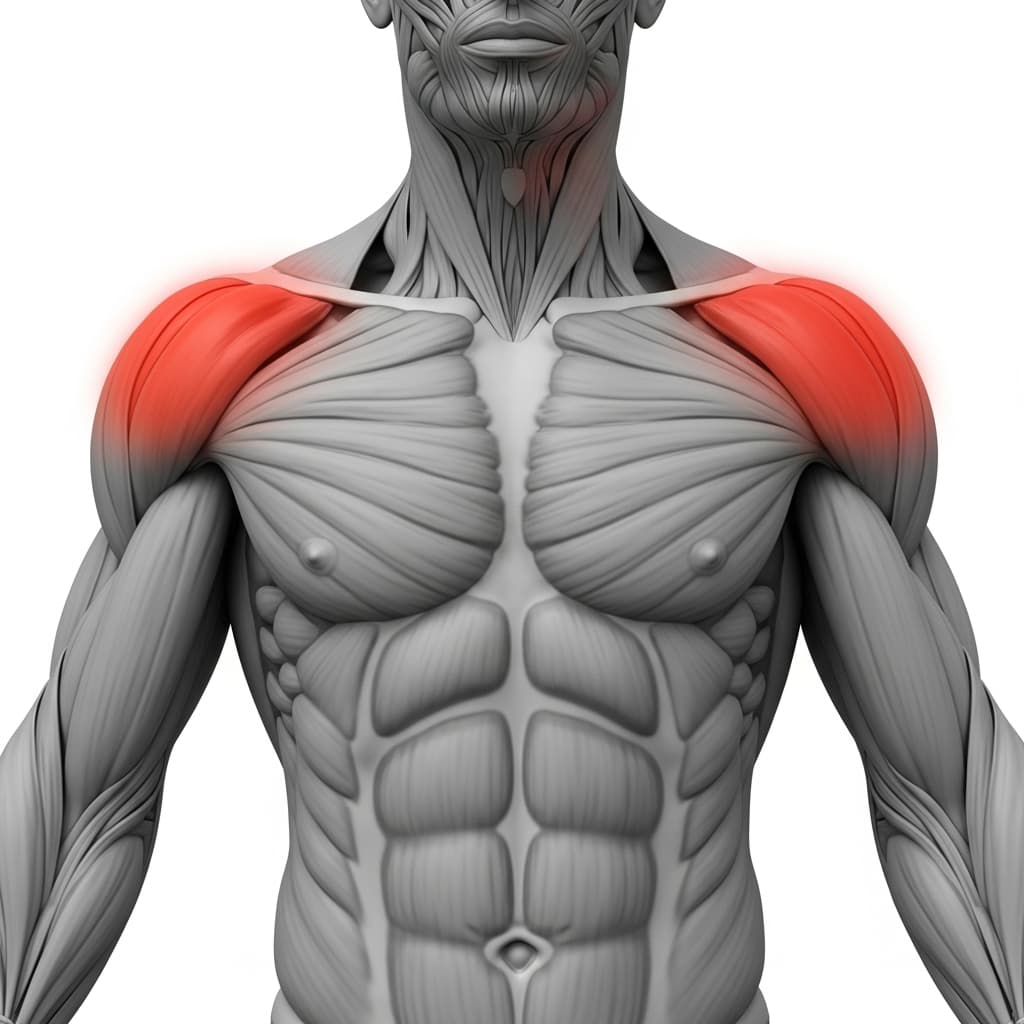
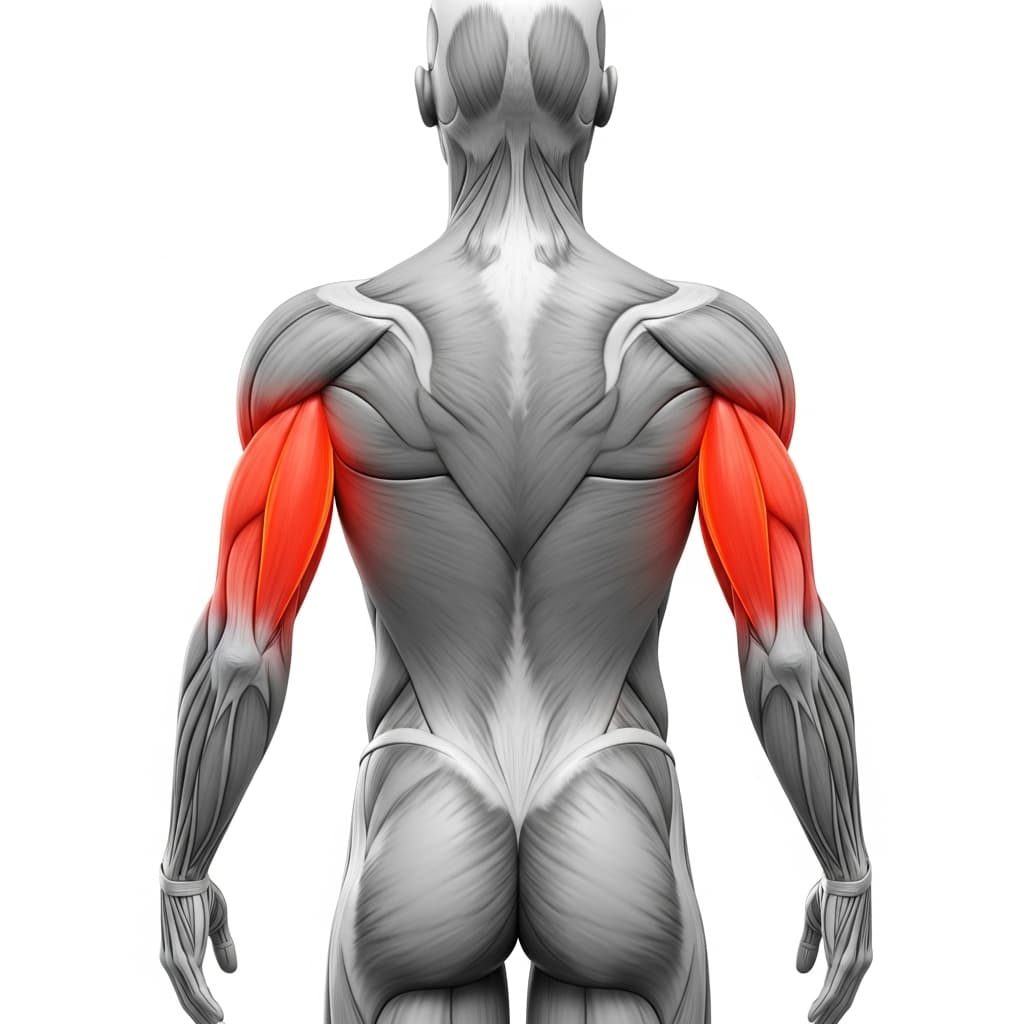
Primary Muscles:
Secondary Muscles:
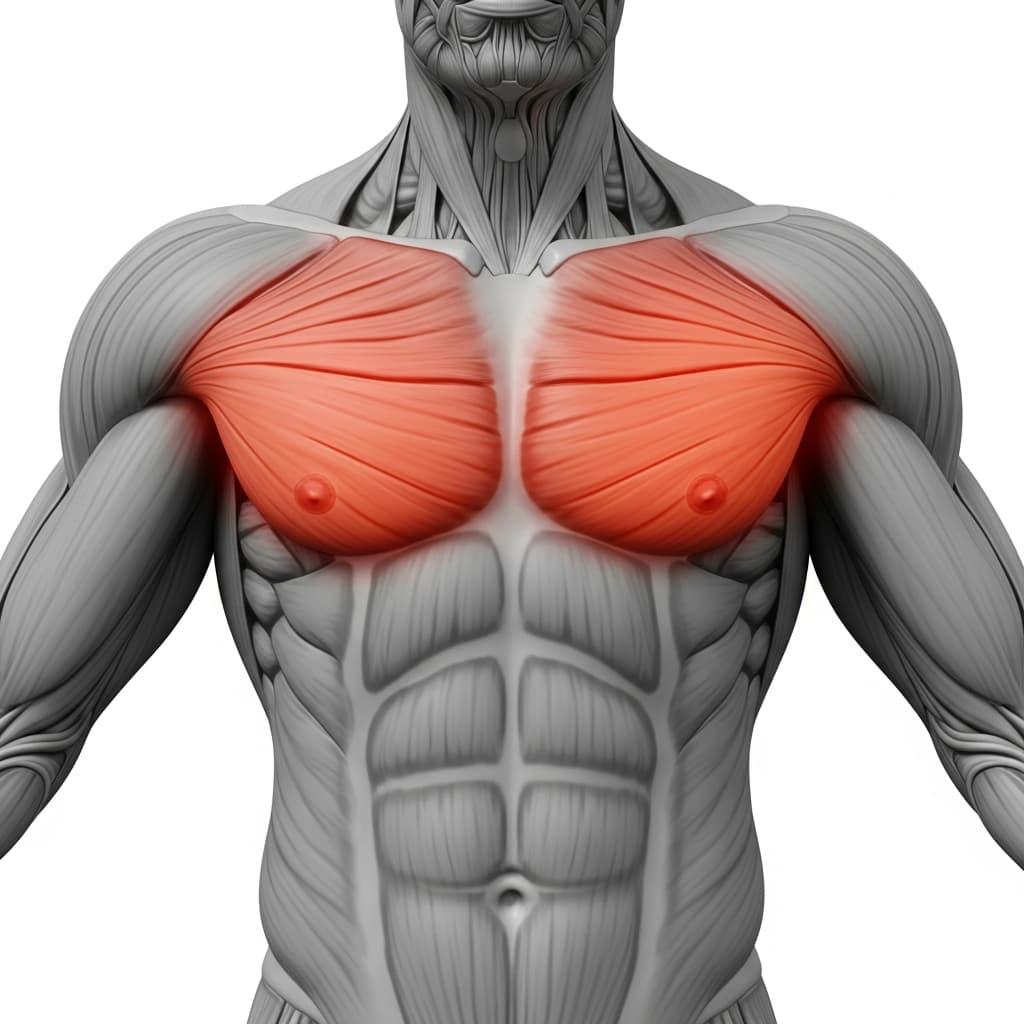
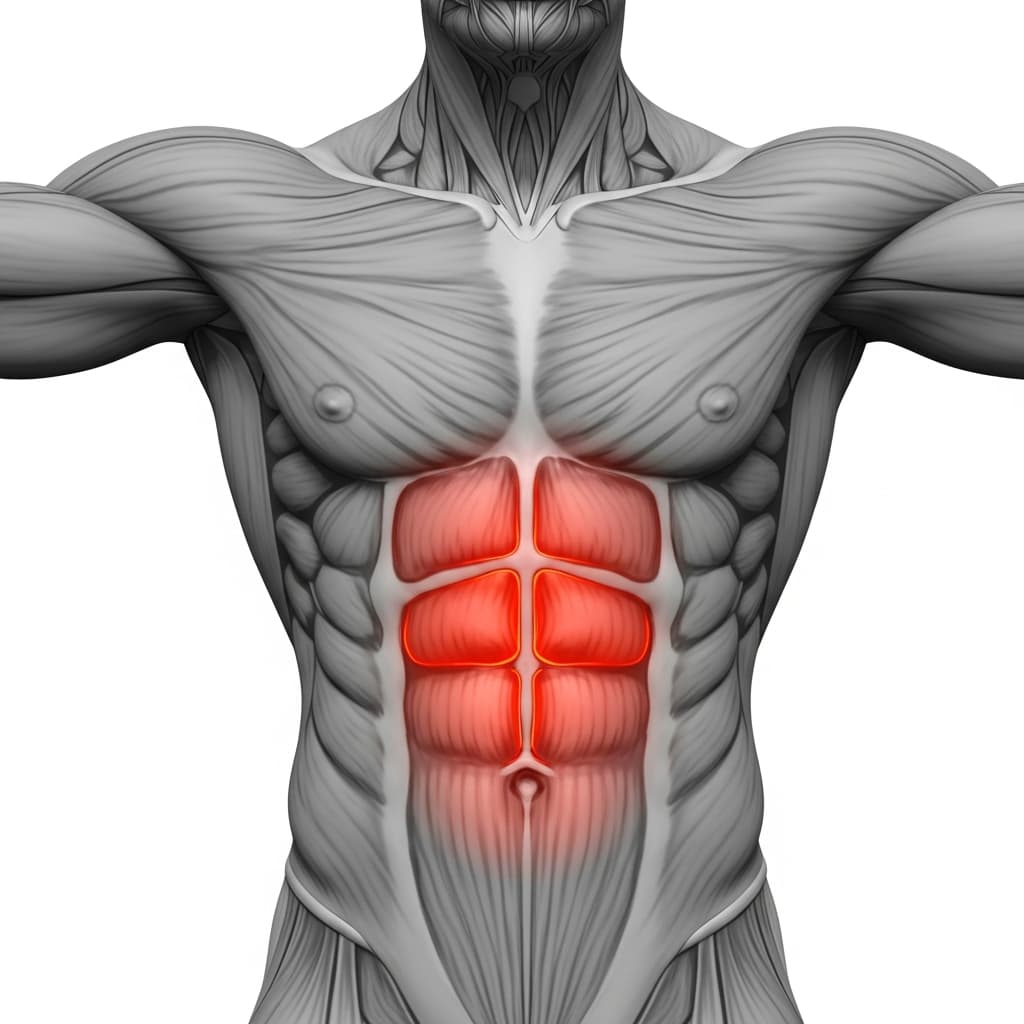
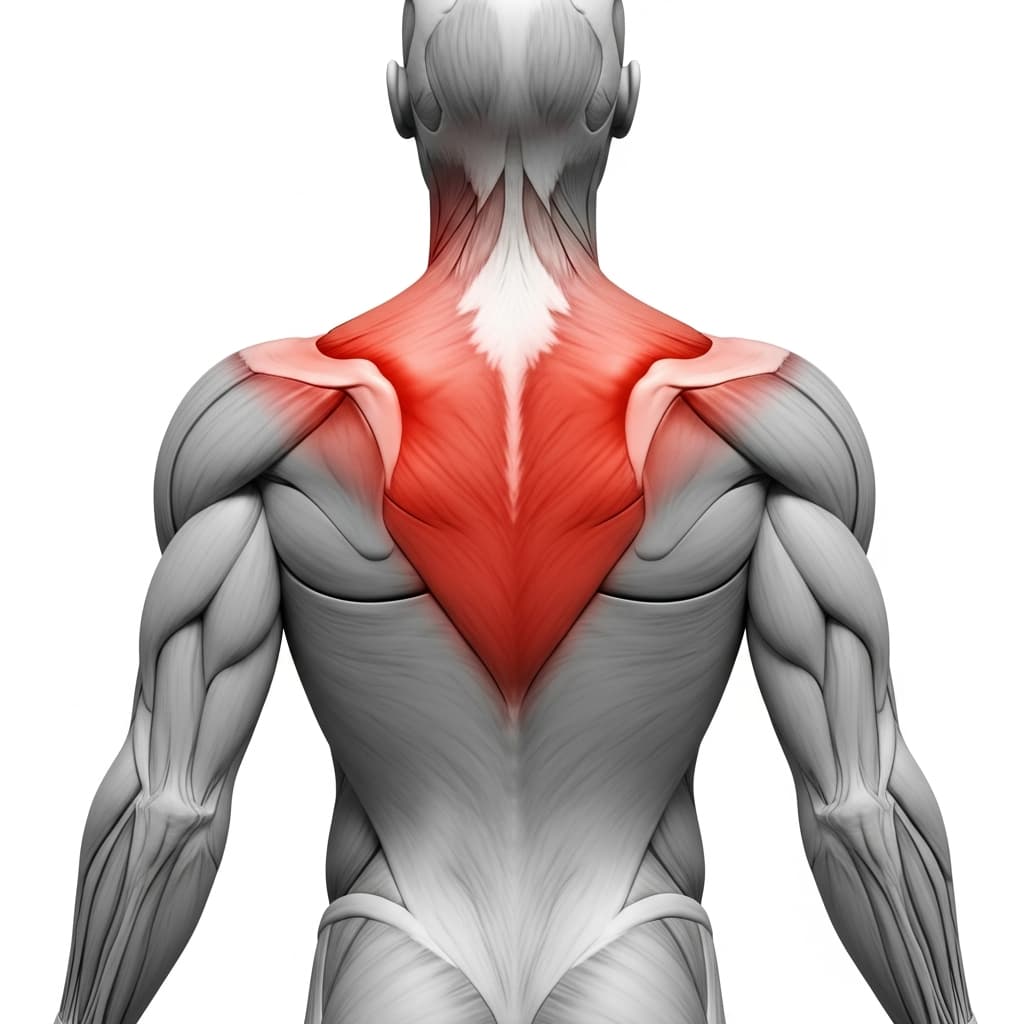
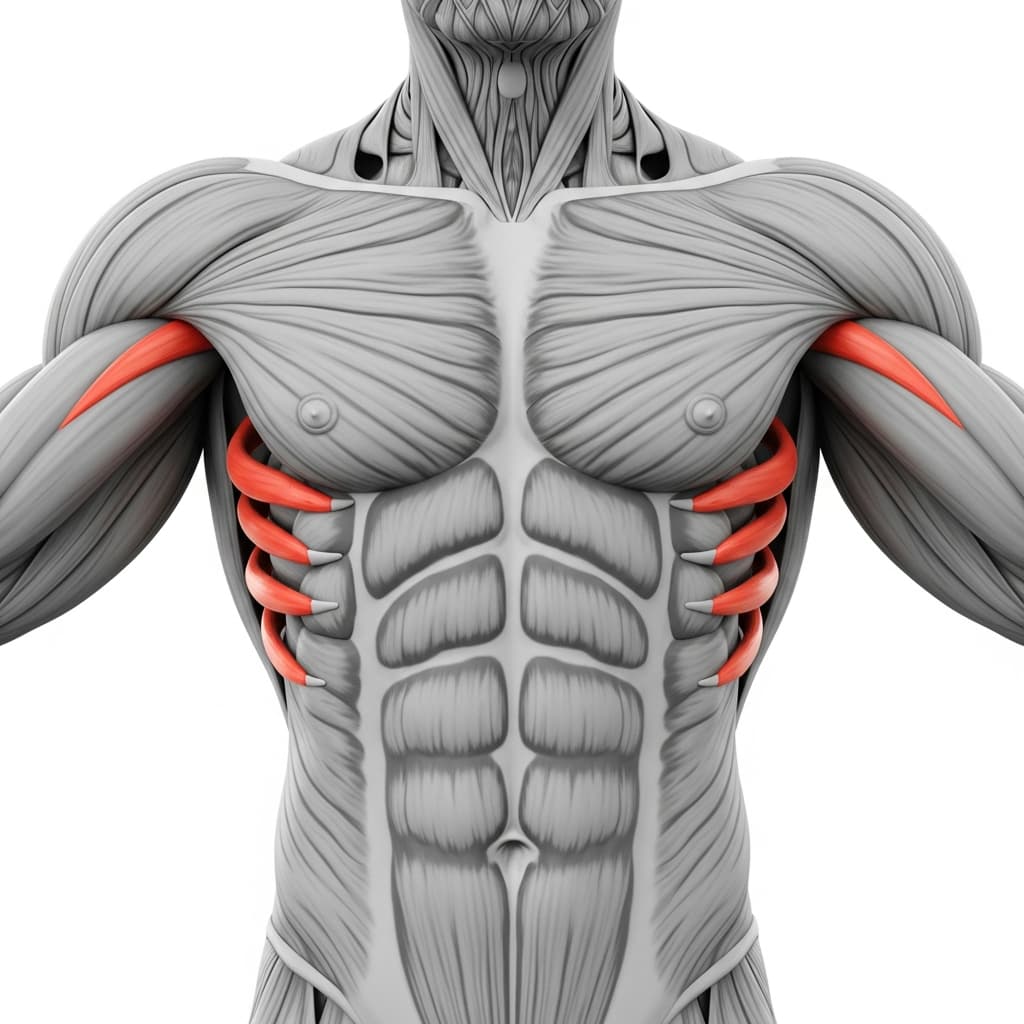
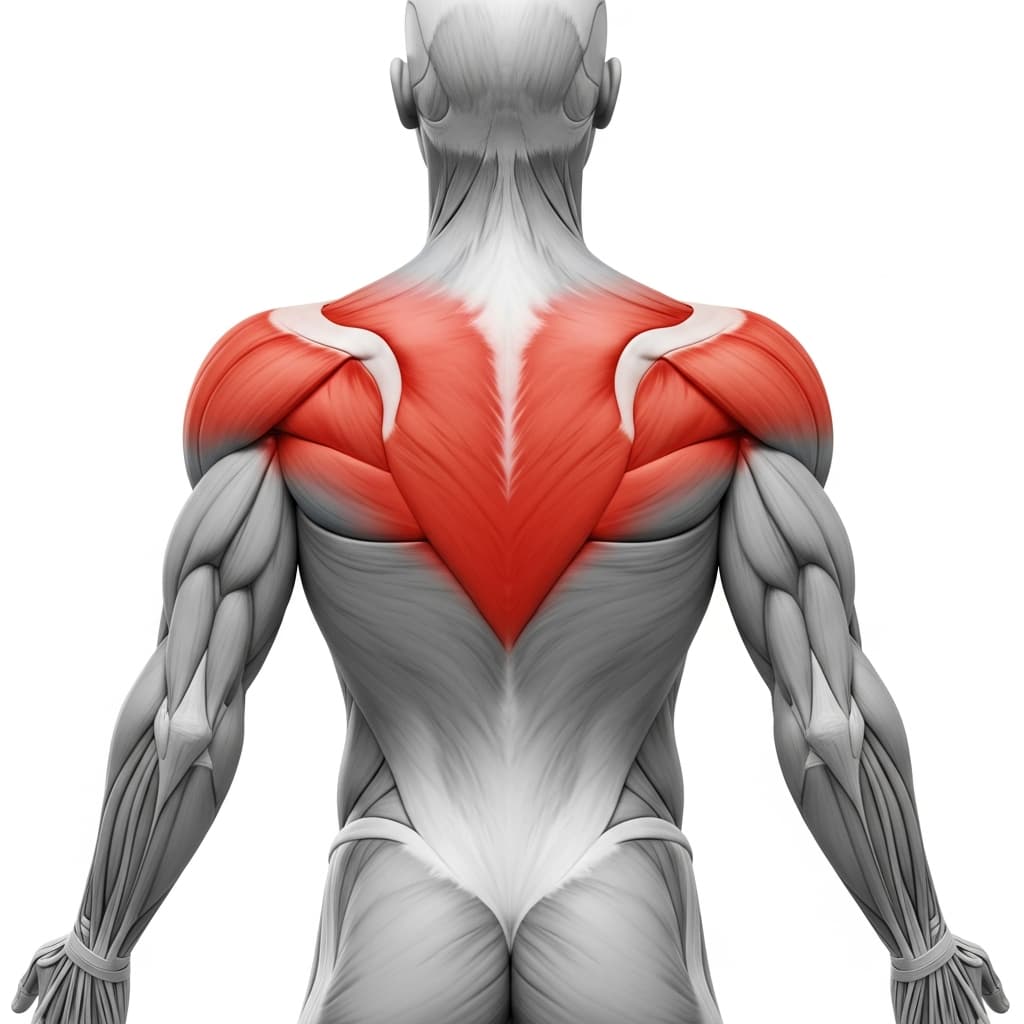
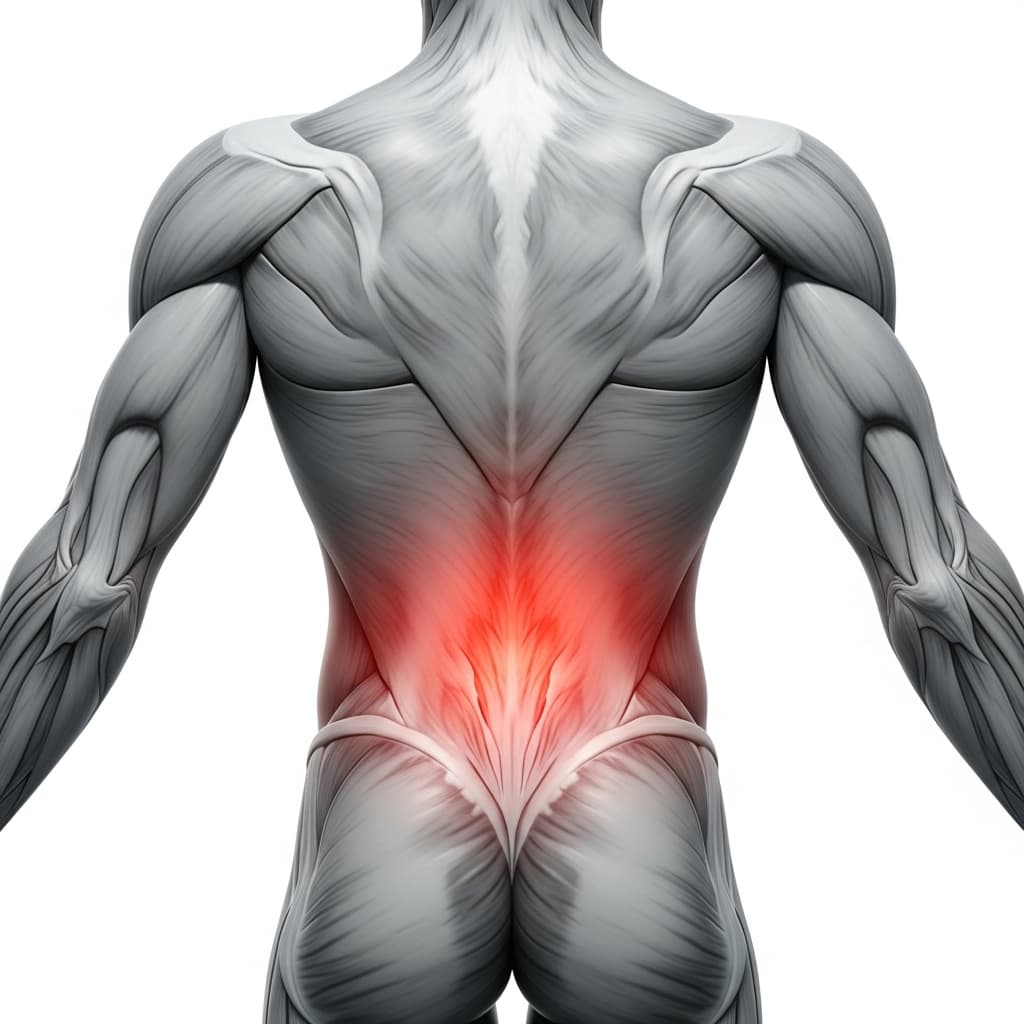
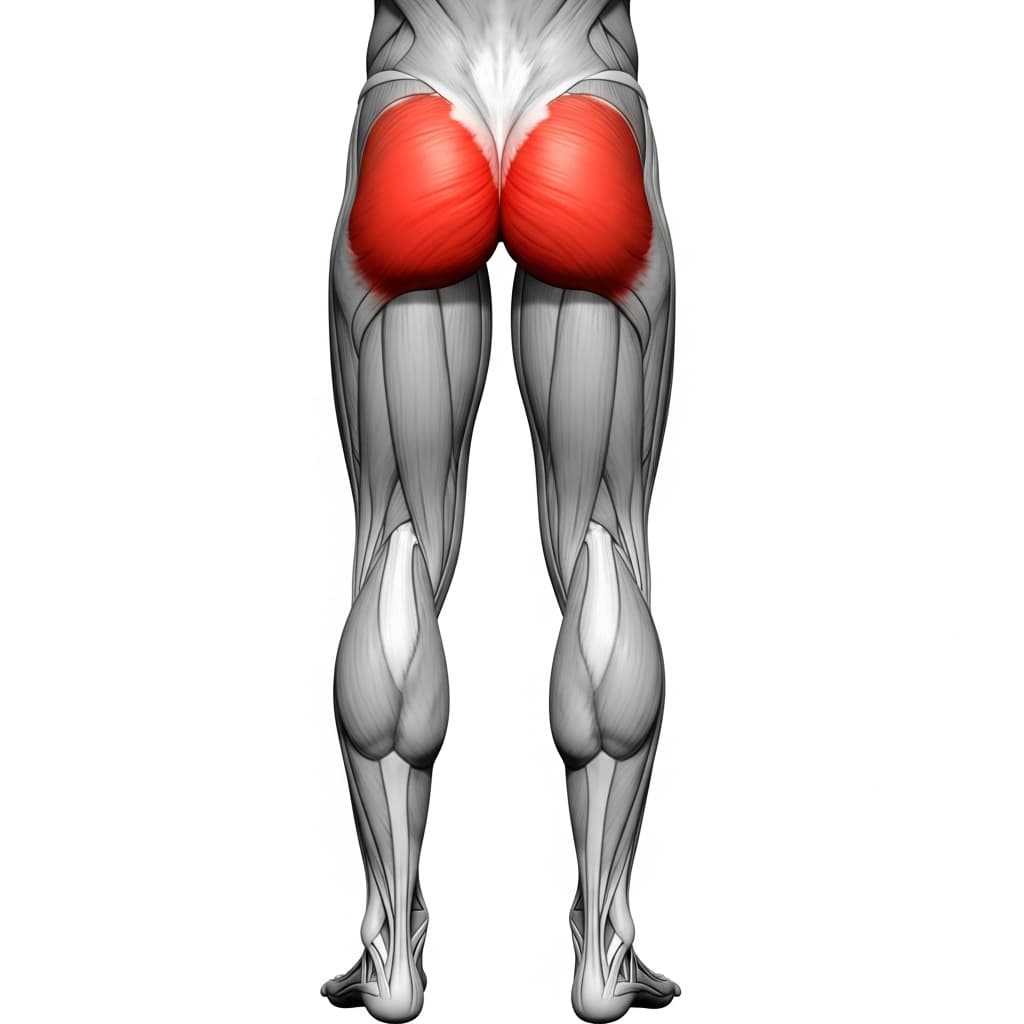
Primary Muscles
Anterior Deltoid (Front Deltoid) - The front deltoids drive the primary pressing force through the entire range of motion, working under extreme leverage as the body transitions from vertical to horizontal and back.
Triceps Brachii (Triceps) - The triceps extend the elbows during both the controlled descent and the powerful press back up to handstand, handling significant load at every point in the range of motion.
Secondary Muscles
Pectoralis Major (Chest) - The upper chest activates progressively as the body leans forward into the horizontal position, contributing to the pressing force when the torso approaches parallel.
Rectus Abdominis (Abs) - The abdominals maintain a rigid body line throughout the movement, preventing the hips from sagging or piking during the transition between vertical and horizontal positions.
Trapezius (Trapezius) - The trapezius muscles stabilize the scapulae and support the shoulder girdle under load, particularly during the overhead lockout phase at the top of each rep.
Serratus Anterior (Serratus Anterior) - The serratus anterior protracts and stabilizes the scapulae against the ribcage, maintaining shoulder joint integrity as force transfers through the arms during pressing.
Rhomboids & Upper Trapezius (Upper Back) - The upper back muscles provide scapular retraction and stabilization, controlling the shoulder blades during the transition between the vertical and horizontal body positions.
Erector Spinae (Lower Back) - The spinal erectors maintain extension of the lumbar spine, working with the abdominals to keep the torso rigid and prevent the body from folding during the lean.
Gluteus Maximus (Glutes) - The glutes maintain hip extension and keep the legs aligned with the torso, preventing the hips from breaking the straight body line during the descent and ascent.
Benefits of 90 Degree Handstand Push Ups
- Develops elite pressing strength through both the vertical and horizontal planes simultaneously, a combination no other single bodyweight exercise replicates
- Builds exceptional front deltoid and upper chest strength under extreme leverage disadvantage, directly transferring to planche and maltese progressions
- Trains overhead balance and proprioception under high load, strengthening the neuromuscular control required for advanced handstand skills
- Strengthens the scapular stabilizers and rotator cuff through a uniquely demanding range of motion, building shoulder resilience for all pressing and overhead work
Who Is This Exercise For?
You must have a confident freestanding handstand hold of at least 15 seconds and be able to perform strict handstand push-ups for 5 or more reps before attempting this exercise. Strong wrist mobility, solid scapular control, and the ability to hold a tuck planche for several seconds are all prerequisites that indicate your shoulders and core are prepared for the forward lean this movement demands. If your freestanding handstand is still inconsistent or you rely on a wall for support, you are not ready for this progression.
Common Mistakes to Avoid
Insufficient forward lean during the descent: The forward lean is not optional. If your shoulders stay directly above your hands as you lower, you are performing a regular handstand push-up, not a 90 degree variation. Actively push your shoulders forward past your fingertips throughout the entire lowering phase.
Letting the core collapse at the bottom: A loose midsection causes the hips to sag or pike, which shifts load away from the shoulders and breaks the body line. Brace your abs and squeeze your glutes before you begin each rep and maintain that tension through the entire range of motion.
Rushing through the movement: Speed kills form on this exercise. Each rep should take at least 3 to 4 seconds on the way down and 2 to 3 seconds on the way up. Controlling the tempo builds the specific strength this movement demands and protects the shoulder joint from sudden load spikes.
Flaring elbows out to the sides: Keep your elbows tracking at roughly 45 degrees from your torso as you lower. Flaring them out to 90 degrees places excessive stress on the shoulder capsule and reduces pressing efficiency.
Variations & Progressions
90 Degree HSPU Negatives
Perform only the lowering phase under control, taking 5 to 8 seconds to descend from handstand to the parallel position, then safely exit and reset. This builds the specific eccentric strength and body awareness needed for the full movement without requiring the pressing power to push back up.
Band-Assisted 90 Degree HSPU
Loop a resistance band between two elevated points and position it across your hips to provide assistance during the pressing phase. The band reduces the load at the bottom of the movement where most athletes fail, allowing you to practice the full range of motion with proper technique.
Deficit 90 Degree HSPU on Parallettes
Perform the movement on parallettes, which allows your body to descend deeper past the hand line for an extended range of motion. The increased depth demands greater shoulder mobility and significantly more pressing strength to recover from the bottom position.