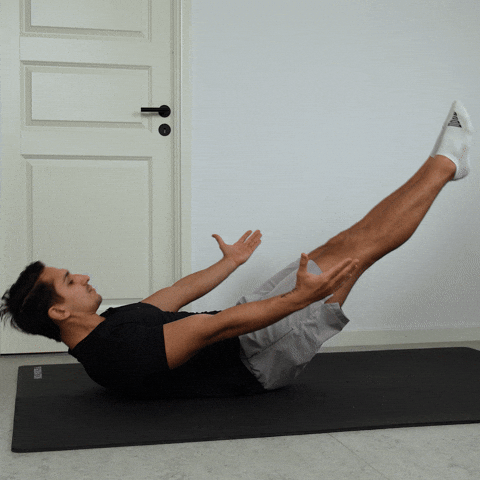
Hollow Body Rocks
Hollow body rocks are a dynamic core exercise that trains anti-extension strength by maintaining a rigid, curved body position while rocking back and forth on the floor. The movement primarily targets the rectus abdominis and hip flexors, with significant demand on the obliques and quads to keep the limbs elevated and the torso locked in shape. This exercise is one of the most transferable core movements in calisthenics because the hollow body position is the foundation of handstands, levers, and virtually every gymnastics-based skill.
Hollow body rocks are a dynamic core exercise that trains anti-extension strength by maintaining a rigid, curved body position while rocking back and forth on the floor. The movement primarily targets the rectus abdominis and hip flexors, with significant demand on the obliques and quads to keep the limbs elevated and the torso locked in shape. This exercise is one of the most transferable core movements in calisthenics because the hollow body position is the foundation of handstands, levers, and virtually every gymnastics-based skill.
How to Do Hollow Body Rocks
1. Lie Flat on the Floor
Start by lying on your back on a flat surface with your legs together and arms resting by your sides. Press your entire lower back firmly into the floor by engaging your abs and tilting your pelvis slightly upward. There should be zero space between your lumbar spine and the ground.
Flatten your lower back completely
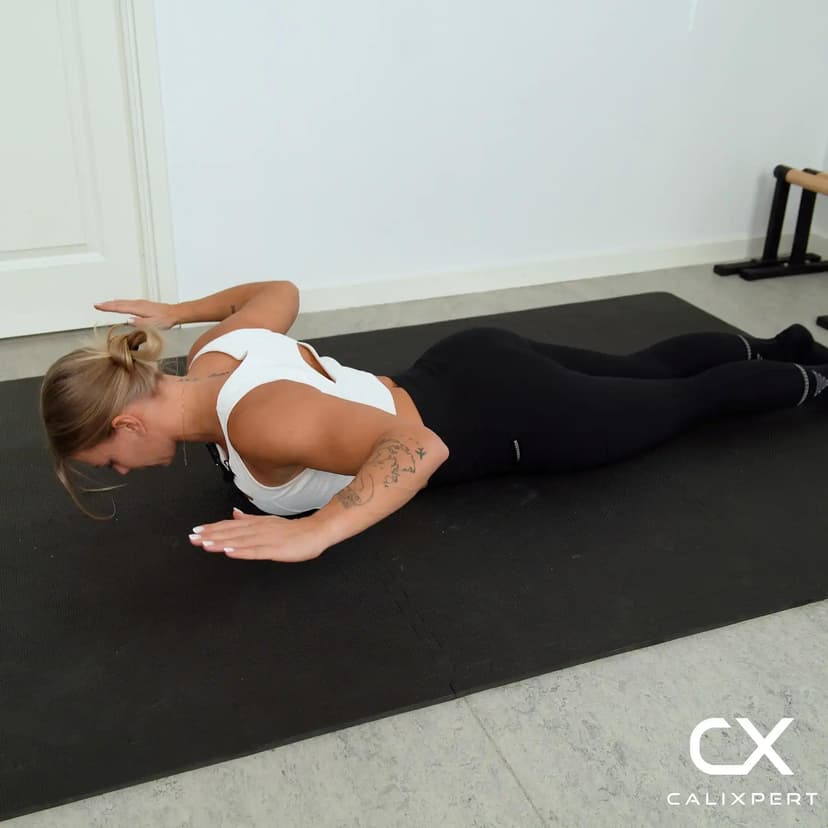
2. Set the Hollow Body Position
Extend your arms overhead past your ears and straighten your legs out in front of you. Lift your shoulders, arms, and legs a few inches off the floor simultaneously. Your body should form a shallow curved shape, like the bottom of a rocking chair, with only your lower back and glutes maintaining contact with the ground.
Shoulders and feet off the floor together
3. Lock Your Core Tight
Brace your abs hard and squeeze your legs together. Your ribs should be pulled down toward your hips, not flared open. This locked-in tension is what holds the shape during the rocking phase, so establish it before you move.
Ribs down, abs squeezed, legs glued together
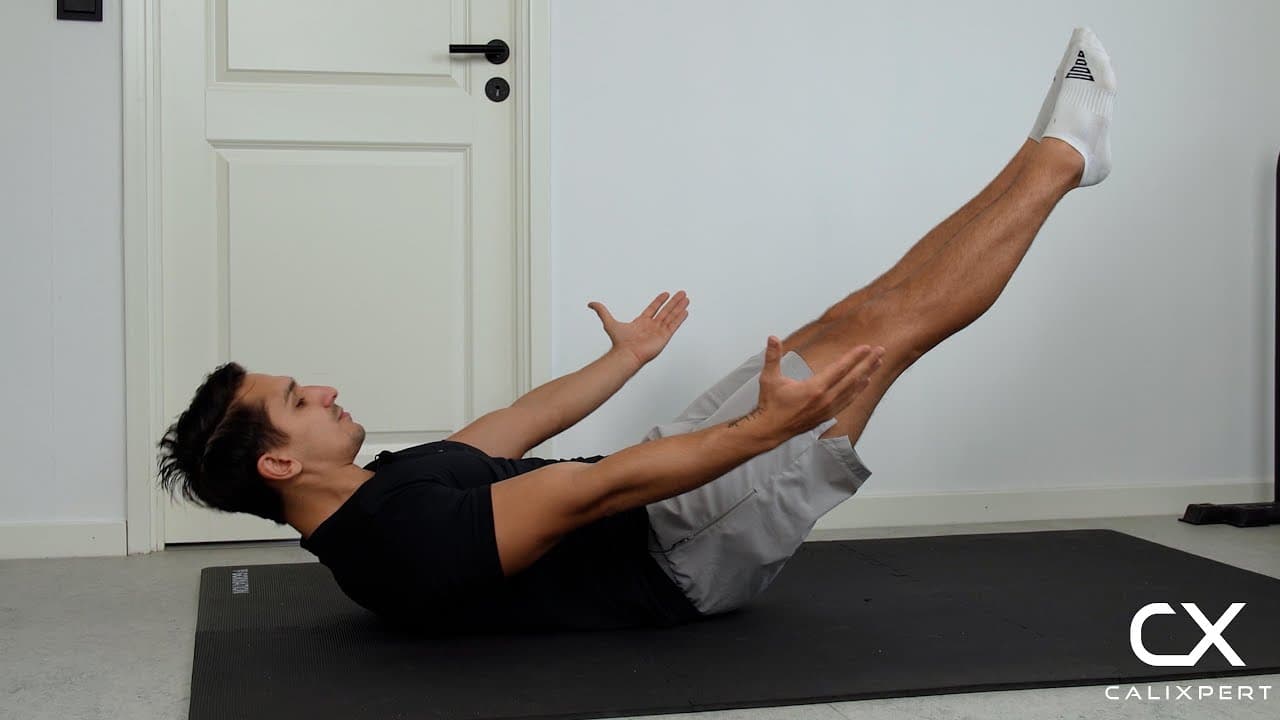
4. Begin the Rocking Motion
Shift your weight slightly toward your shoulders, then back toward your hips in a controlled rocking motion. The rock should come from your core tension and body shape, not from swinging your arms or legs. Keep the amplitude small and controlled, rocking only a few inches in each direction.
Rock from the core, not the limbs
5. Maintain the Shape Throughout
Your body position should not change at any point during the rocking. Arms stay by your ears, legs stay at the same height, and your lower back stays rounded. If you feel your back arching or your limbs dropping, stop and reset the position before continuing.
Same shape at the top and bottom of each rock
6. Lower and Reset Between Sets
After completing your reps, slowly lower your arms and legs back to the floor in a controlled manner. Rest with your back flat on the ground and take a few breaths before starting the next set. Rushing between sets leads to sloppy positioning on the next round.
Lower slowly, do not drop
Most people treat hollow body rocks like a speed drill and miss the entire point. The exercise is about proving that your core can hold one shape while your body moves through space. Slow the rocks down, make each one take two full seconds, and focus on feeling zero change in your body position from start to finish.
Muscles Worked During Hollow Body Rocks
Primary Muscles:

Secondary Muscles:


Primary Muscles
Rectus Abdominis (Abs) - The rectus abdominis works isometrically to maintain spinal flexion and prevent the lower back from arching as the body rocks back and forth.
Secondary Muscles
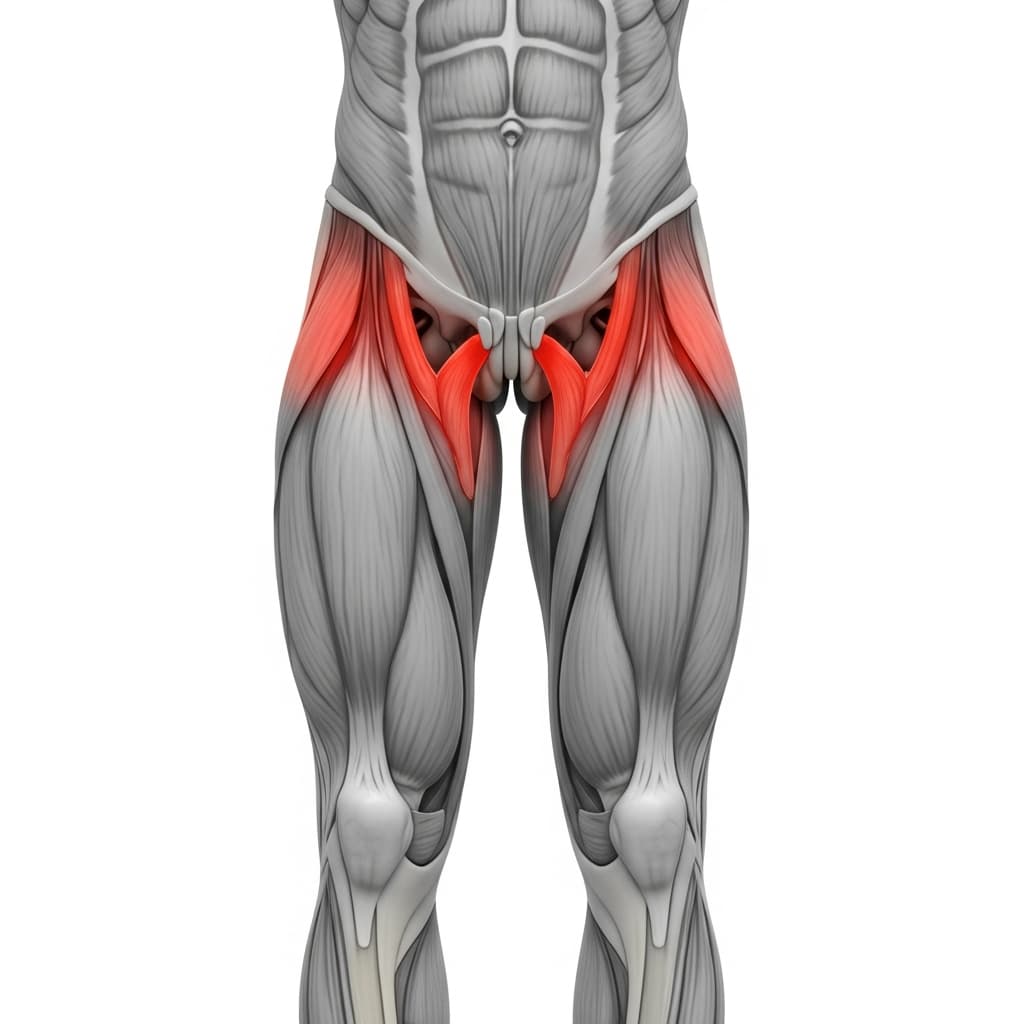
Iliopsoas (Hip Flexors) - The hip flexors hold the legs elevated off the ground throughout the entire set, working under constant isometric tension to resist gravity pulling the legs down.
Obliques (Obliques) - The obliques stabilize the torso laterally and prevent any rotation or side-to-side shift during the rocking motion, keeping the body rocking in a straight line.
Quadriceps (Quads) - The quadriceps maintain full knee extension to keep the legs straight and locked during the hold, increasing the lever length that the core must control.
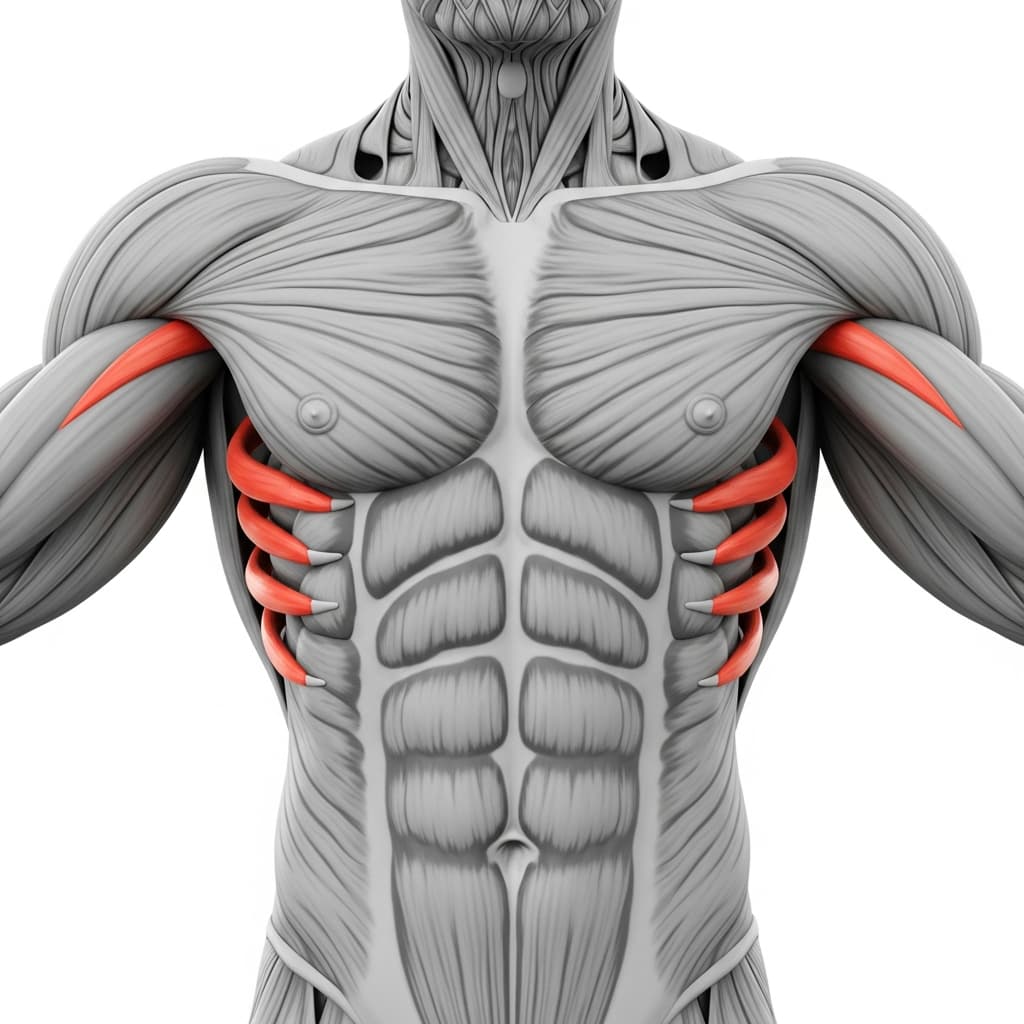
Serratus Anterior (Serratus Anterior) - The serratus anterior protracts the shoulder blades and helps keep the arms locked in position overhead, contributing to the rigid upper-body shape required for the movement.
Benefits of Hollow Body Rocks
- Builds anti-extension core strength, which is the specific type of abdominal control required for handstands, front levers, and muscle-ups
- Trains the ability to maintain full-body tension under movement, a skill that transfers directly to every gymnastics and calisthenics hold
- Strengthens the hip flexors in an isometric hold position, improving active leg compression for L-sits and V-sits
- Develops proprioceptive awareness of spinal position, teaching you to feel and correct lower back arching in real time
Who Is This Exercise For?
You should be able to hold a static hollow body position with your lower back pressed flat into the floor for at least 15 seconds before adding the rocking motion. If your lower back lifts off the ground during a basic hollow hold, work on that position first with bent knees until you can maintain full contact. Jumping to rocks without a stable hold will reinforce the wrong spinal position and limit your progress.
Common Mistakes to Avoid
Lower back lifting off the floor: Press your lumbar spine into the ground before you lift your limbs and maintain that contact throughout the entire set. If your back arches, raise your legs higher or bend your knees slightly until you can hold the flat-back position.
Breaking the hollow body shape while rocking: The rocking motion should move your entire body as one rigid unit. If your arms or legs are moving independently, your core is not braced hard enough. Reduce the range of the rock until you can maintain a locked shape.
Rocking too aggressively: Large, fast rocks indicate you are using momentum instead of core tension. Slow the tempo down and reduce the amplitude to just a few inches in each direction. The exercise is about maintaining position under movement, not speed.
Holding breath throughout the set: Breathe in short, controlled breaths while keeping your abs braced. Holding your breath limits your set duration and causes unnecessary tension in the neck and jaw. Practice breathing behind the brace before adding the rocking motion.
Variations & Progressions
Hands-by-sides hollow body rocks
Place your hands beside your hips instead of overhead, which shortens the lever arm and significantly reduces the demand on your core. This is the best starting point if you cannot maintain a flat lower back with arms extended.
Bent-knee hollow body rocks
Keep your knees bent at roughly 90 degrees with your shins parallel to the floor while rocking. This shortens the leg lever and makes it much easier to keep your lower back pressed into the ground.
Low-leg extended hollow body rocks
Lower your legs to just a few inches off the floor with arms fully overhead, maximizing the lever length in both directions. This demands significantly more anti-extension strength and is the full competition-level hollow body rock.