Assisted Straddle Halflay Front Lever
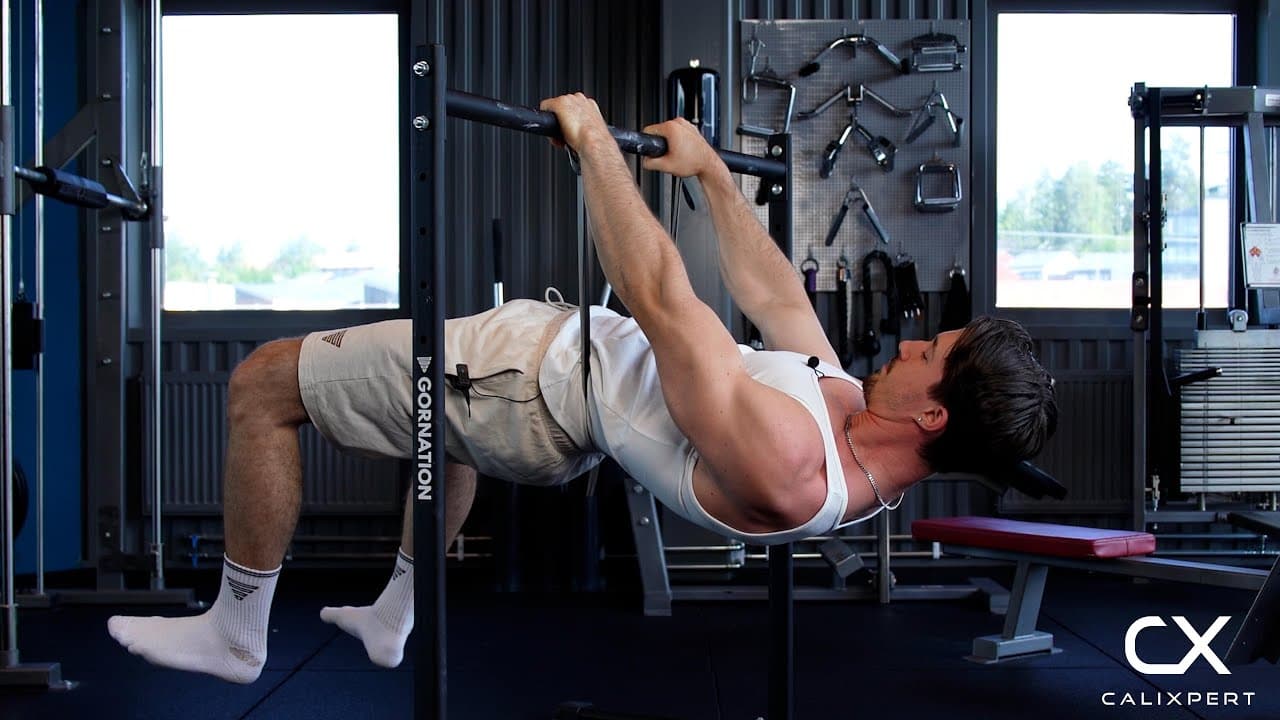
The assisted straddle halflay front lever is the softest way into the part of the front lever that stops most people, holding the hips fully open. The knees stay bent and the legs split wide, which pulls your weight in toward your shoulders, and the band across your lower back takes off the rest. Your lats and upper back still have to hold retraction, and your abs still have to stop the hips sinking. Only the load is smaller.
The assisted straddle halflay front lever is the softest way into the part of the front lever that stops most people, holding the hips fully open. The knees stay bent and the legs split wide, which pulls your weight in toward your shoulders, and the band across your lower back takes off the rest. Your lats and upper back still have to hold retraction, and your abs still have to stop the hips sinking. Only the load is smaller.
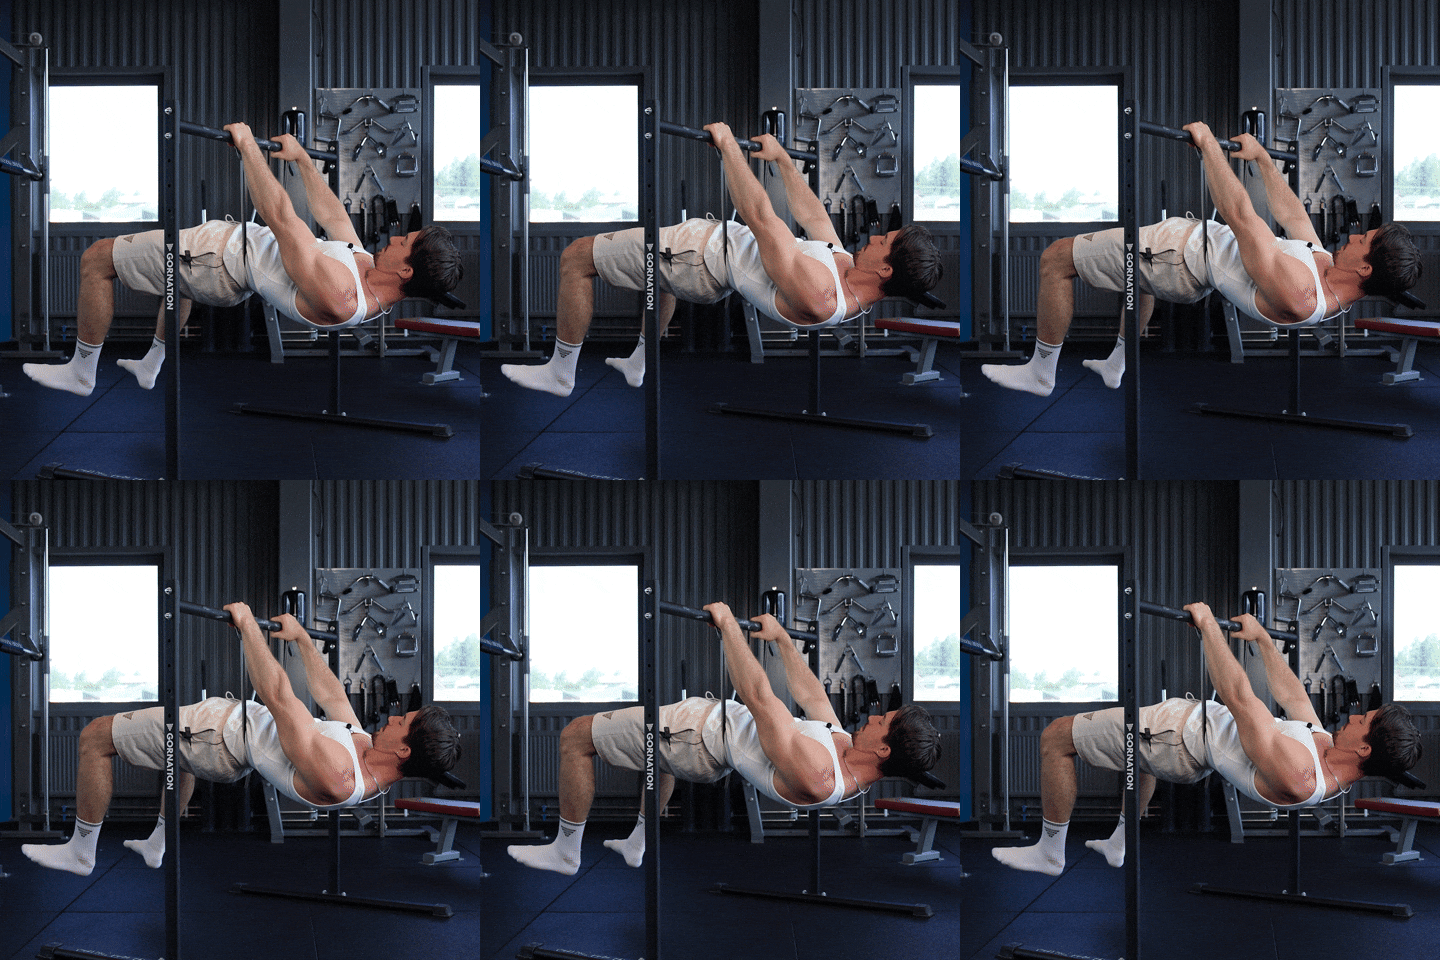
How to Do Assisted Straddle Halflay Front Lever
1. Anchor The Band On One Side
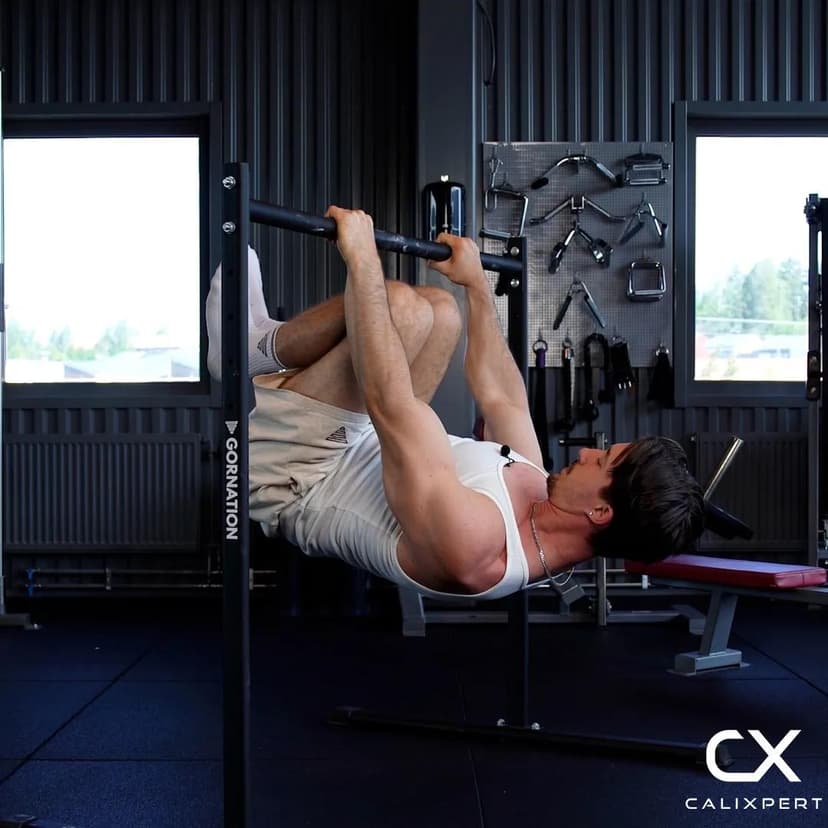
Fasten one end of the resistance band around one side of the bar and pull it tight. It does not matter which side, so take the one you are most comfortable working from. Use a bar low enough that you can lie back under it and still keep your heels clear of the floor.
Either side of the bar works.
2. Run The Band Across Your Lower Back
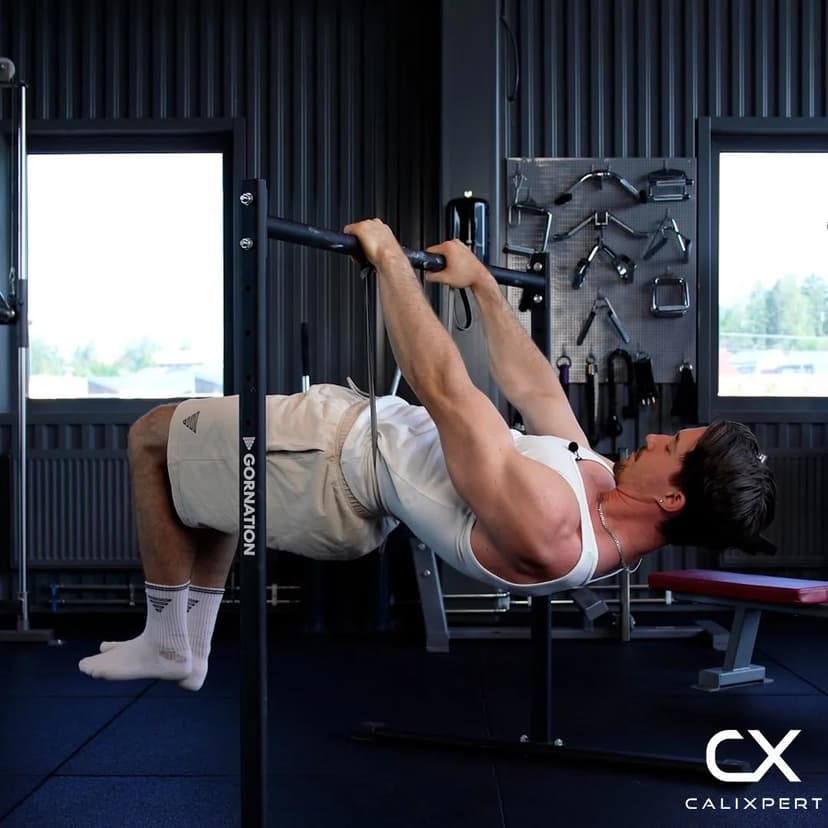
Pull the free end of the band over your lower back, bring it up to the bar and trap it under one hand. That puts the lift in the middle of your body, which is where most of your weight sits, so the band takes load off the whole line rather than propping up one end of it.
Over the lower back, held at the bar.
3. Grip And Lock The Arms
Take an overhand grip around shoulder width and lie back under the bar with the arms fully locked. The front lever is a straight arm skill, so any elbow bend hands the work to your biceps and turns the hold into a row.
Elbows straight and staying straight.
4. Set Retraction Before You Lift
Pull your shoulders back and down and hold them there before either foot leaves the ground. The lever is constantly trying to drag your shoulder blades forward, so you pull hard into retraction and depression just to keep them neutral. Lose it and your lats have nothing to pull from, the shoulder rises and the whole body drops.
Shoulders back and down.
5. Take The Straddle Halflay Shape
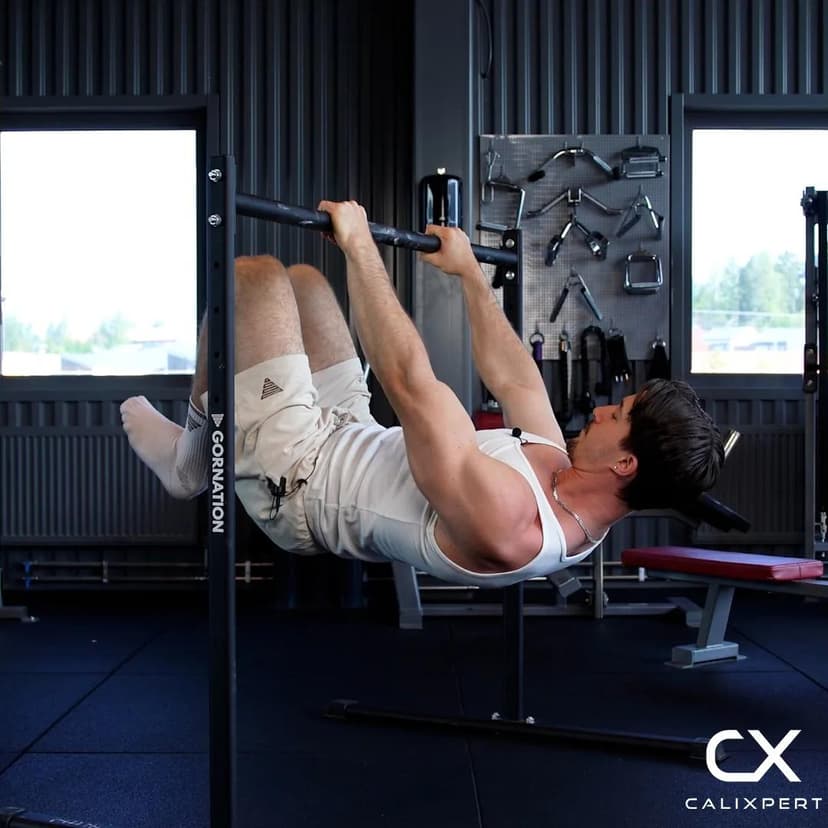
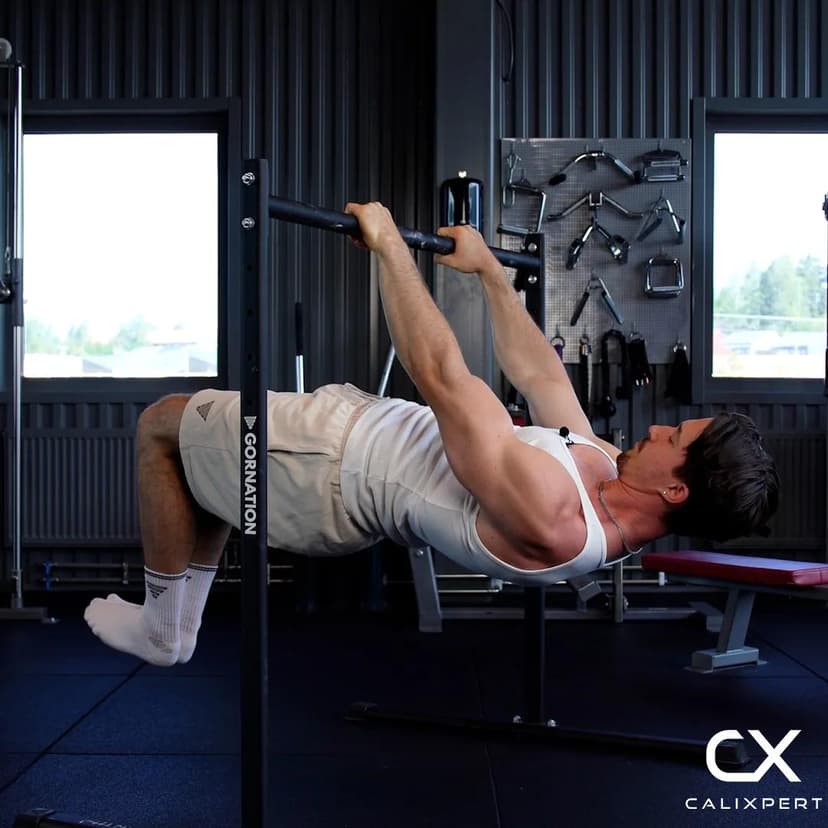
Bend both knees to about 90 degrees and let the legs split apart. Bent knees and a wide straddle both bring your weight closer to your shoulders, which is what makes this the easiest shape on the ladder that still has the hips fully open.
Knees bent, legs wide.
6. Lift One Foot At A Time
Engage your lower back and squeeze the glutes so the hips stay in line with your chest, then lift one foot off the floor. Check that you are still flat and aligned, then lift the other one. Taking it one foot at a time lets you feel the position instead of kicking into it.
Brace, then lift.
7. Hold, Then Come Down Under Control
Hold for four to ten seconds with the line flat, then put one foot down and stand up. End the set the moment the hips start sinking or the shoulders roll forward, because the seconds after that are not this exercise any more. Four to six sets with two to three minutes rest is plenty.
Quality seconds, not maximum seconds.
Fasten the band on whichever side of the bar you are most comfortable with, it does not matter which one. Pull it over your lower back and hold the free end at the bar with one hand. From there the arms stay fully locked and retraction is engaged, shoulders back and down. Lift one foot, check you are aligned, then lift the other and hold. If the hips sink the moment both feet leave the floor, the band is too thin.
Muscles Worked During Assisted Straddle Halflay Front Lever
Secondary Muscles:
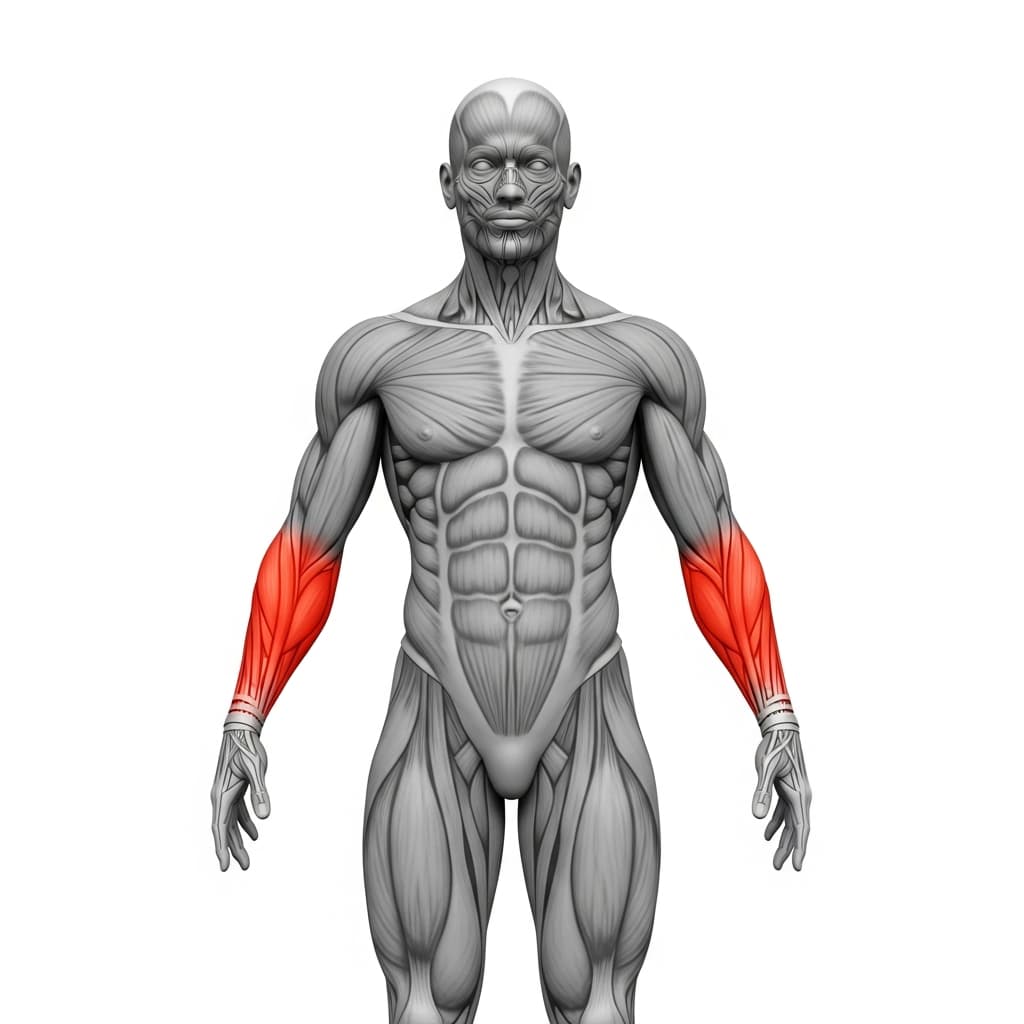
Primary Muscles
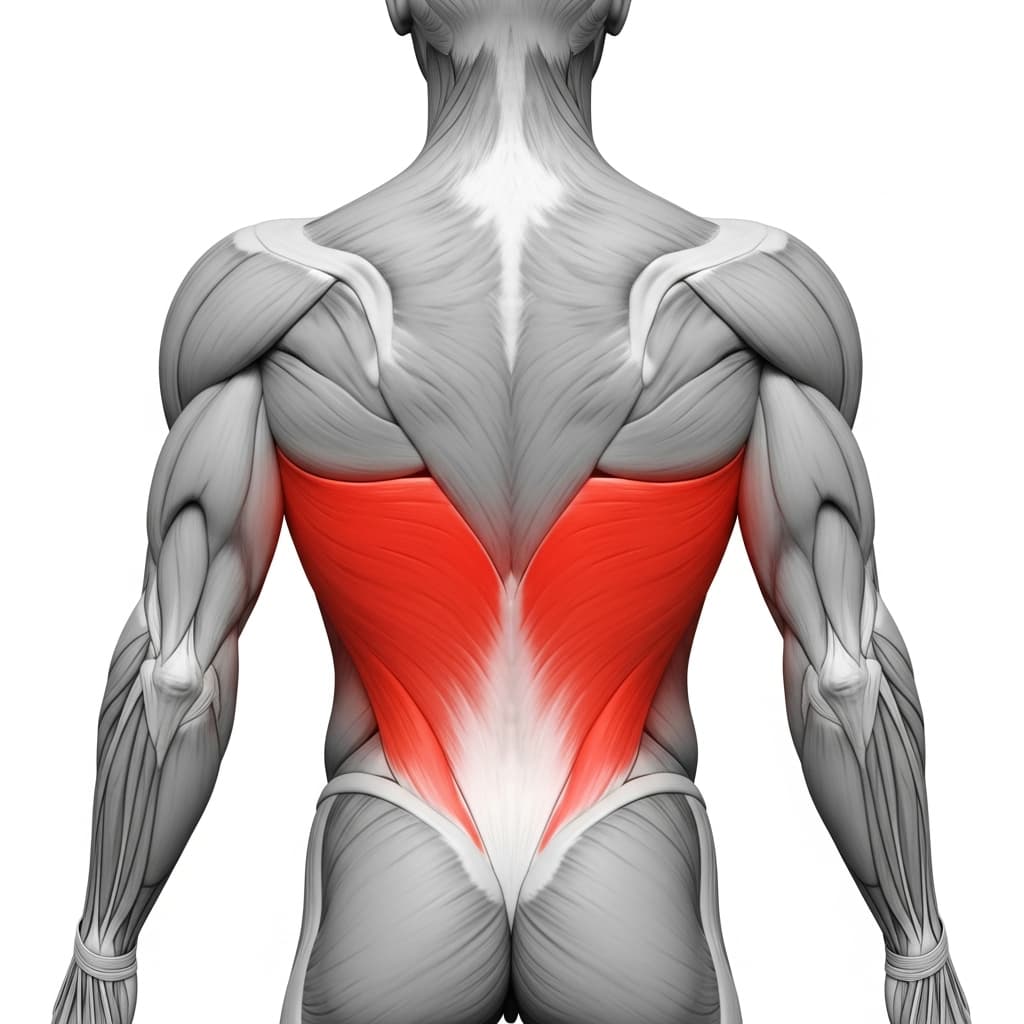
Latissimus Dorsi (Lats) - The lats do the main job, pulling your locked arms down toward your sides so your body stays level under the bar instead of hanging below it.
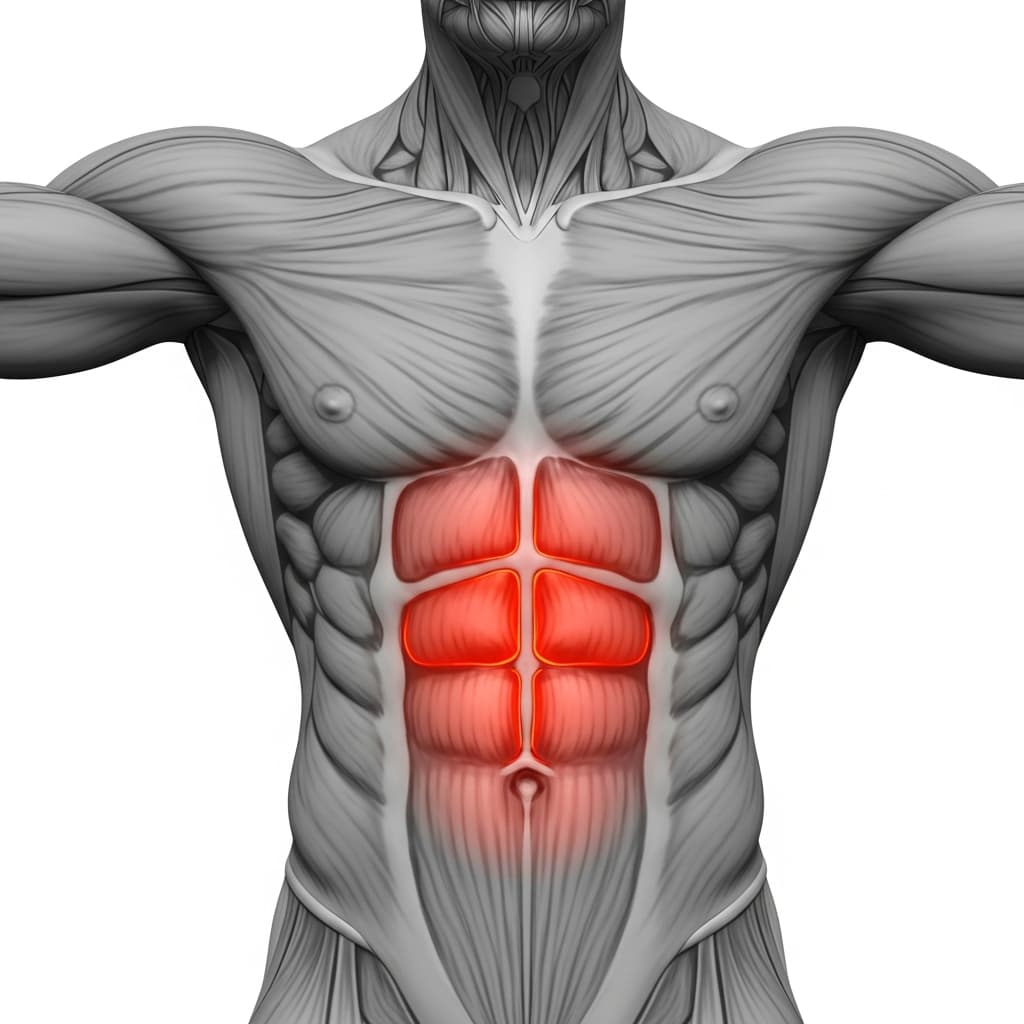
Rectus Abdominis (Abs) - The abs stop the hips folding and stop the lower back arching, which is what holds the line straight once the knees are open.
Secondary Muscles
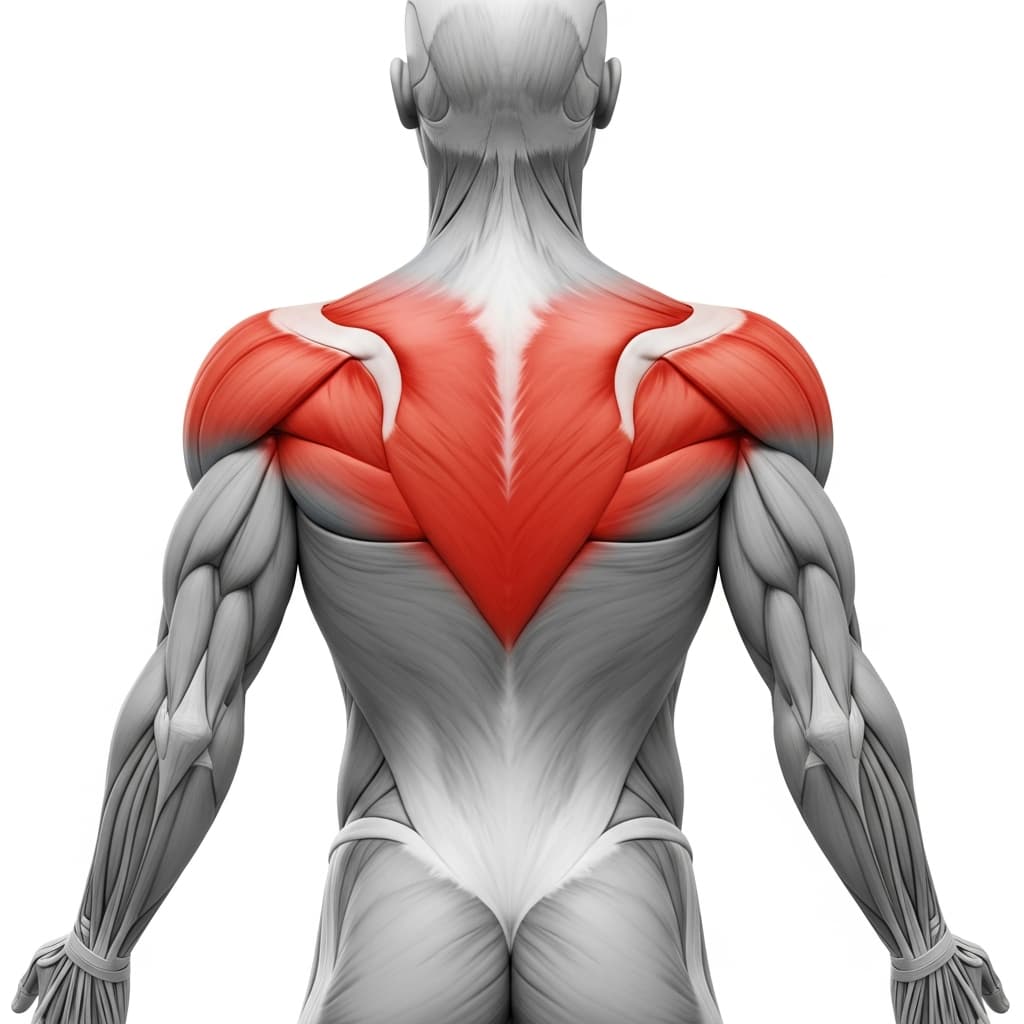
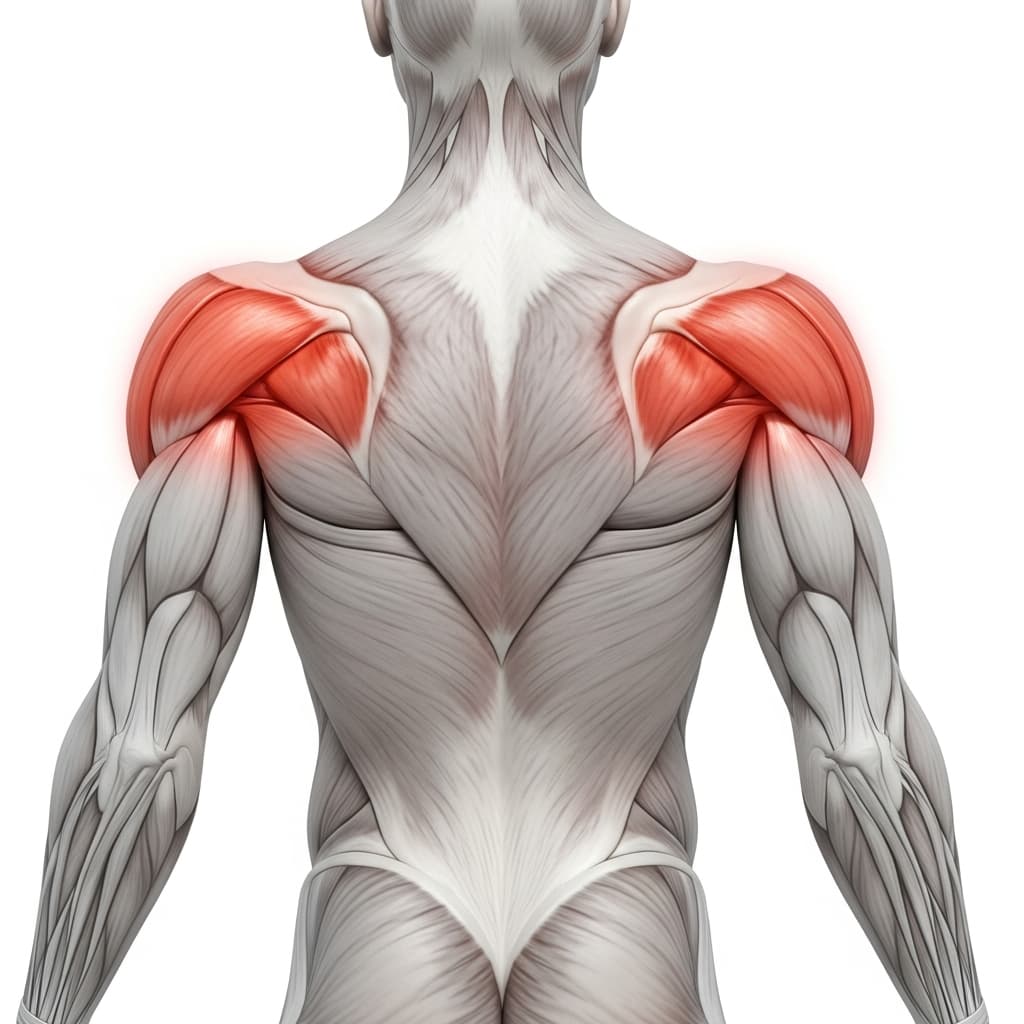
Rhomboids & Upper Trapezius (Upper Back) - The upper back holds the shoulder blades back and down so the lever cannot drag them forward around the ribcage.
Posterior Deltoid (Rear Deltoid) - The rear deltoids help draw the upper arm back behind the body and keep the shoulder from rolling forward.
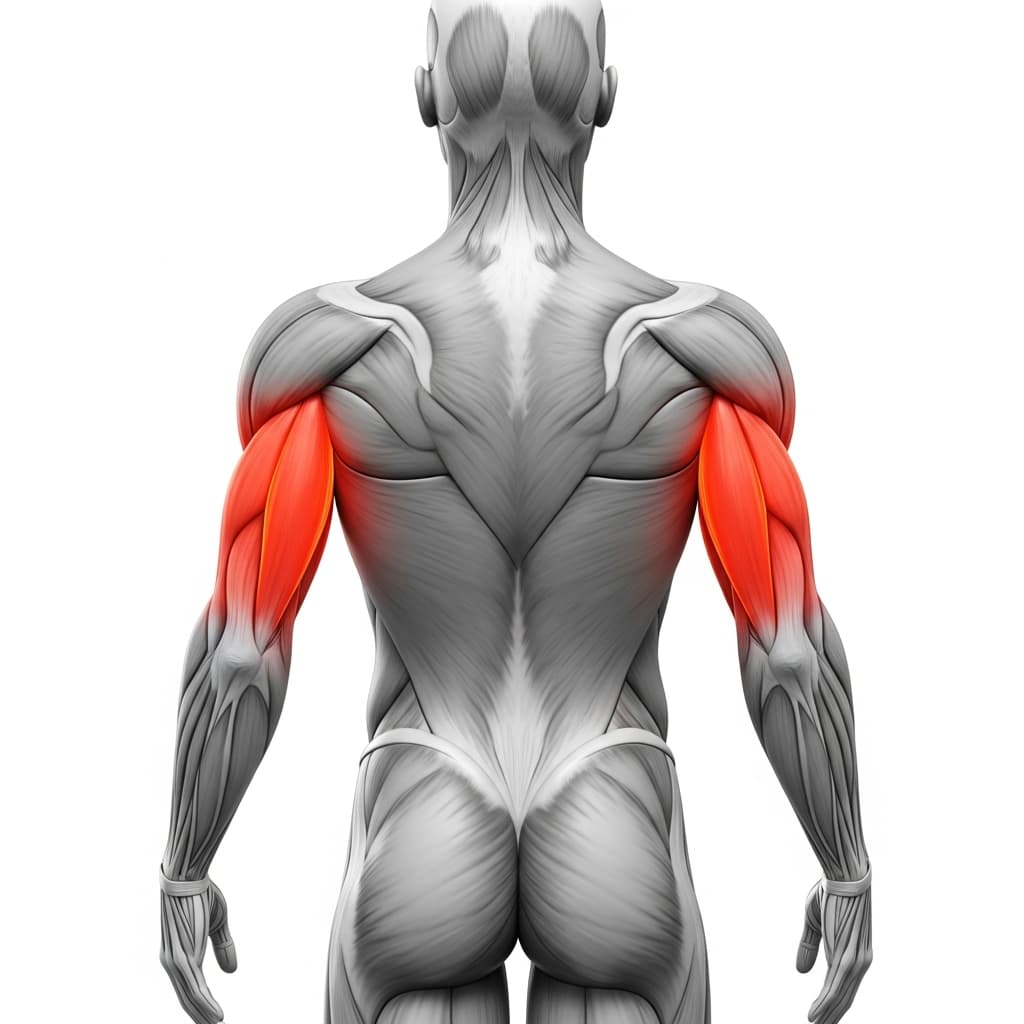
Triceps Brachii (Triceps) - The long head of the triceps helps extend the shoulder and keeps the elbow locked out for the whole hold.
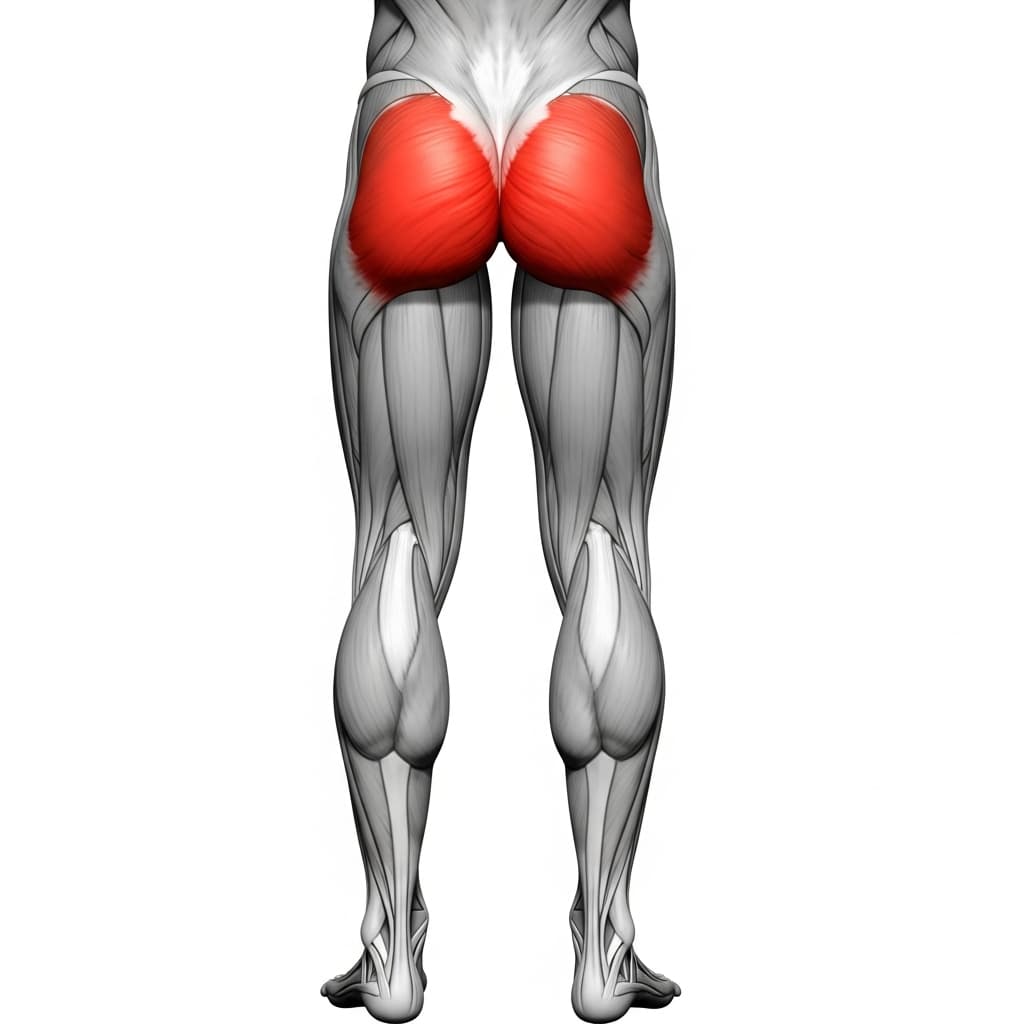
Gluteus Maximus (Glutes) - The glutes hold the hips extended so the thighs stay in line with your torso instead of drifting up into a tuck.
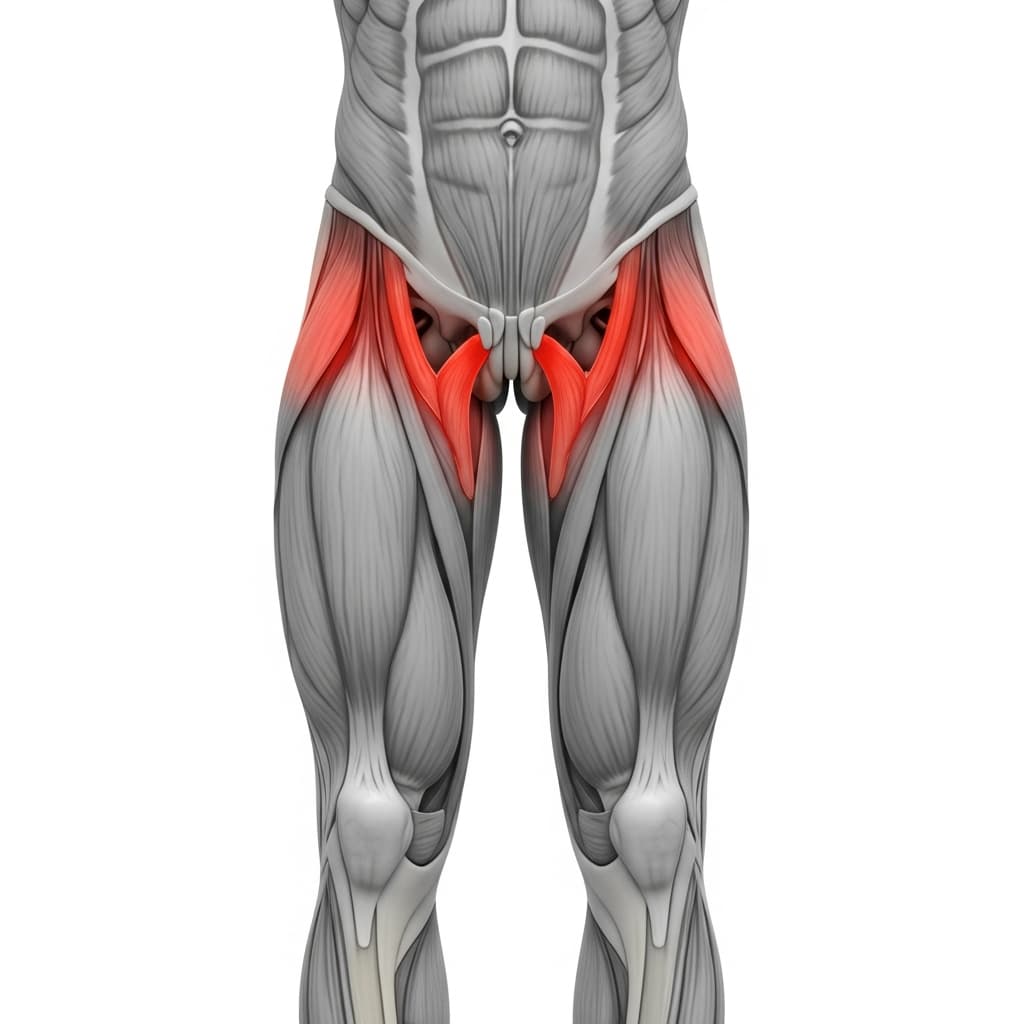
Iliopsoas (Hip Flexors) - The hip flexors work with the abs to stop the hips sagging toward the floor, so the thighs stay level with your chest rather than dropping below it.
Forearm Flexors & Extensors (Forearms) - The forearms keep a firm grip on the bar and pin the free end of the band under one hand for the whole set.
Benefits of Assisted Straddle Halflay Front Lever
- Teaches the hips-open position that most people never reach, at a load you can actually hold for real seconds instead of touching for one.
- Builds straight arm pulling strength in the lats and upper back at a longer lever than any tuck shape gives you.
- Keeps the abs, hip flexors and glutes working, because the band takes weight off the middle of your body and leaves you to hold the line yourself.
- Lets you accumulate quality seconds in a position that would otherwise only ever be a maximum effort, and volume is what actually drives progress here.
- Bridges the gap between the advanced tuck and an unassisted halflay, which is exactly where people stall for months.
Who Is This Exercise For?
Before this one you want a clean advanced tuck front lever with a flat back, held for around ten seconds, plus a few months of straight arm hanging work such as scapula pull ups, skin the cat and the german hang. The front lever loads the elbows and shoulders with the arms locked, and connective tissue adapts slower than muscle, so that base is what keeps your elbows quiet later. Treat the band as a bridge across one rung, not a lift over three: use it for the shape one step above the hardest one you can already hold on your own. If the advanced tuck still collapses at the shoulders, spend more time there first.
Common Mistakes to Avoid
Setting the band up under your feet: It is the quicker setup to rig, and it changes what you are training. With the band under your feet your legs get held up for you, so the abs and hip flexors stop fighting the sag and you end up holding a shape the band is making. Run it over the lower back instead, the way it is set up here, so it only takes weight off and the position stays yours.
Losing retraction and letting the shoulders roll forward: This is the fault that ends most holds. The shoulder blades get dragged forward, the shoulders creep toward the ears, and the lats lose the position they pull from, so the hips drop and people blame their abs. Pull back and down hard for the whole hold, and understand that you are pulling that hard just to keep the shoulder blades neutral.
Bending the elbows to stay horizontal: When the shoulders run out, the arms fold and the biceps take over, which is also how elbows get sore. If you cannot keep them locked, use a slightly thicker band or bring the knees closer to your chest. Straight arms in a smaller shape is worth more than a bent arm halflay.
Folding the hips back into a tuck: The open hip is the entire reason this progression exists, so as soon as the thighs drift toward your chest you are doing an advanced tuck with the legs apart. Squeeze the glutes, keep the ribs down and hold the thighs in line with your torso. If they will not stay there, the answer is more band, not more effort.