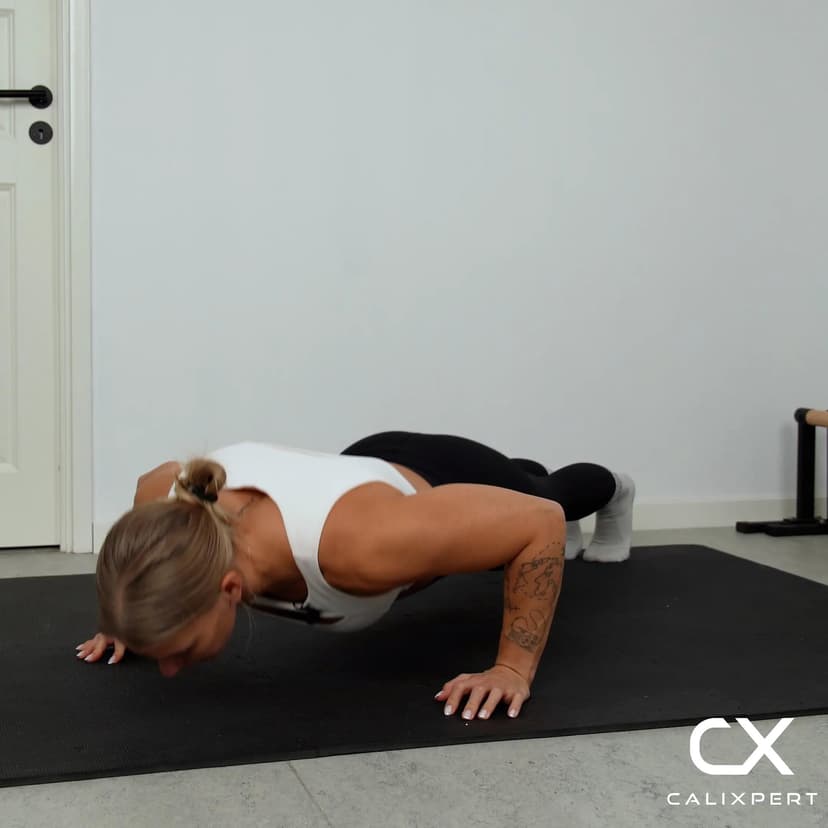
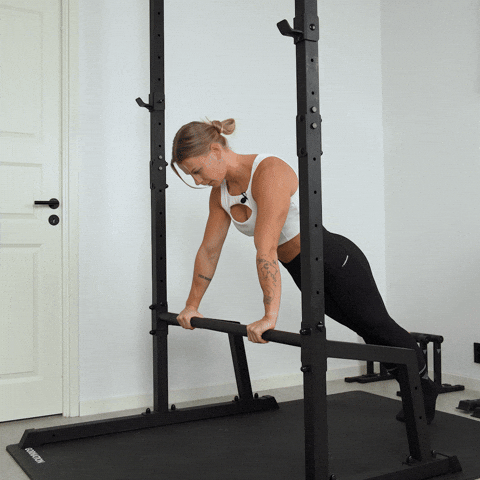
Knee Height Incline Push Ups
Knee height incline push-ups are a foundational pushing exercise where your hands are placed on a surface at knee level, reducing the load compared to a standard push-up while still training the chest, front deltoids, and triceps through a full range of motion. The incline angle shifts more emphasis onto the lower chest and allows you to focus on strict body alignment and controlled tempo without being limited by raw pressing strength. This makes them one of the most effective progressions for building the pushing base you need before moving to floor push-ups and beyond.
Knee height incline push-ups are a foundational pushing exercise where your hands are placed on a surface at knee level, reducing the load compared to a standard push-up while still training the chest, front deltoids, and triceps through a full range of motion. The incline angle shifts more emphasis onto the lower chest and allows you to focus on strict body alignment and controlled tempo without being limited by raw pressing strength. This makes them one of the most effective progressions for building the pushing base you need before moving to floor push-ups and beyond.
How to Do Knee Height Incline Push Ups
1. Find a Knee Height Surface
Choose a stable surface at approximately knee height, such as a sturdy bench, low bar, or box. The surface must not slide or wobble under load. A slightly lower or higher surface changes the difficulty, so aim for a height that lines up with your kneecap when standing next to it.
Stable surface, knee height
2. Set Your Hand Position
Place your hands on the surface slightly wider than shoulder width apart, with fingers spread and pointing forward. Wrap your thumbs around the edge if using a bar, or press your palms flat if using a bench. Your wrists should stack directly under your shoulders when viewed from the side.
Hands just outside shoulder width
3. Step Back and Lock Your Body
Walk your feet back until your shoulders are directly above your hands and your body forms one straight line from head to heels. Squeeze your glutes, brace your core, and lock your legs so nothing sags or pikes. This full-body tension must stay engaged throughout every rep.
Squeeze glutes, brace core, straight line
4. Lower Your Chest to the Surface
Bend your elbows and lower your chest toward the surface in a controlled descent. Keep your elbows angled roughly 45 degrees out from your body, not flared wide or tucked tight against your ribs. Lower until the surface touches slightly below your chest and your elbows reach at least 90 degrees of bend.
Elbows at 45 degrees, chest to surface
5. Press Back Up in One Line
Push through your palms and extend your arms to return to the starting position. Your entire body should move as one rigid unit, with no hip sag or pike at any point during the press. Keep your head in a neutral position throughout, looking slightly ahead of your hands rather than straight down.
Push up in one straight line
6. Reset and Repeat
At the top of each rep, confirm your body is still in a straight line and your core is braced before starting the next descent. Do not let your hips drop or your shoulders creep forward between reps. Each rep should look identical to the last.
Re-check your line at the top
Most people rush through incline push-ups because they see them as a beginner exercise. Slow your tempo to a 2-second descent and a 1-second press, and focus on keeping your elbows at 45 degrees the entire time. You will feel your chest and triceps work far harder than if you just bounce through fast reps, and you will build the body control that actually matters when you progress to harder variations.
Muscles Worked During Knee Height Incline Push Ups
Secondary Muscles:
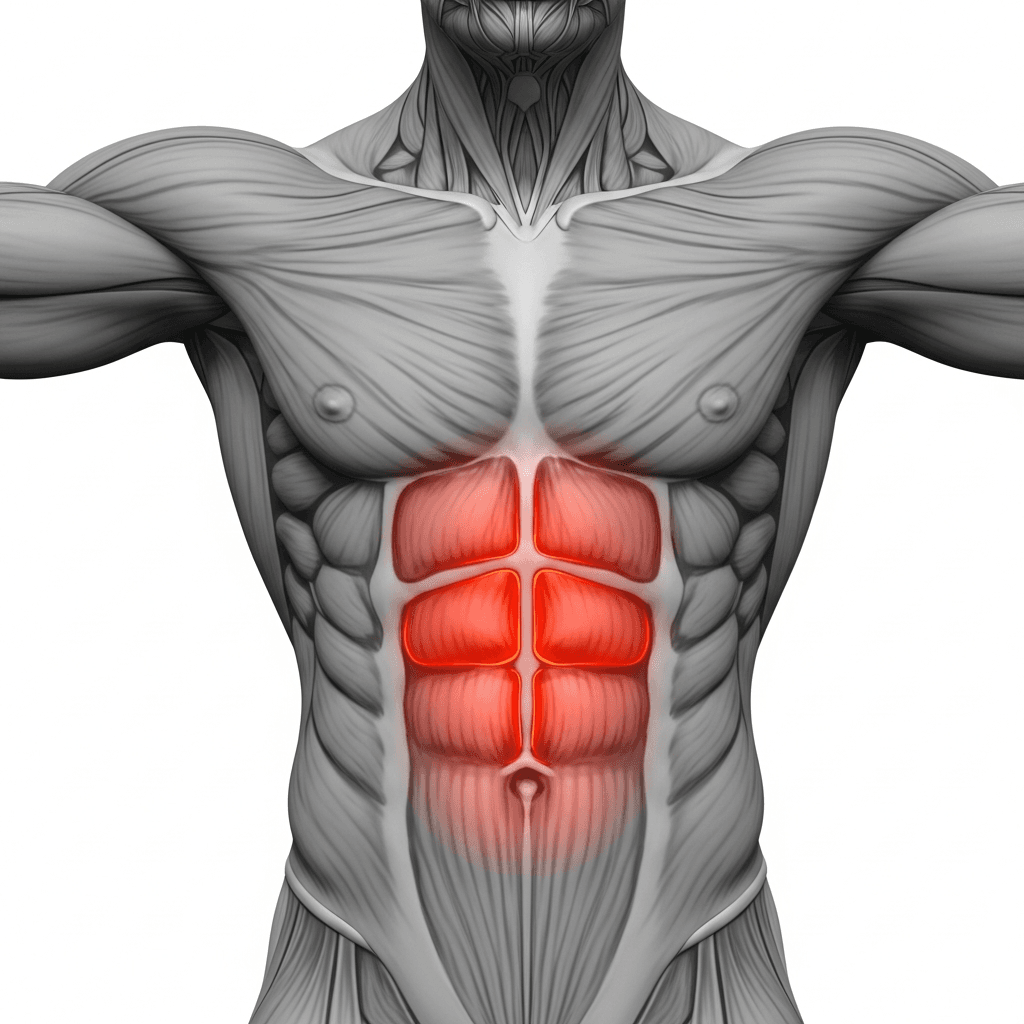
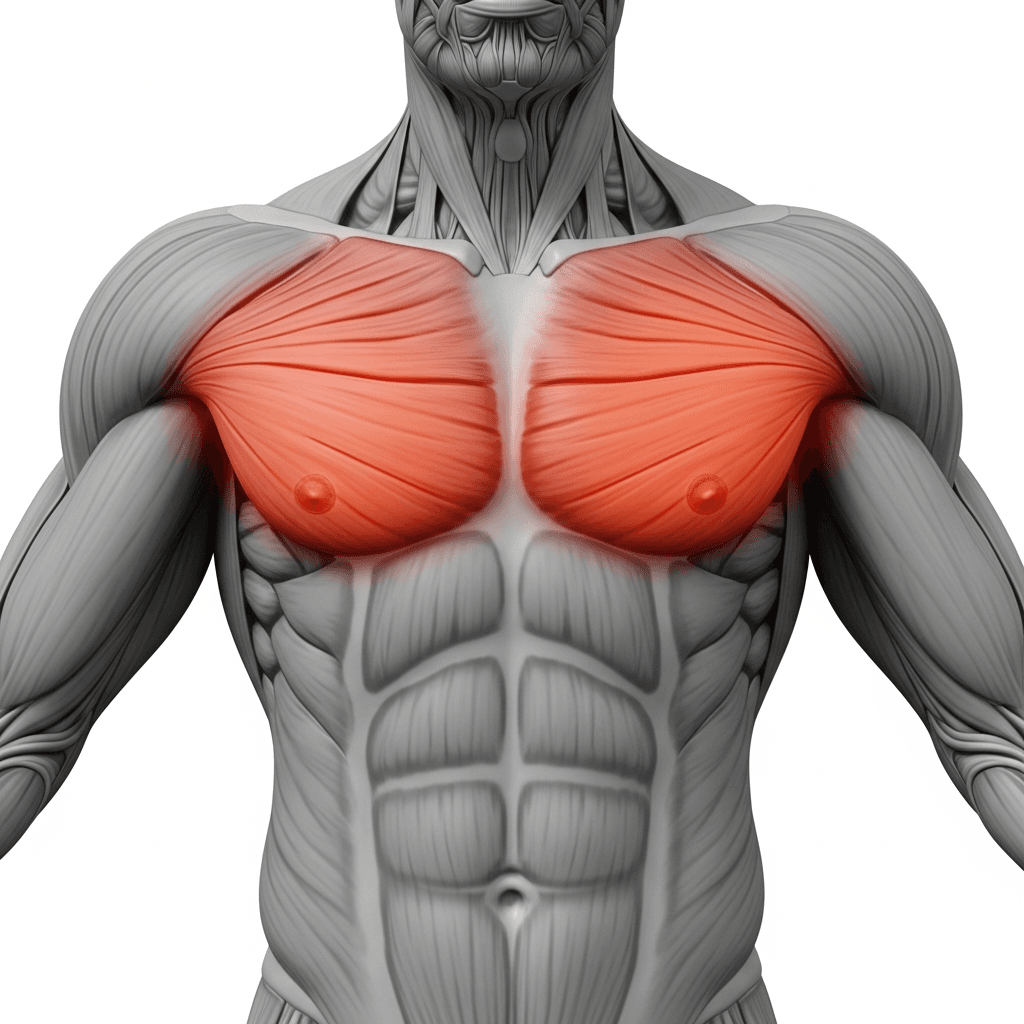
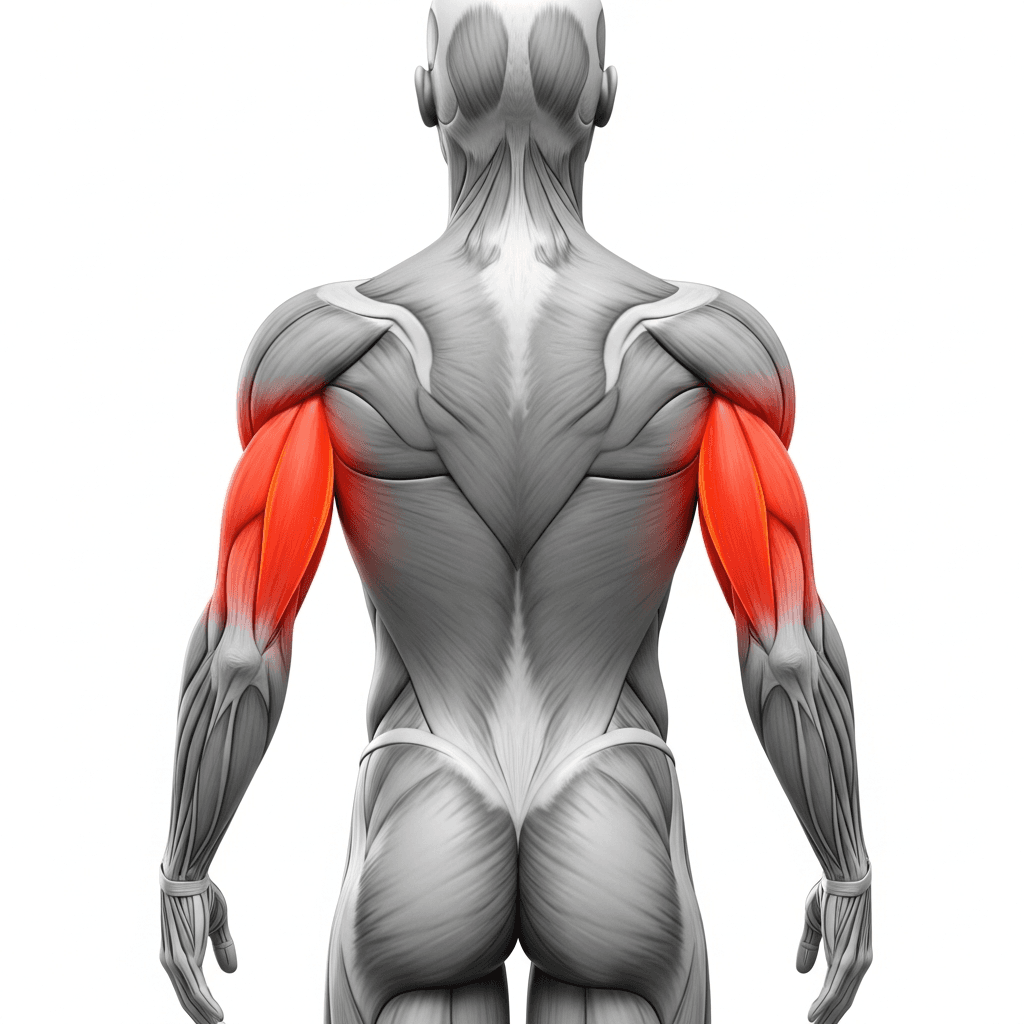
Primary Muscles
Pectoralis Major (Chest) - The chest drives horizontal pressing force as you push your body away from the surface, working through both the lowering and pressing phases of each rep.
Triceps Brachii (Triceps) - The triceps extend the elbow during the pressing phase, handling the final lockout portion of the movement where the chest's mechanical advantage decreases.
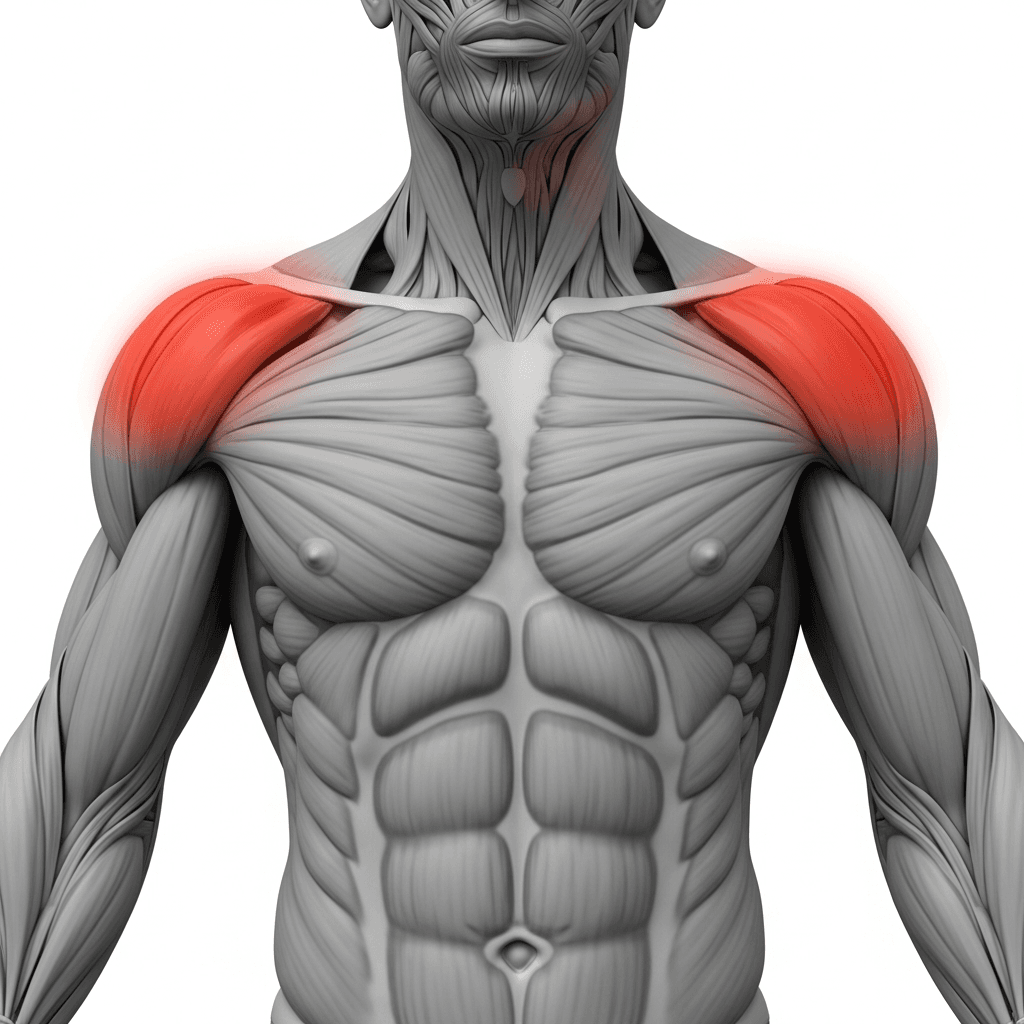
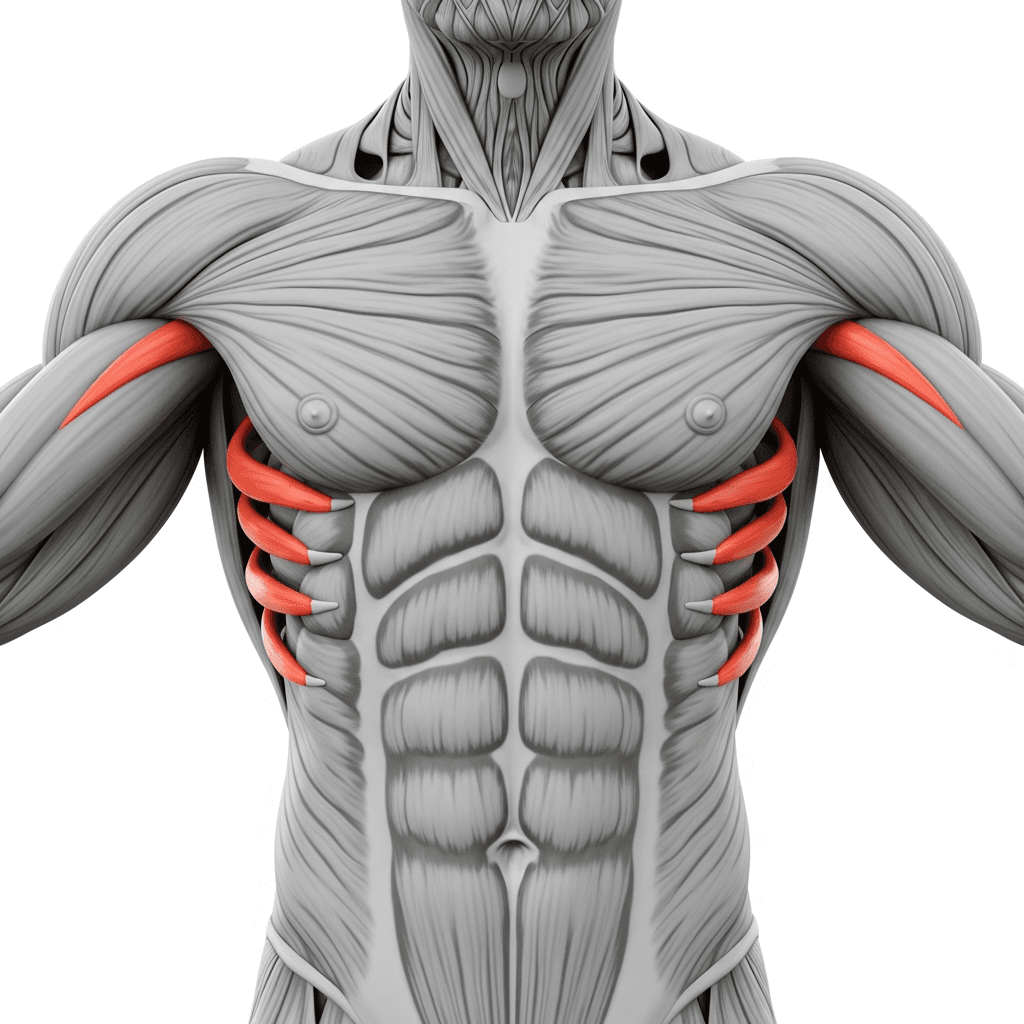
Secondary Muscles
Anterior Deltoid (Front Deltoid) - The front deltoids assist the chest in shoulder flexion during the press, stabilizing the shoulder joint throughout the movement.
Rectus Abdominis (Abs) - The abs brace isometrically to maintain a straight body line, preventing the hips from sagging under gravity during each rep.
Serratus Anterior (Serratus Anterior) - The serratus anterior protracts the scapula at the top of each rep, completing the pressing motion and stabilizing the shoulder blade against the ribcage.
Benefits of Knee Height Incline Push Ups
- Builds chest and triceps pressing strength at a manageable load, bridging the gap between higher incline variations and floor push-ups
- Trains full-body tension and core bracing under real load, which transfers directly to every calisthenics pushing skill
- Strengthens the serratus anterior through protraction at the top of each rep, improving scapular stability for all overhead and pressing work
- Allows high-quality volume for beginners who cannot yet perform enough floor push-ups to create a meaningful training stimulus
Who Is This Exercise For?
You should be able to hold a straight-arm plank for at least 20 seconds with your core fully engaged before attempting knee height incline push-ups. If maintaining a rigid body line is still difficult, practice wall push-ups and chest height incline push-ups first to build the necessary pressing strength and core stability.
Common Mistakes to Avoid
Letting the hips sag: Squeeze your glutes and brace your abs before every rep. If your hips drop, the lower back absorbs the load instead of the chest and triceps. Think of your body as a plank that happens to move.
Flaring elbows out to 90 degrees: Keep your elbows at roughly 45 degrees from your torso. Flaring them straight out to the sides puts excessive stress on the shoulder joint and reduces pressing power.
Cutting the range of motion short: Lower until your chest nearly touches the surface and your elbows bend to at least 90 degrees. Partial reps reduce muscle activation and slow your progress toward harder push-up variations.
Looking straight down or craning the neck up: Keep your head neutral by looking slightly ahead of your hands. Dropping or lifting the head breaks the straight body line and can strain the neck over time.