Tuck Hollow Body Hold
The Tuck Hollow Body Hold is a foundational core isometric that targets the rectus abdominis and hip flexors while teaching full-body tension from a supine position. By drawing the knees toward the chest and pressing the lower back flat into the floor, this exercise trains the deep core stabilizers that are essential for handstands, levers, and every bodyweight pressing movement. It is the safest entry point into the hollow body progression and one of the most effective ways to build the anterior core control that calisthenics demands.
The Tuck Hollow Body Hold is a foundational core isometric that targets the rectus abdominis and hip flexors while teaching full-body tension from a supine position. By drawing the knees toward the chest and pressing the lower back flat into the floor, this exercise trains the deep core stabilizers that are essential for handstands, levers, and every bodyweight pressing movement. It is the safest entry point into the hollow body progression and one of the most effective ways to build the anterior core control that calisthenics demands.
How to Do Tuck Hollow Body Hold
1. Lie Flat and Set Your Back
Lie on your back with your legs extended and your arms resting at your sides. Press your entire lower back firmly into the floor by tilting your pelvis posteriorly. Think about pulling your belly button down toward your spine. This posterior pelvic tilt is the foundation of the entire hold and must stay locked in throughout.
Flatten your lower back into the floor
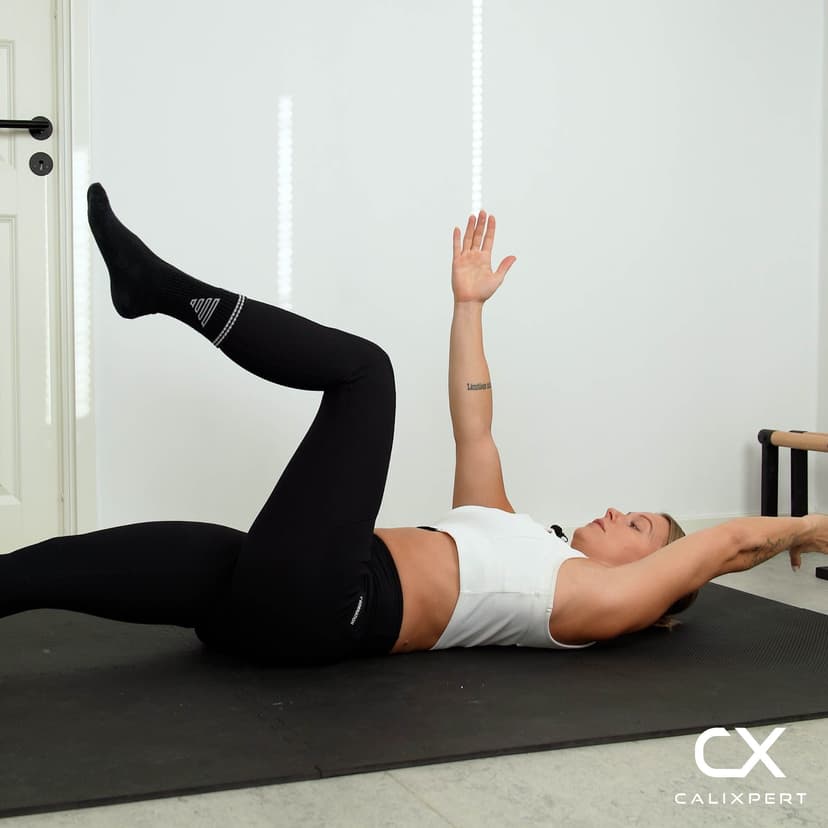
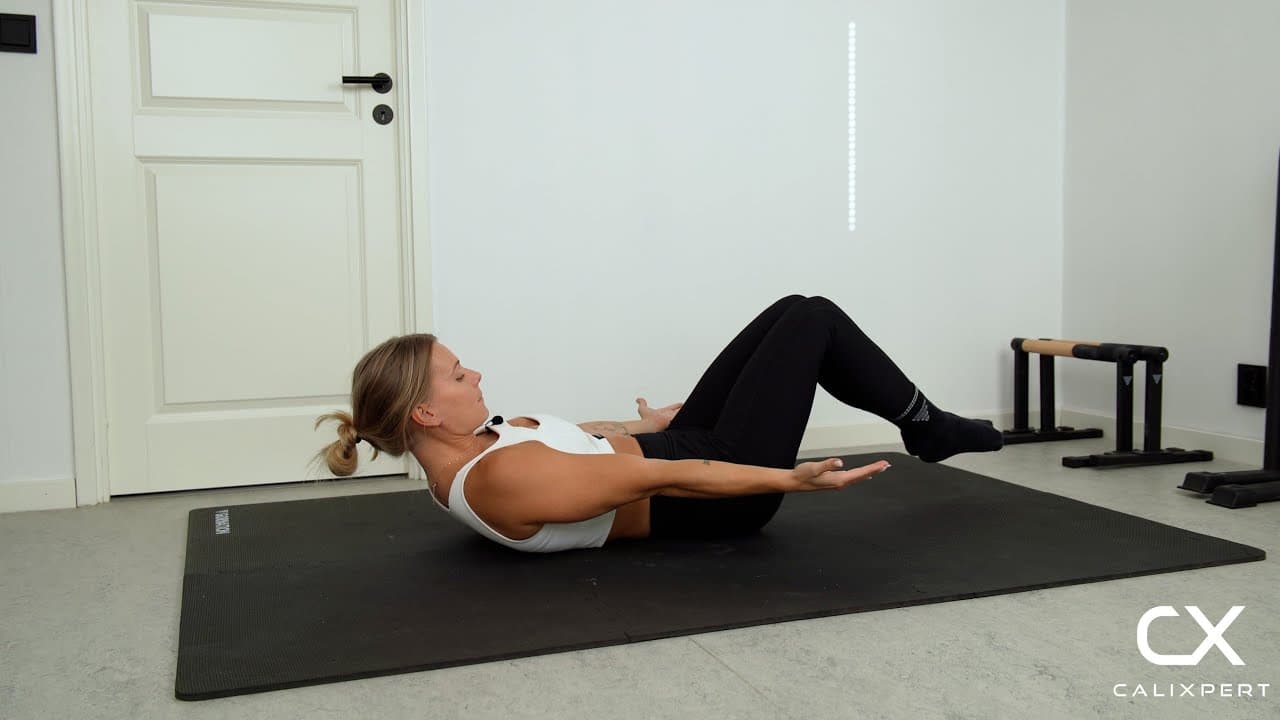
2. Tuck Your Knees Toward Your Chest
Bend your knees and lift your feet off the ground, bringing your thighs toward your torso. Keep your knees bent at roughly 90 degrees. The tighter the tuck, the easier the hold, so start with knees pulled close and only extend them as you build strength.
Knees bent, feet off the ground
3. Lift Your Upper Body
Raise your head, neck, and shoulder blades off the floor. Lift just enough to feel your upper abs engage and your scapulae clear the ground. Keep your chin slightly tucked and your gaze directed toward your knees, not the ceiling.
Shoulder blades off the floor, eyes on knees
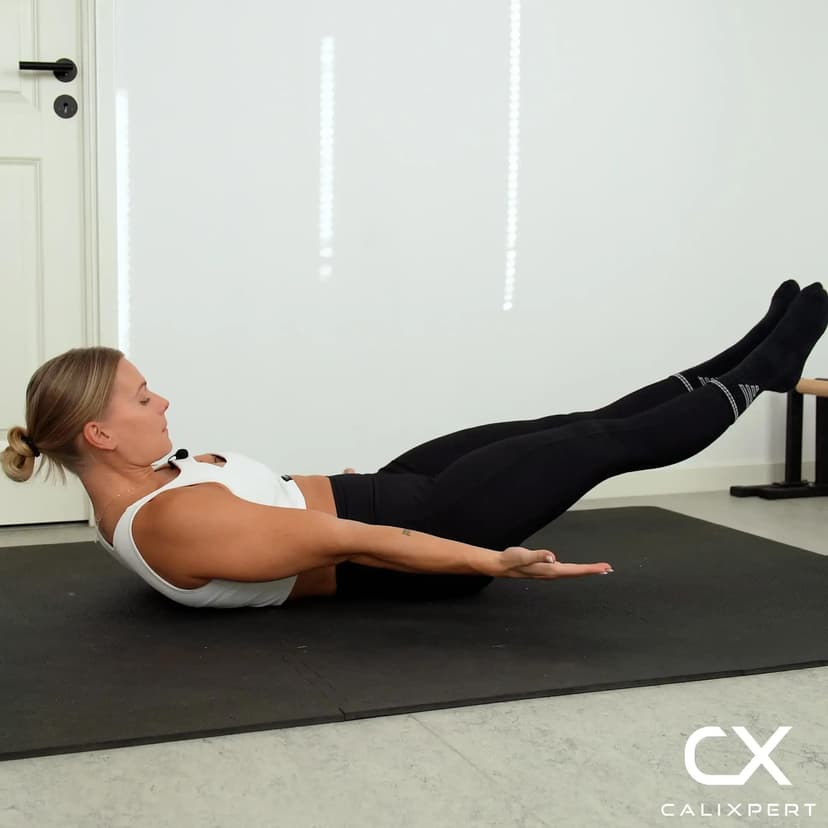
4. Extend Your Arms Forward
Reach your arms straight forward alongside your body, keeping them parallel to the floor. Your arms should hover a few centimeters off the ground with active tension through your fingertips. This arm position adds a small lever that increases core demand without changing the difficulty dramatically.
Arms straight, fingers reaching forward
5. Hold and Breathe
Maintain the position with every muscle engaged. Breathe with short, controlled breaths into your chest, keeping your belly tight and drawn in on each exhale. If your lower back starts to lift off the floor, pull your knees in tighter or end the set. Quality of position matters more than duration.
Back stays flat, breathe into your chest
Most people lose the tuck hollow from the lower back first, and the fix is simpler than they think. Instead of fighting to hold your legs in place, focus entirely on sucking your belly button toward your spine and pressing your lower back into the floor. Once that contact is locked in, the legs will find the right position on their own, and the hold will feel completely different.
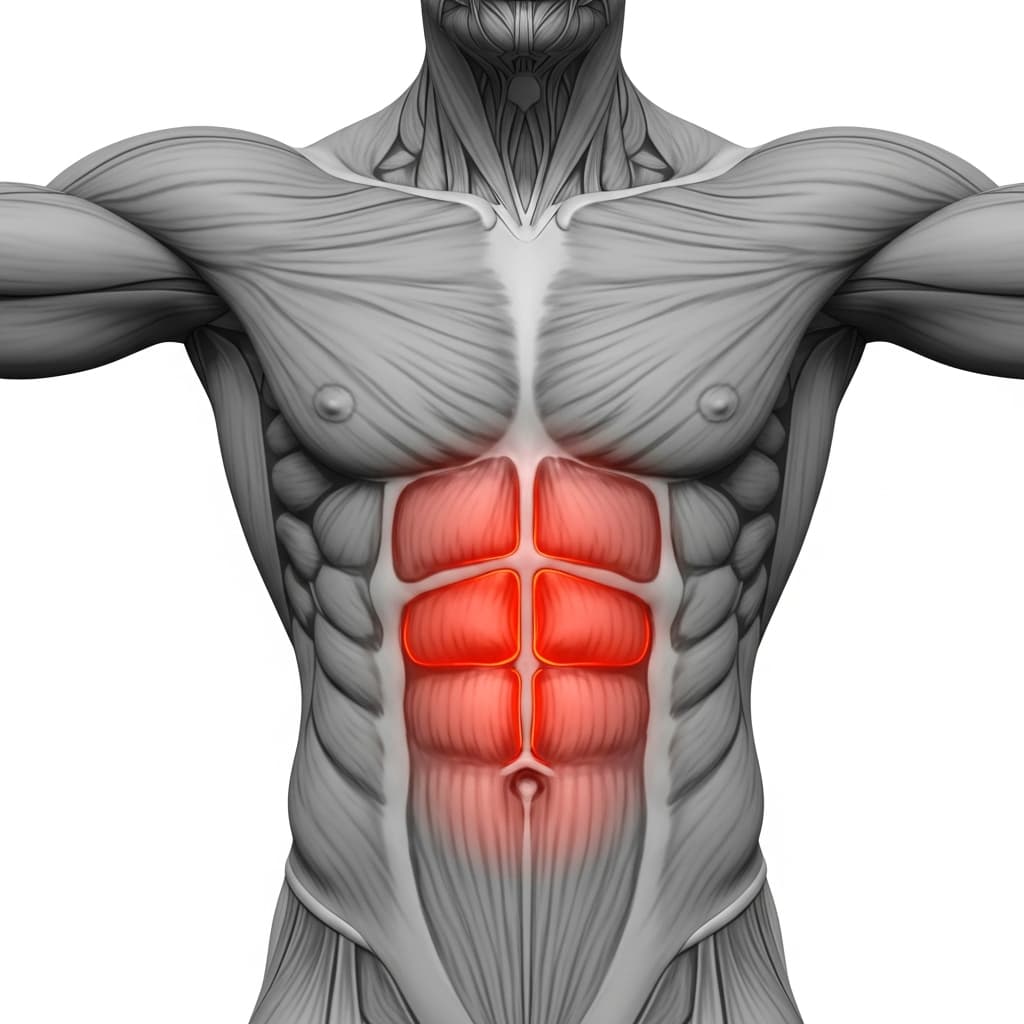
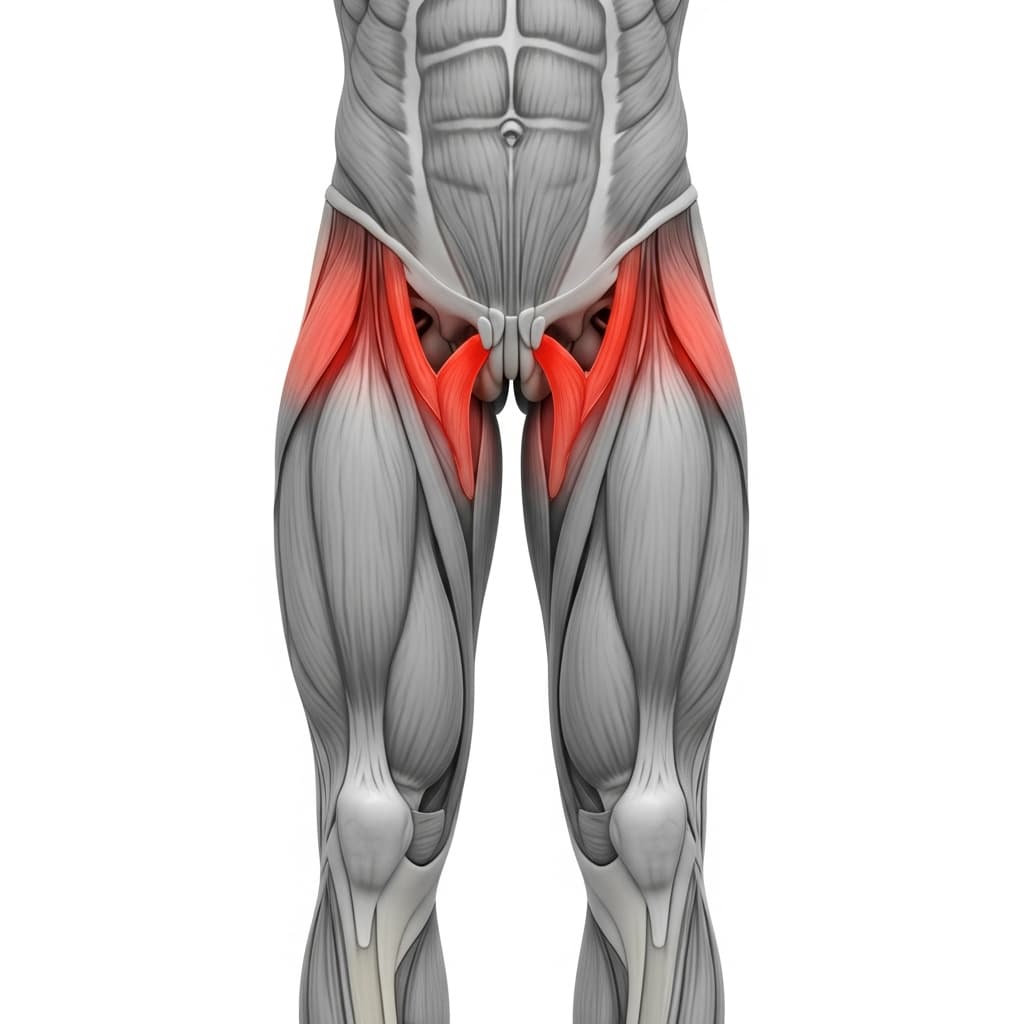
Muscles Worked During Tuck Hollow Body Hold
Primary Muscles:
Secondary Muscles:
Primary Muscles
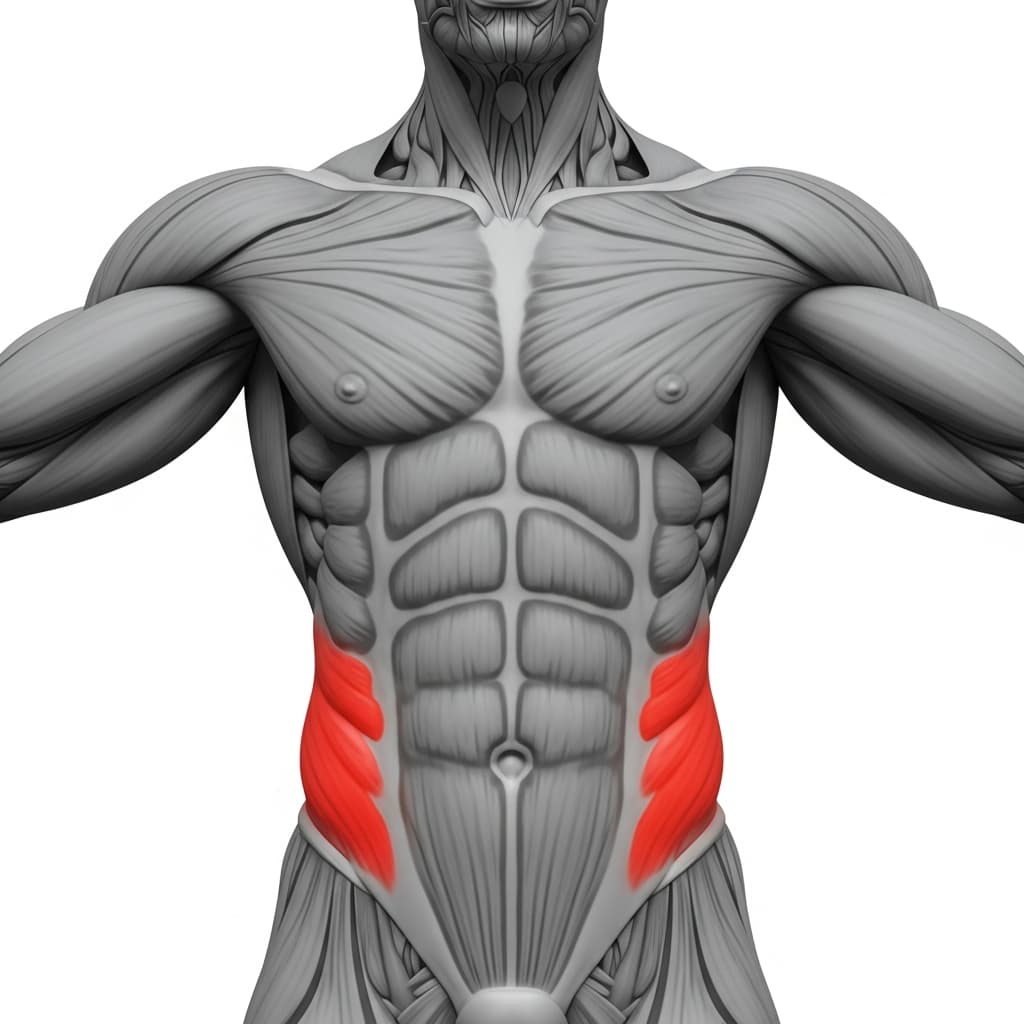
Rectus Abdominis (Abs) - The rectus abdominis contracts isometrically to maintain spinal flexion and hold the upper body off the floor while resisting the pull of gravity on the legs.
Secondary Muscles
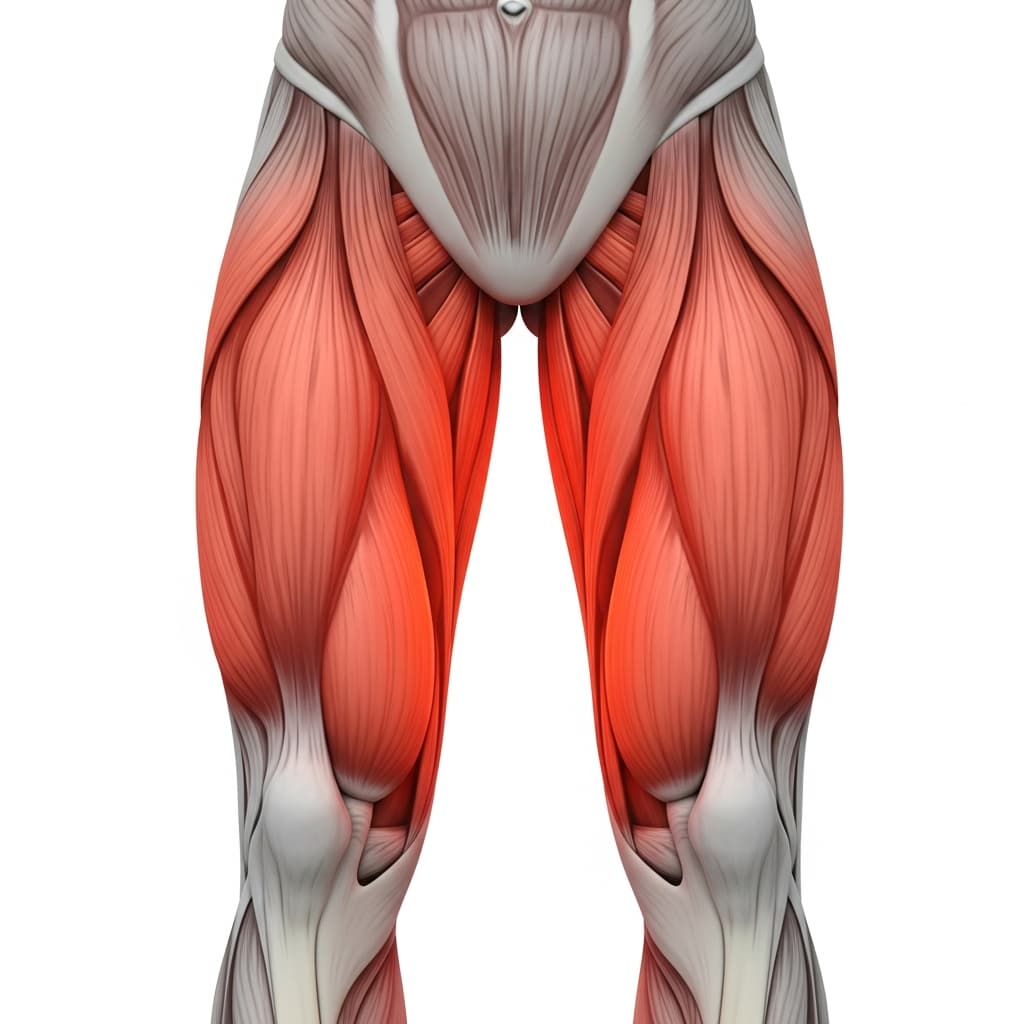
Iliopsoas (Hip Flexors) - The hip flexors sustain the isometric contraction that keeps the bent knees elevated off the ground throughout the hold.
Obliques (Obliques) - The obliques co-contract with the rectus abdominis to stabilize the torso against any lateral shifting or rotation during the hold.
Quadriceps (Quads) - The quadriceps maintain knee flexion tension and assist the hip flexors in keeping the legs elevated and controlled.
Benefits of Tuck Hollow Body Hold
- Develops the anterior core strength and posterior pelvic tilt control required for handstands, front levers, and L-sits
- Teaches full-body tension from a low-risk supine position, building the coordination pattern that transfers to every loaded calisthenics skill
- Strengthens the deep transverse abdominis, which stabilizes the spine during heavy compound movements and reduces lower back injury risk
- Builds hip flexor endurance under sustained isometric load, improving performance in hanging leg raises and compression movements
Who Is This Exercise For?
You should be able to lie flat on your back and actively press your lower back into the floor for at least 10 seconds without your back arching. If maintaining that posterior pelvic tilt is a struggle, practice dead bugs with slow leg extensions until you can hold the position with control.
Common Mistakes to Avoid
Lower back lifting off the floor: If your lower back arches away from the ground, your legs are too far from your body for your current strength level. Pull your knees in closer until you can maintain full contact between your lower back and the floor for the entire hold.
Holding your breath: Breathe in short, controlled cycles throughout the hold. Holding your breath spikes intra-abdominal pressure momentarily but causes you to fatigue and lose position much faster.
Looking at the ceiling: Keep your chin slightly tucked and your gaze toward your knees. Looking straight up opens the ribcage and disengages the upper abs, which breaks the hollow position from the top.
Relaxing the legs: Keep your feet and knees actively pulled together with tension through the quads. Letting the legs go passive shifts all the load onto the hip flexors and reduces the core training effect.