Assisted Skin The Cat
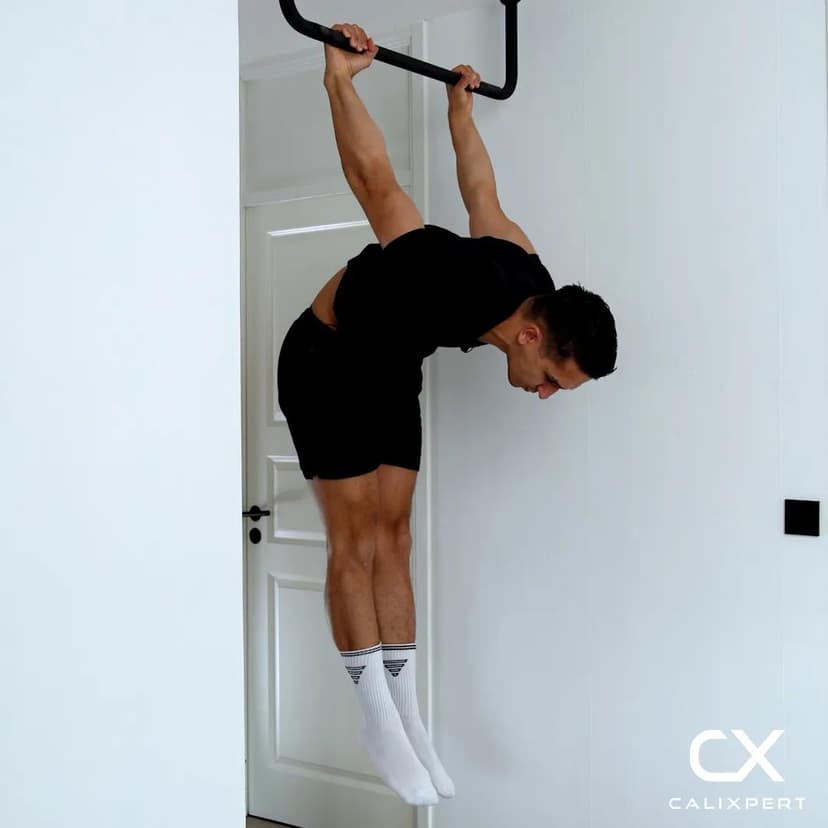
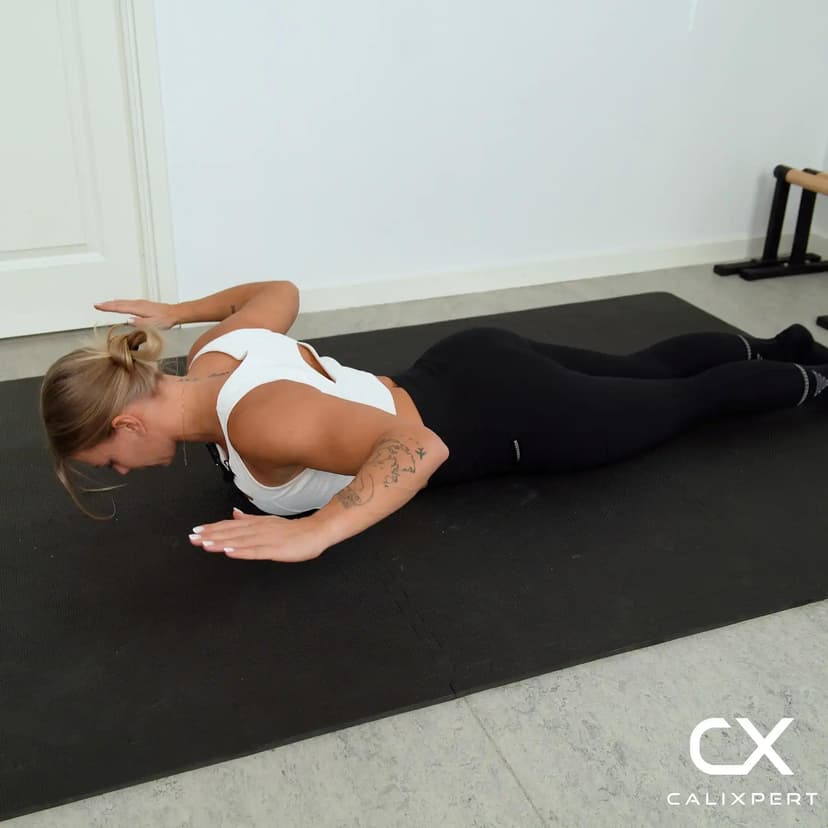
Assisted skin the cat is a beginner-level gymnastics rotation performed on low rings that trains shoulder mobility, lat strength, and core control through a full backward rotation under the arms. The assistance comes from setting the rings at shoulder height so your feet can push off the ground, reducing the load on the shoulders and making the movement safer to learn. Building this movement with clean, controlled form prepares the shoulders and lats for the full skin the cat and more advanced ring skills like back levers and muscle-ups.

Assisted skin the cat is a beginner-level gymnastics rotation performed on low rings that trains shoulder mobility, lat strength, and core control through a full backward rotation under the arms. The assistance comes from setting the rings at shoulder height so your feet can push off the ground, reducing the load on the shoulders and making the movement safer to learn. Building this movement with clean, controlled form prepares the shoulders and lats for the full skin the cat and more advanced ring skills like back levers and muscle-ups.
How to Do Assisted Skin The Cat
1. Set the Rings to Shoulder Height
Adjust gymnastic rings so the bottom of each ring sits at approximately shoulder height. This low position allows your feet to stay close to the ground throughout the movement, giving you the support needed to control the rotation safely. The lower you set the rings, the easier the movement becomes.
Lower rings mean more assistance
2. Grip the Rings and Hang
Stand between the rings and grip them firmly with a full overhand grip, thumbs wrapped around. Step slightly forward so your arms are fully extended behind you at an angle. Engage your shoulders by pulling the shoulder blades down and keeping your core tight before initiating the movement.
Arms fully straight, shoulders active
3. Pull and Jump to Inverted Tuck
Pull yourself roughly halfway up toward a pull-up position while simultaneously jumping with both feet off the ground. Tuck your knees tightly to your chest as your hips rise between your arms. The jump provides momentum, but your lats and core should be doing the majority of the pulling work.
Jump with both feet at the same time
4. Rotate Slowly Through the Bottom
Once inverted, slowly lower your tucked body down behind you by extending through the shoulder joint. Squeeze your upper arms tight against your body throughout the entire descent. Move slowly and stop if you feel sharp pain in the shoulders. Your feet will approach the ground as you reach the bottom german hang position.
Arms squeezed tight to the body
5. Push Off and Return to Inverted Tuck
From the bottom position, use your feet to push off the floor and jump your legs back up to the inverted tuck position. Keep your knees pulled in tight and your core engaged throughout the return phase. This ground support is what makes the assisted version safe and repeatable for building strength gradually.
Push from the floor, tuck tight
6. Lower Back to the Start
From the inverted tuck, reverse the rotation by lowering your legs forward and down until you return to the starting hang position. Control the descent with your lats and core rather than dropping. Reset your grip and shoulder position before starting the next rep.
Control the descent, never drop
The biggest mistake people make with skin the cat progressions is rushing to high rings before they own the movement at low heights. Set the rings at shoulder height, nail 5 perfectly controlled reps where you never lose tension in your arms or core, and only then raise them one notch. Your shoulders will progress faster because you built real control instead of just surviving the rotation.
Muscles Worked During Assisted Skin The Cat
Primary Muscles:
Secondary Muscles:
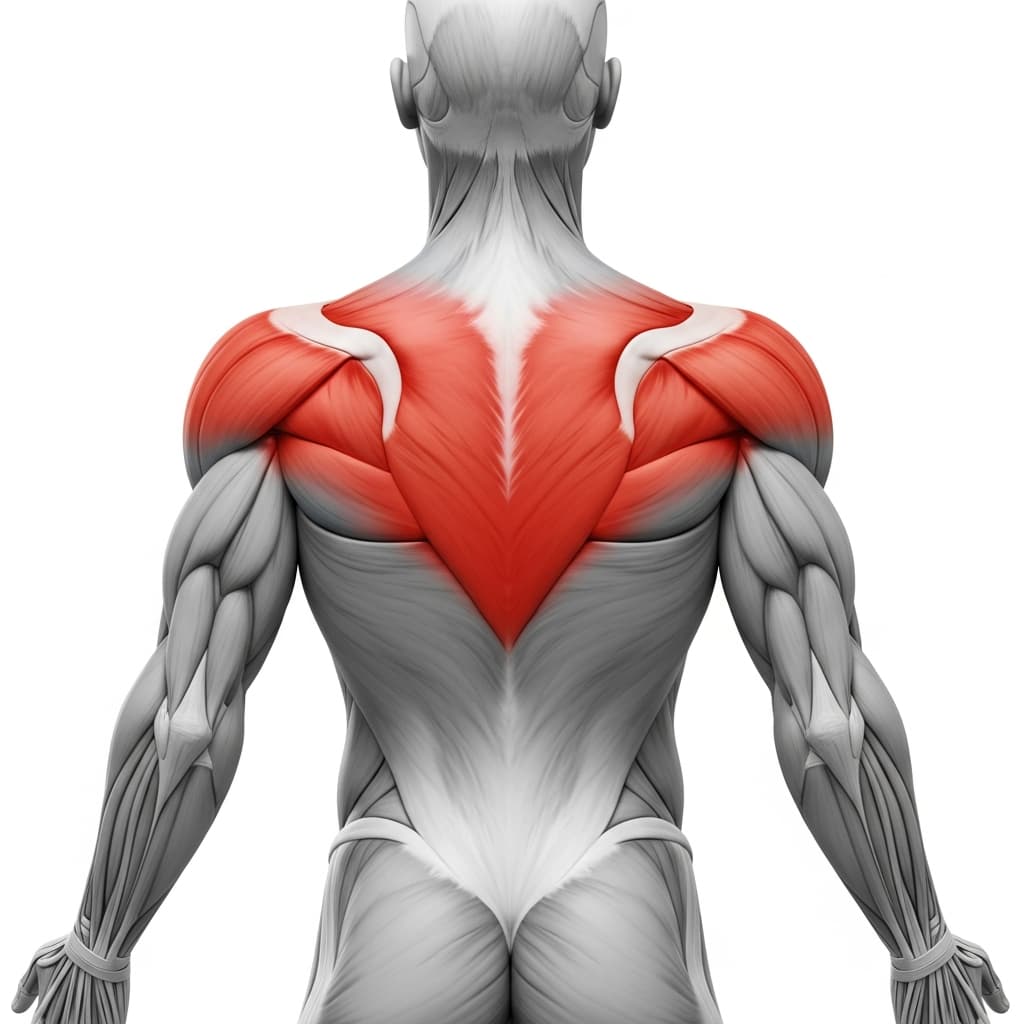
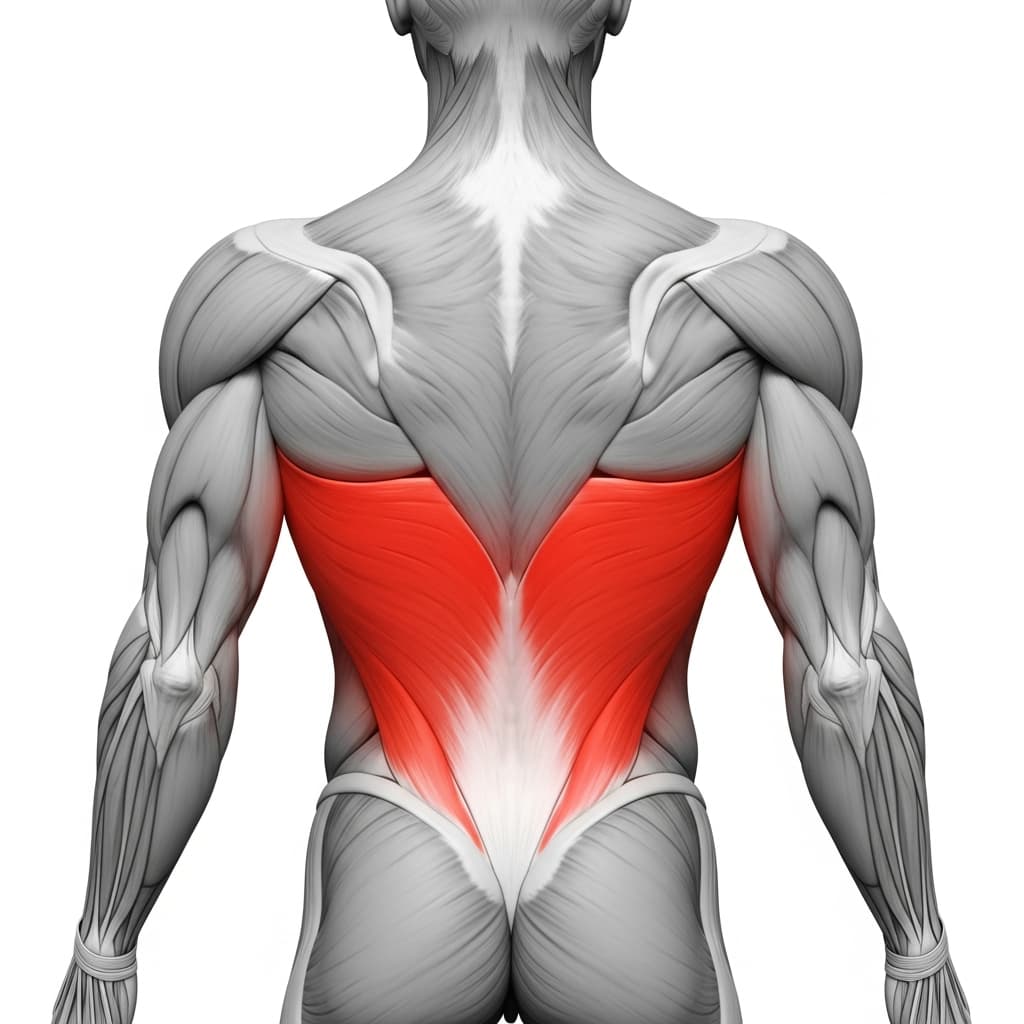
Primary Muscles
Latissimus Dorsi (Lats) - The lats control the pulling phase into the inverted tuck and manage the eccentric lowering as the body rotates through the bottom position.
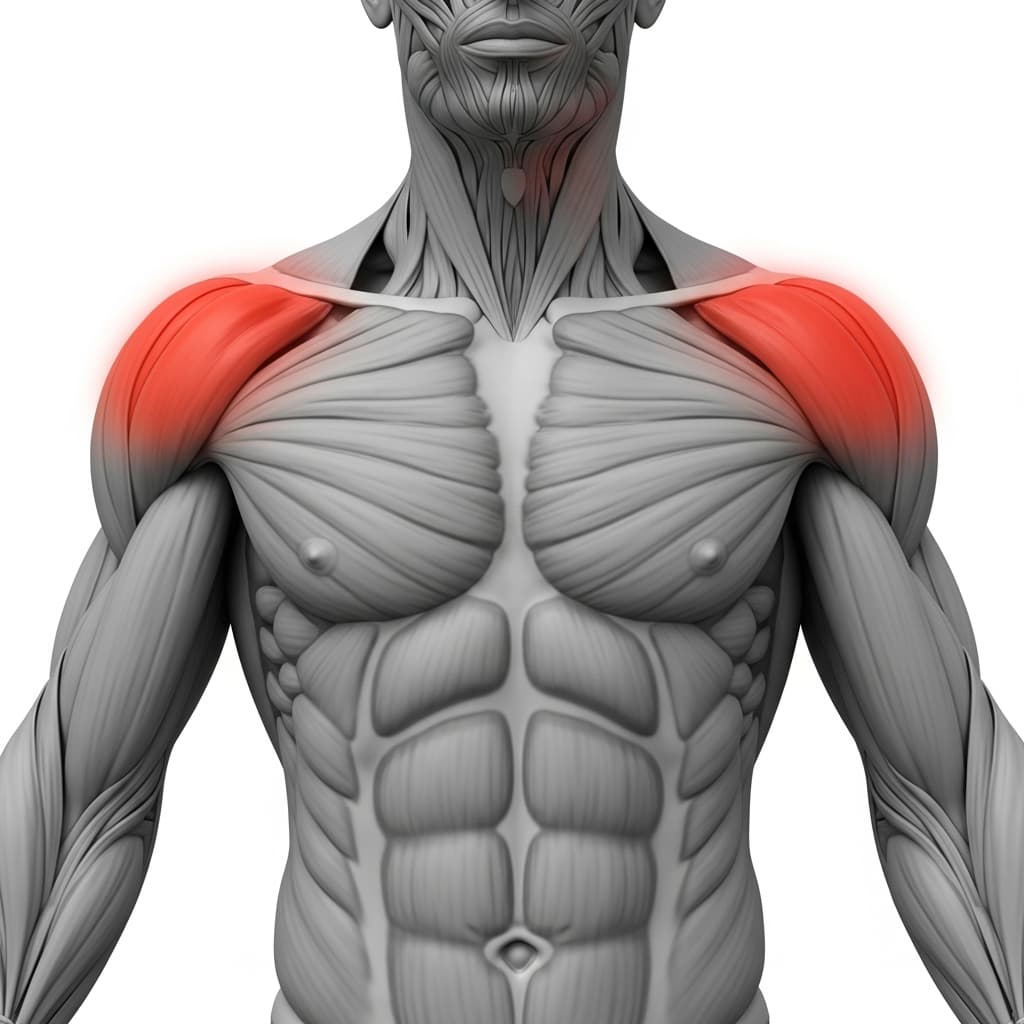
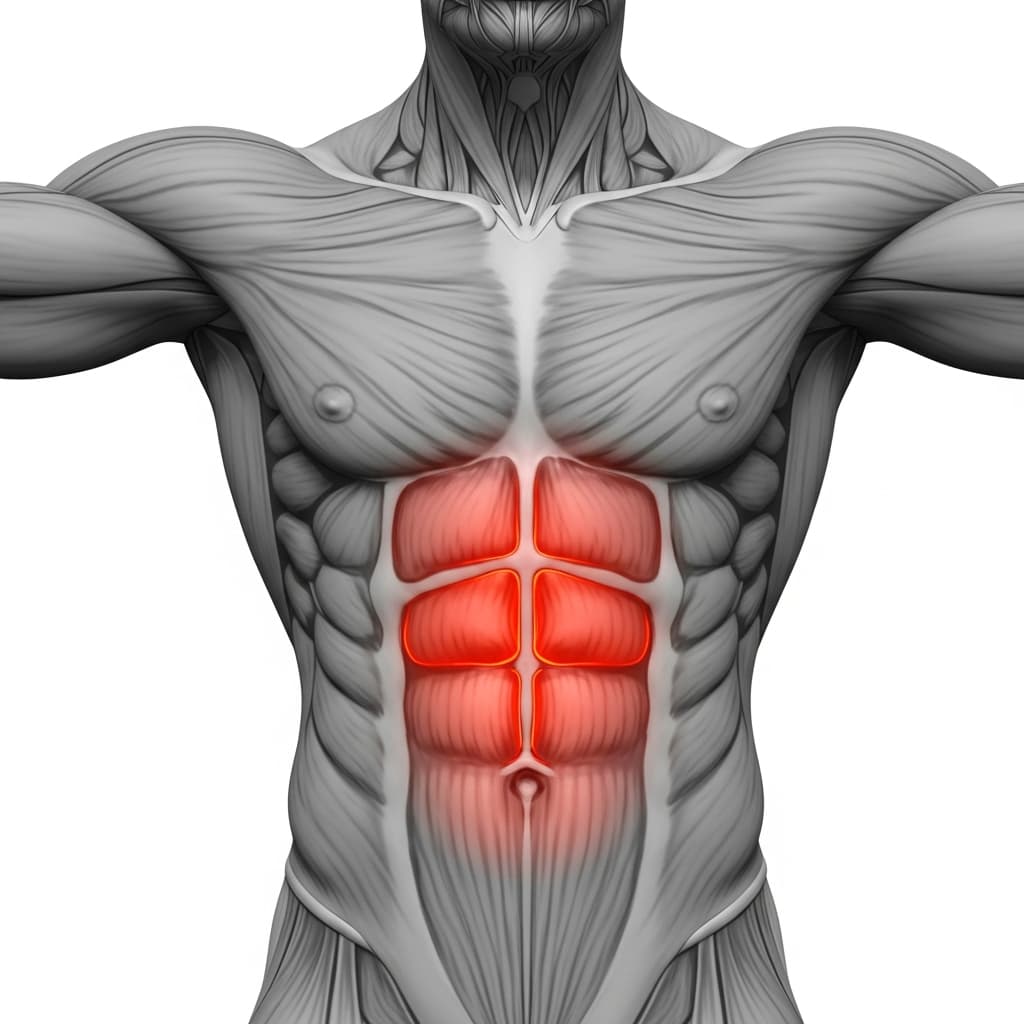
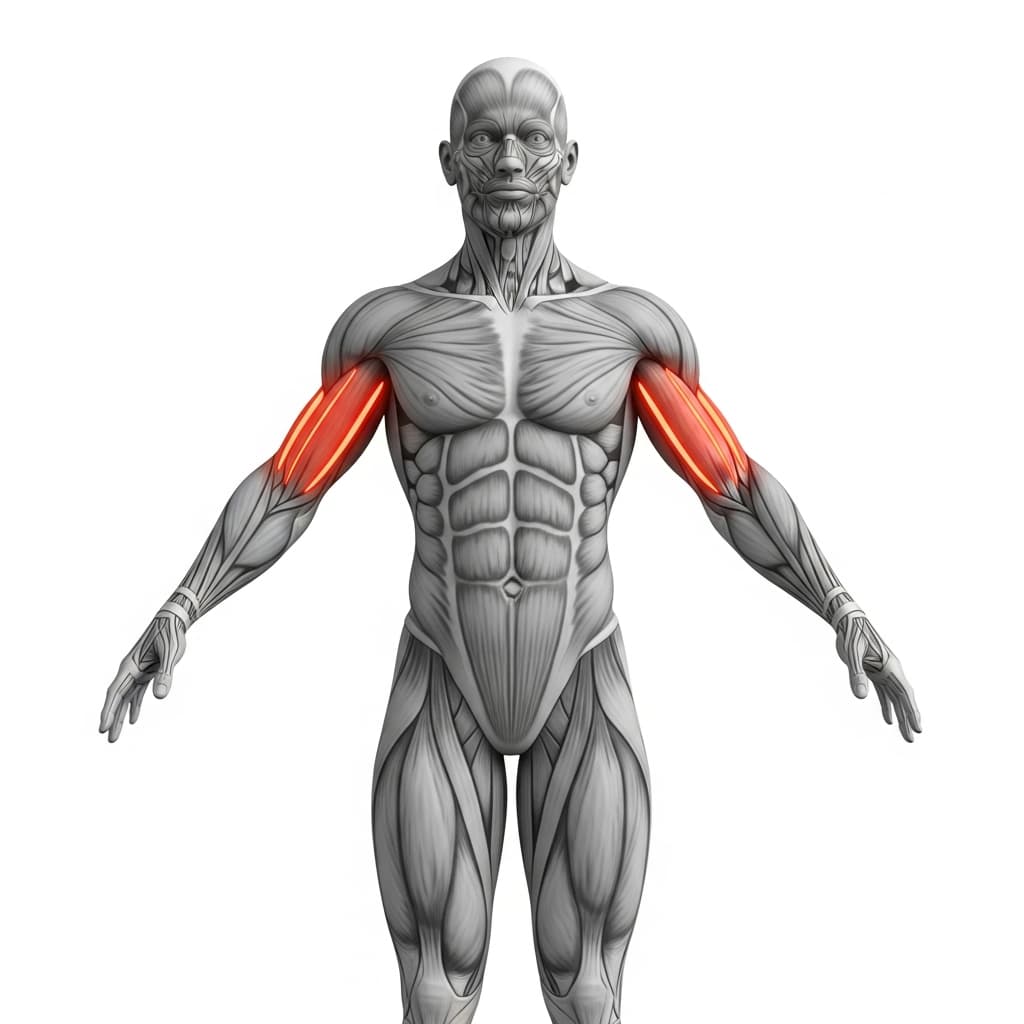
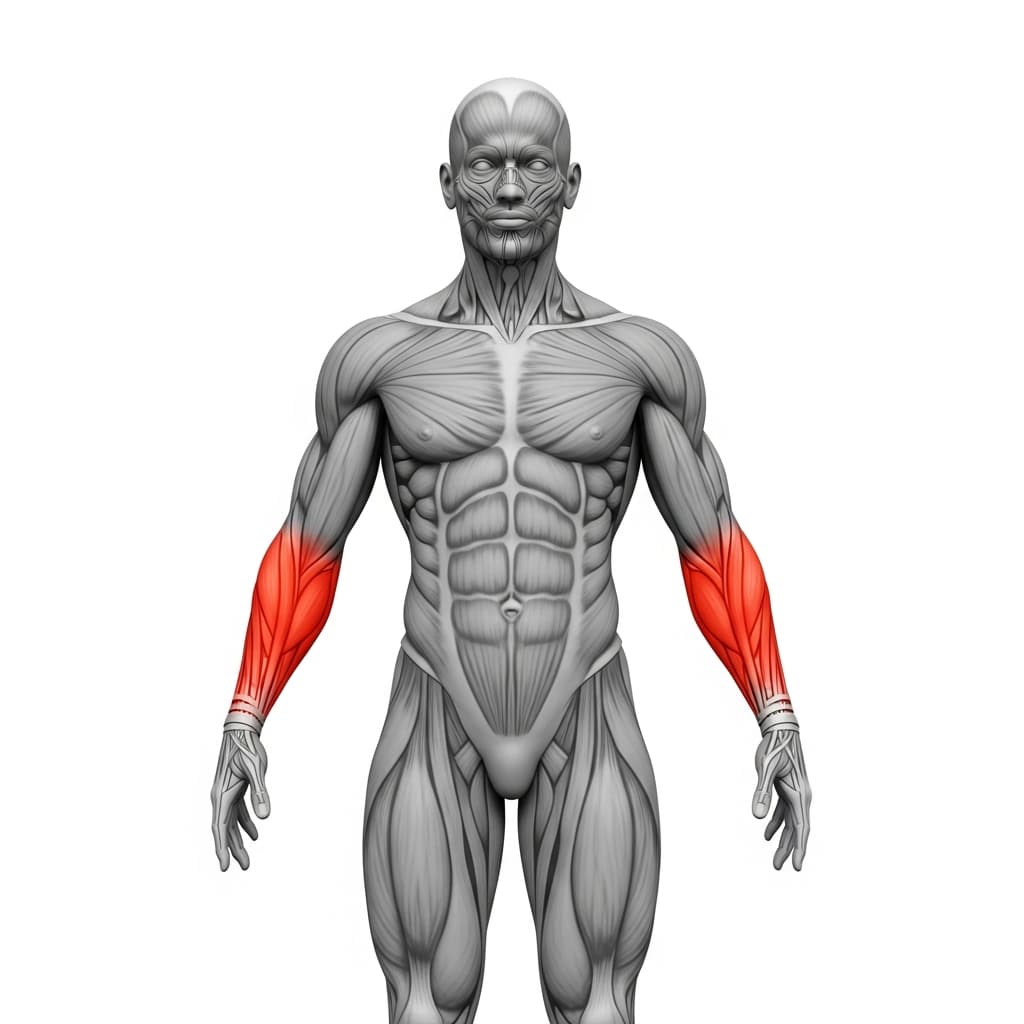
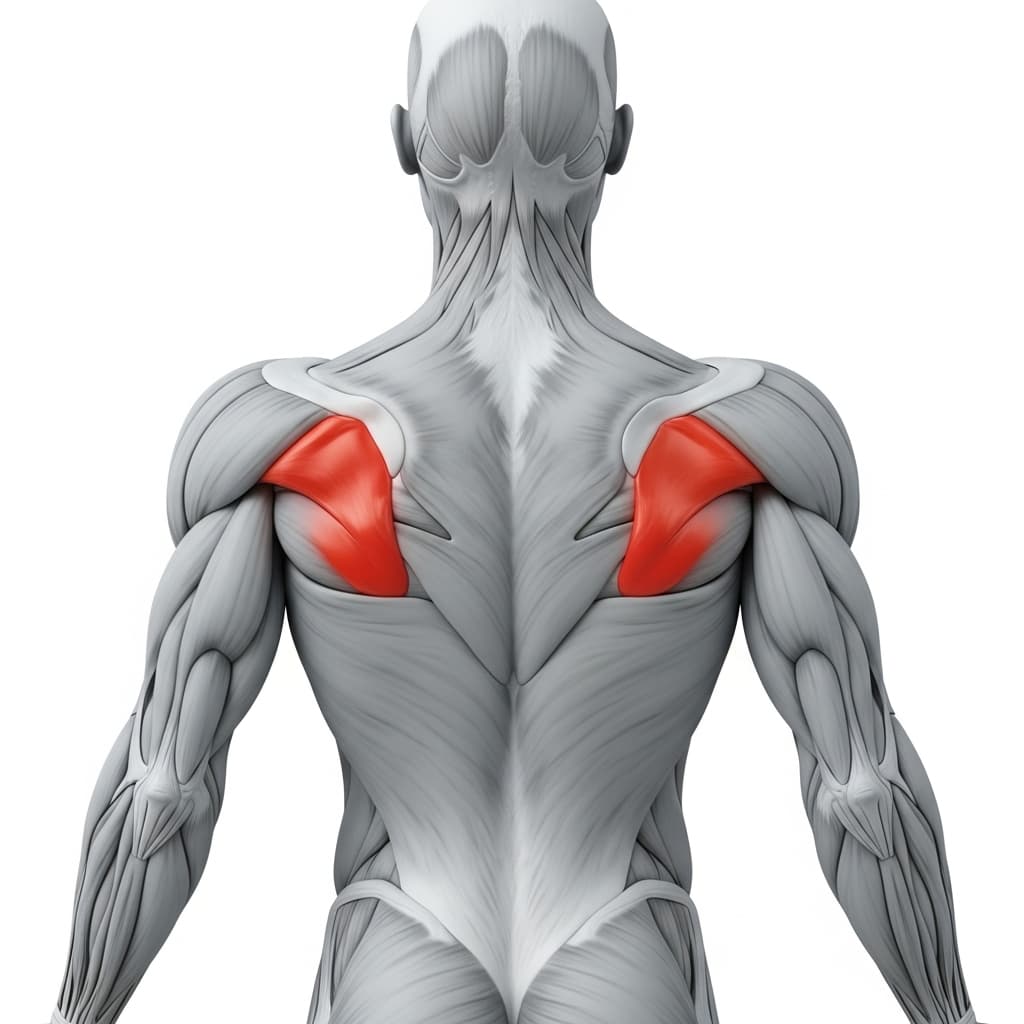
Secondary Muscles
Anterior Deltoid (Front Deltoid) - The front deltoids are placed under significant stretch and stabilizing load in the bottom german hang position, building shoulder extension flexibility under tension.
Rectus Abdominis (Abs) - The abs maintain a tight tuck position throughout the rotation and prevent the lower body from swinging out of control.
Rhomboids & Upper Trapezius (Upper Back) - The upper back muscles stabilize the scapulae during the pulling and rotation phases, keeping the shoulder blades properly positioned under load.
Biceps Brachii (Biceps) - The biceps assist during the initial pull toward the inverted tuck and help maintain arm tension throughout the full rotation.
Forearm Flexors & Extensors (Forearms) - The forearms maintain a secure grip on the rings throughout the rotation, which demands sustained grip strength as the body continuously changes orientation.
Rotator Cuff (SITS) (Rotator Cuff) - The rotator cuff muscles stabilize the shoulder joint through the extreme range of motion, particularly during the transition into and out of the bottom german hang position.
Benefits of Assisted Skin The Cat
- Develops shoulder extension mobility that is required for german hangs, back levers, and advanced ring work
- Strengthens the lats and upper back through a rotational pulling pattern that standard pull-ups and rows do not train
- Builds shoulder joint resilience by progressively loading connective tissue through increasingly greater ranges of motion
- Teaches rotational body awareness and control on rings, which transfers directly to muscle-ups and ring routines
Who Is This Exercise For?
You should be able to hold a dead hang on rings for at least 15 seconds with stable, active shoulders and perform basic scapular pull-ups with control before attempting this movement. Comfort with a tuck hang, where you pull your knees to your chest while hanging, is also necessary. If hanging from rings feels unstable or your grip gives out quickly, spend more time on ring support holds and dead hangs first.
Common Mistakes to Avoid
Dropping too fast through the bottom position: The bottom of the rotation places the shoulders in their most vulnerable range. Lower yourself slowly and keep your arms squeezed against your body the entire time. If you cannot control the speed, set the rings lower for more foot assistance.
Jumping with one leg instead of both: Jumping with a single leg creates an uneven rotation that loads one shoulder more than the other. Use both feet simultaneously to generate symmetrical momentum. Only use a single-leg jump as a temporary regression if the two-leg version feels too difficult initially.
Letting the arms flare away from the body: When your elbows drift away from your torso during the rotation, the shoulder joint takes on excessive stress. Actively squeeze your upper arms against your ribcage throughout the entire movement to keep the load distributed safely.
Setting the rings too high too soon: Higher rings reduce the assistance from the ground and dramatically increase shoulder load. Start at shoulder height and only raise the rings once you can perform 5 smooth, controlled reps at your current height without relying on your feet for support.