Archer Push Ups
Archer push-ups are an advanced unilateral pressing variation that shifts the majority of the load onto one arm while the opposite arm stays straight as a guide. This exercise heavily targets the chest and triceps on the working side, with significant demand on the front deltoids, core, and serratus anterior for stabilization. Mastered with clean form, archer push-ups build the single-arm pressing strength that serves as the direct bridge to one-arm push-ups and planche progressions.
Archer push-ups are an advanced unilateral pressing variation that shifts the majority of the load onto one arm while the opposite arm stays straight as a guide. This exercise heavily targets the chest and triceps on the working side, with significant demand on the front deltoids, core, and serratus anterior for stabilization. Mastered with clean form, archer push-ups build the single-arm pressing strength that serves as the direct bridge to one-arm push-ups and planche progressions.
How to Do Archer Push Ups
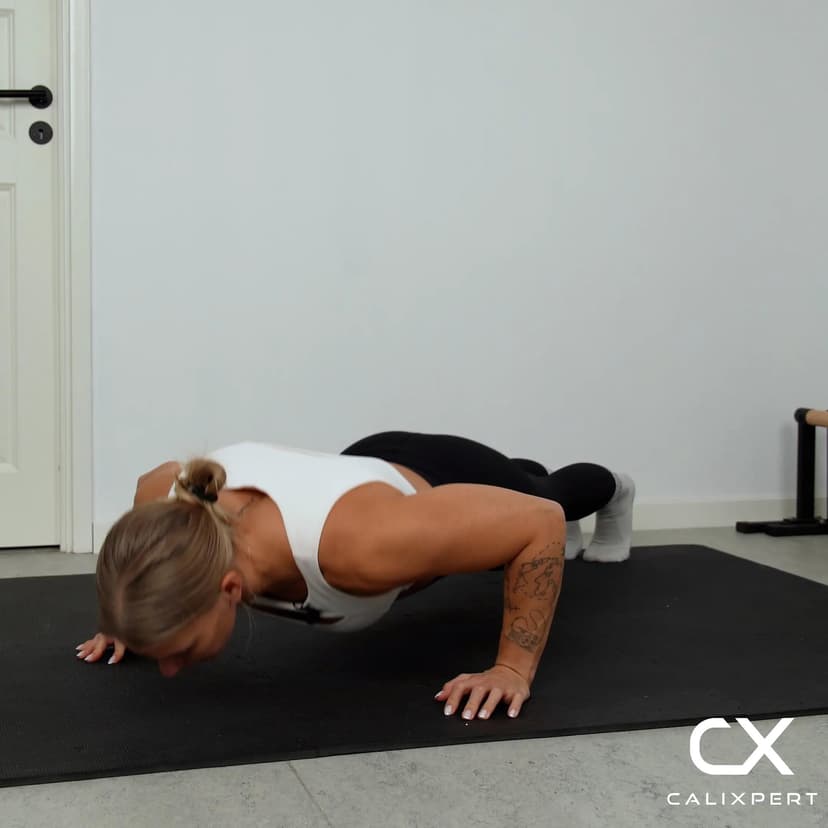
1. Set Your Wide Hand Position
Place your hands on the floor significantly wider than shoulder width, roughly 1.5 to 2 times your shoulder span. Point your fingers outward at about a 45-degree angle. This externally rotated hand position keeps your wrists in a safe alignment and allows you to bend deeply into one arm without jamming the joint. Press your palms flat with fingers spread for maximum ground contact.
Fingers pointing outward, not forward
2. Set Your Body in a Straight Line
Extend your legs fully behind you with feet together or slightly apart. Squeeze your glutes and brace your core so your hips, spine, and head form one rigid line. Do not let your hips sag or pike upward at any point during the set. This straight body position is the foundation that must stay locked for every rep.
Squeeze glutes, lock the hips
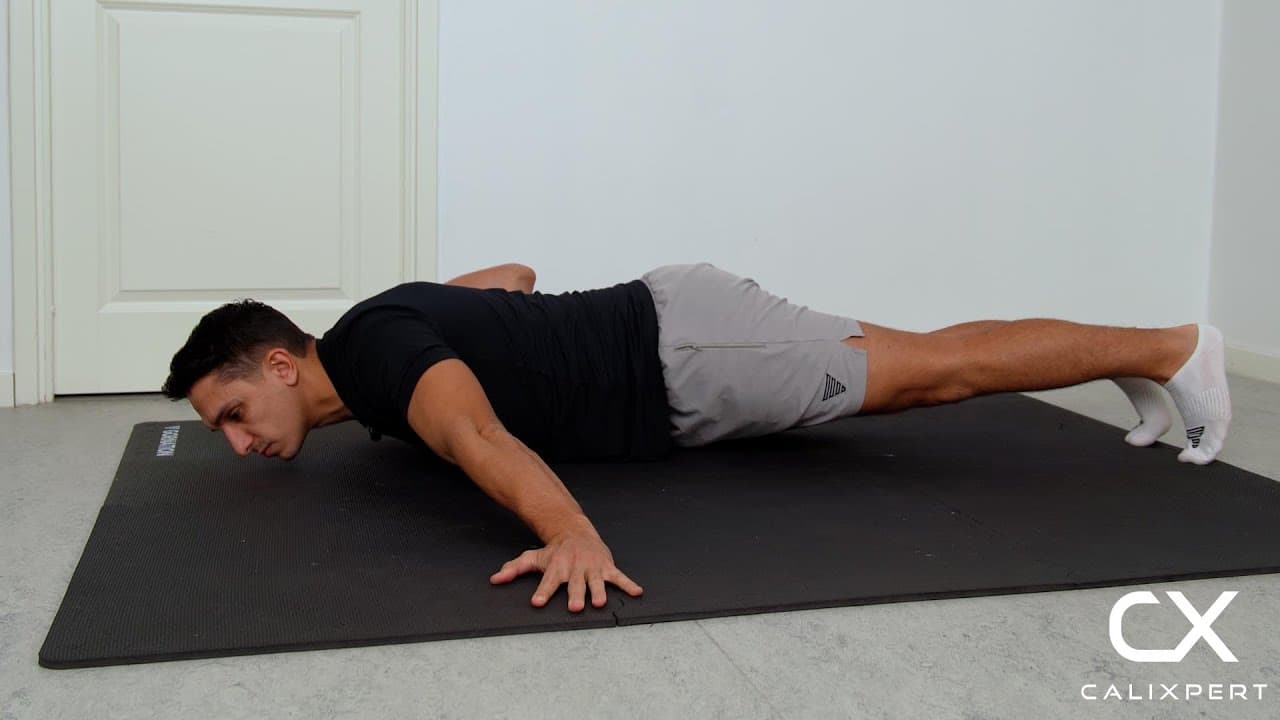
3. Lower to One Side
Shift your bodyweight toward one hand and begin bending that elbow to lower your chest toward the floor on that side. As you descend, the opposite arm should straighten out completely, acting as a support but not doing the primary pushing work. Lower until your chest is just above the floor on the working side. Keep your hips level and facing the ground throughout the entire descent.
Chest to the working hand, hips stay level
4. Keep the Straight Arm Extended
The non-working arm must remain fully extended with a slight press into the floor for balance. Do not bend this elbow or collapse it during the lowering or pushing phase. Think of this arm as a kickstand, not a second engine. The straighter this arm stays, the more load transfers to the working side.
Straight arm stays locked out
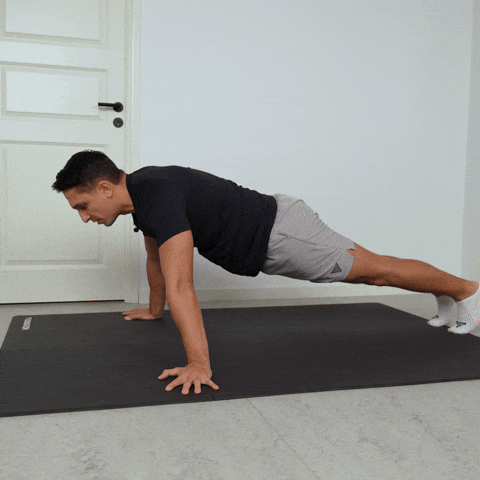
5. Press Back Up With the Working Arm
Drive through the palm of the working hand and push your body back to the starting wide position. Focus on pressing the floor away rather than just lifting your body up. Maintain the straight line from head to heels and do not let your hips twist or shift to compensate. Exhale forcefully as you push through the hardest part of the press.
Push the floor away, no hip twist
6. Alternate to the Other Side
Once you return to the top position, shift your weight to the opposite hand and repeat the movement on the other side. Alternate sides with each rep to ensure balanced development. Reset your body alignment at the top of every rep before initiating the next descent. Each side should receive the same number of reps within a set.
Reset at the top, then switch sides
Most people rush archer push-ups and end up doing sloppy wide push-ups where both arms share the load equally. The real value of this exercise comes from deliberately shifting as much weight as possible onto the working arm while the straight arm barely helps. If you feel both arms working the same amount, you are not shifting far enough to the working side.
Muscles Worked During Archer Push Ups
Secondary Muscles:

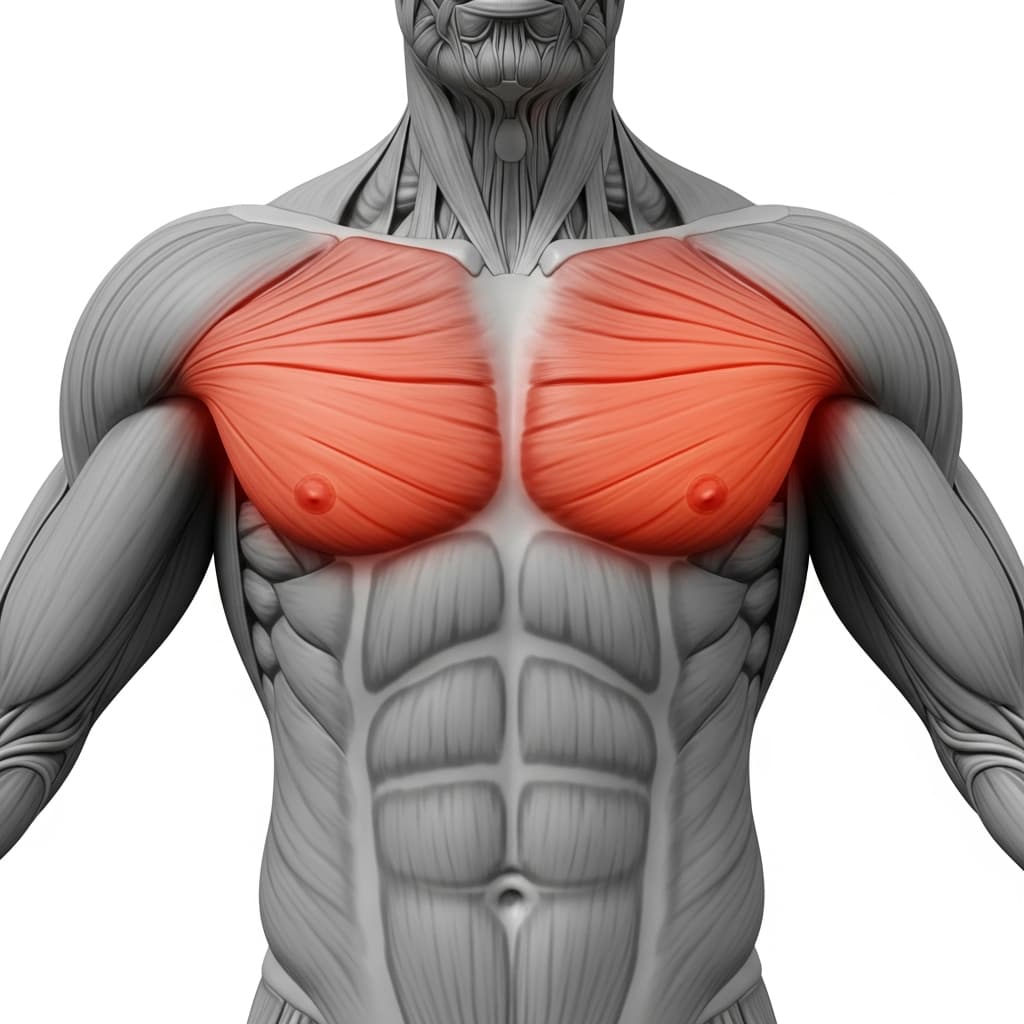
Primary Muscles
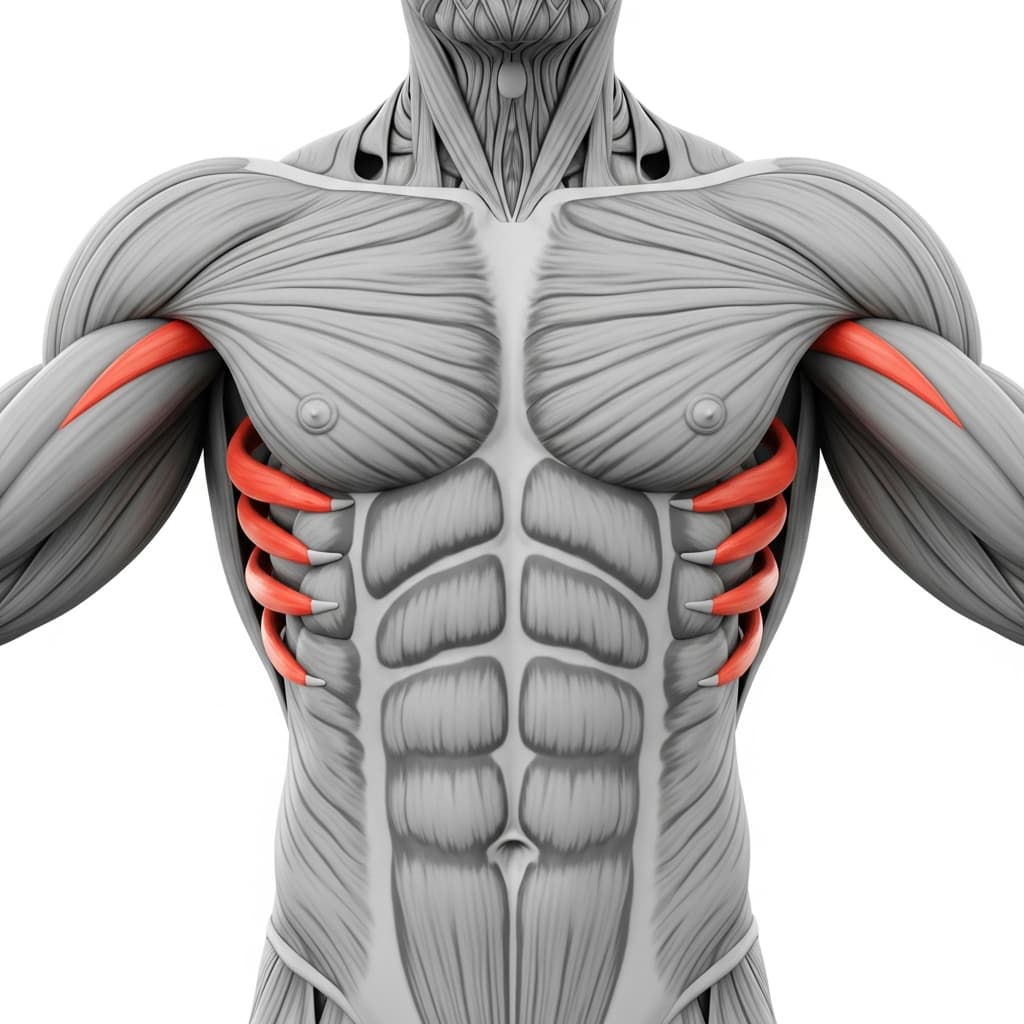
Pectoralis Major (Chest) - The pectoralis major on the working side drives horizontal adduction and flexion of the shoulder to press the body away from the floor through the full range of motion.
Triceps Brachii (Triceps) - The triceps extend the elbow of the working arm during the pressing phase, handling the majority of the lockout effort under near-full bodyweight load.
Secondary Muscles
Anterior Deltoid (Front Deltoid) - The anterior deltoid assists the chest in flexing the shoulder on the working side, particularly through the bottom portion of the press where the shoulder is most loaded.
Serratus Anterior (Serratus Anterior) - The serratus anterior protracts the scapula on the working side at the top of each rep, stabilizing the shoulder blade against the ribcage throughout the pressing motion.
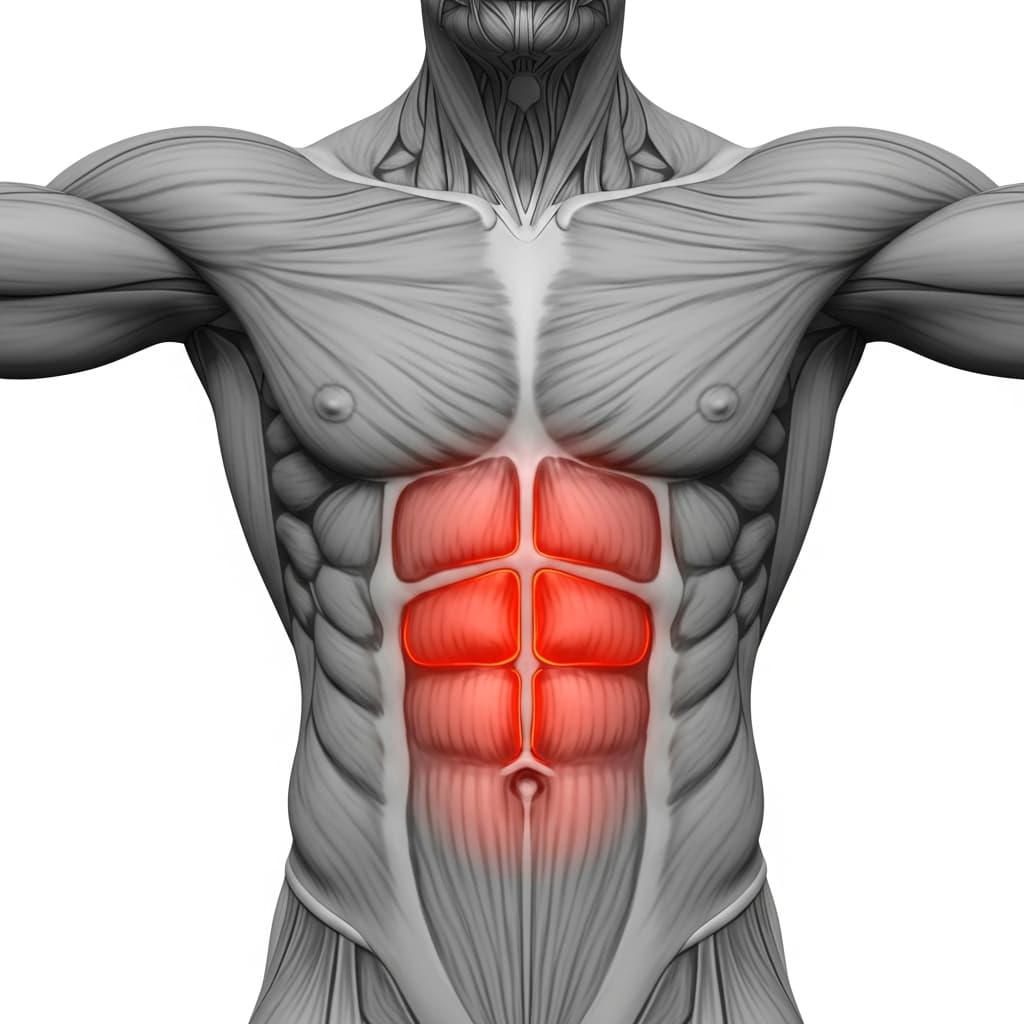
Rectus Abdominis (Abs) - The rectus abdominis holds the torso rigid and prevents the lower back from sagging under the asymmetric loading pattern of each rep.
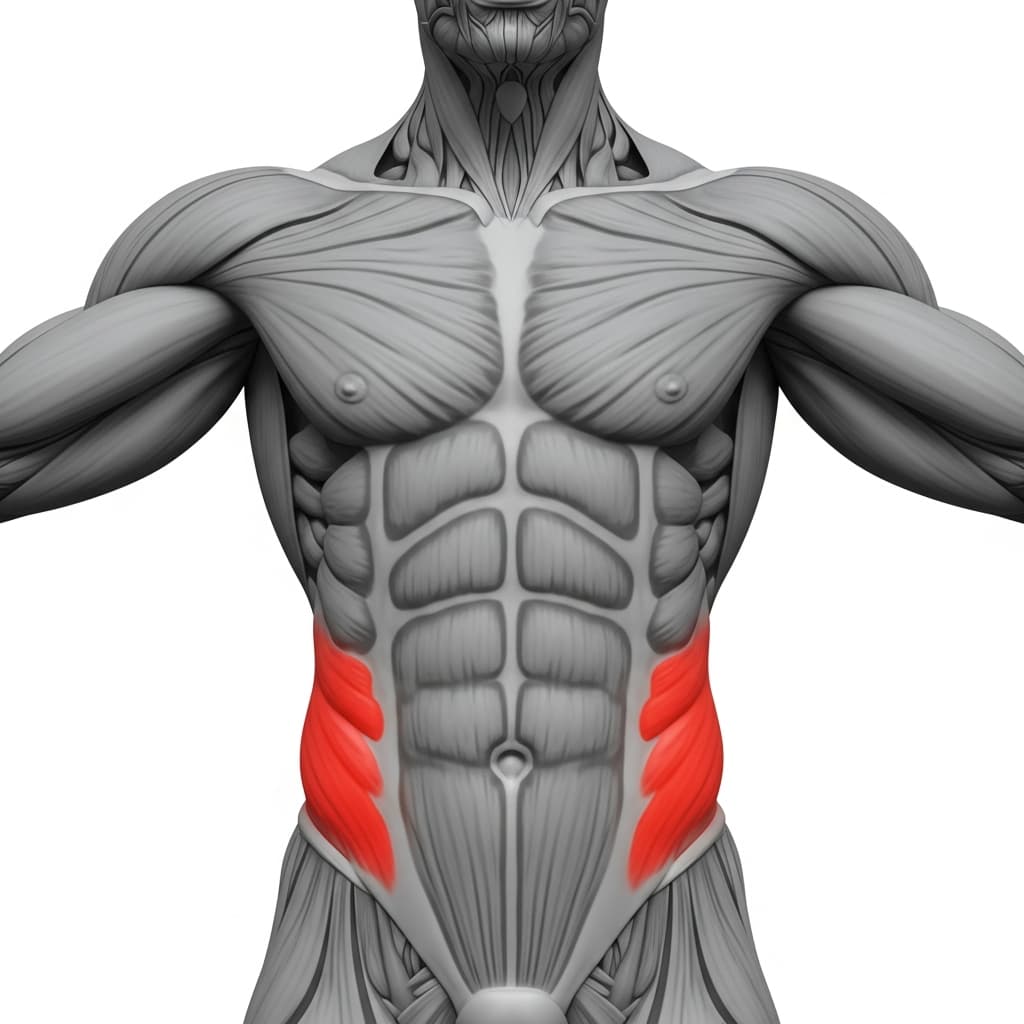
Obliques (Obliques) - The obliques resist rotational forces created by the uneven weight distribution, keeping the hips level and the torso square to the floor throughout the movement.
Benefits of Archer Push Ups
- Develops unilateral chest and tricep pressing strength, directly bridging the gap between standard push-ups and one-arm push-ups
- Exposes and corrects left-to-right strength imbalances that bilateral push-up variations hide
- Builds anti-rotation core stability by forcing the obliques and abs to resist hip twist under asymmetric loading
- Strengthens the serratus anterior through a full protraction-retraction cycle on the working side, improving scapular health for all pressing movements
- Requires zero equipment and can be performed anywhere with enough floor space for a wide hand stance
Who Is This Exercise For?
You should be able to perform at least 15 clean, full-range standard push-ups and 10 wide push-ups before attempting archer push-ups. Solid wrist mobility and the ability to hold a plank for 45 seconds with a tight core are also required. If wide push-ups still feel shaky or you cannot maintain a straight body line under load, stay with those until your pushing base is stronger.
Common Mistakes to Avoid
Letting the hips sag or rotate: Squeeze your glutes and brace your abs hard before every rep. Your hips should stay perfectly level and facing the floor, just like a standard push-up. If they twist, the load shifts off the working arm and the exercise loses its unilateral benefit.
Bending the straight arm: The non-working arm must stay fully locked throughout the entire rep. If you cannot keep it straight, the exercise is too advanced, and you should regress to wide push-ups or a partial range archer variation until you build enough pressing strength.
Pointing fingers forward instead of outward: Turn your fingers outward at roughly 45 degrees. Keeping them pointed forward at this wide hand placement puts excessive stress on the wrists and limits how deep you can descend on the working side.
Not lowering deep enough on the working side: Lower until your chest is just above the floor next to the working hand. Cutting the range of motion short reduces chest and tricep activation and slows your progression toward one-arm push-ups.
Using momentum to push back up: Each rep should start from a controlled bottom position with no bounce or body sway. If you need momentum to get back up, reduce the range of motion slightly or switch to kneeling archer push-ups until strict reps are possible.