Hip Height Incline Push ups
Hip height incline push-ups are an upper-body pressing exercise that trains the chest, front deltoids, and triceps at a reduced load compared to a standard push-up. The steep incline angle shifts more emphasis to the lower chest and shoulders while allowing you to focus on strict elbow tracking and full-body tension. This variation is one of the most effective stepping stones toward a full push-up because it builds pressing strength through the exact same movement pattern at a manageable intensity.
Hip height incline push-ups are an upper-body pressing exercise that trains the chest, front deltoids, and triceps at a reduced load compared to a standard push-up. The steep incline angle shifts more emphasis to the lower chest and shoulders while allowing you to focus on strict elbow tracking and full-body tension. This variation is one of the most effective stepping stones toward a full push-up because it builds pressing strength through the exact same movement pattern at a manageable intensity.
How to Do Hip Height Incline Push ups
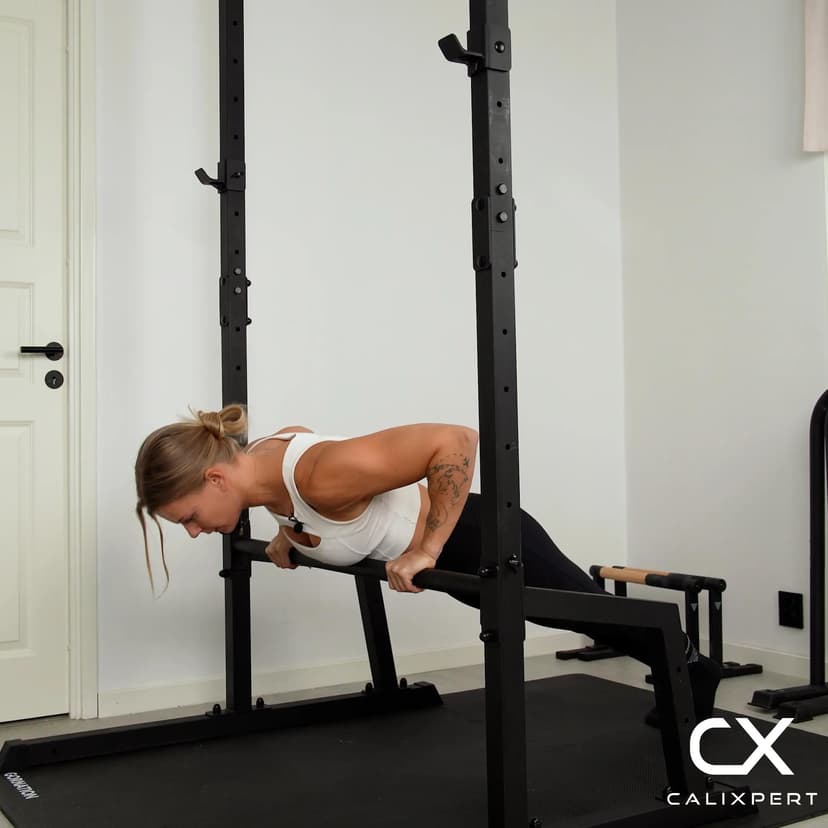
1. Find a Hip Height Surface
Choose a sturdy surface that sits roughly at hip height, such as a table, railing, or barbell in a rack. The surface must not slide or tip under load. A wider, flat surface like a table edge gives you more room to adjust hand placement compared to a narrow bar.
Solid surface, no wobble
2. Set Your Hand Position
Place your hands slightly wider than shoulder width apart on the surface. Grip firmly with fingers spread and palms flat, or wrap your fingers around the bar if using one. This width allows a natural elbow path and puts the chest in a strong pressing position.
Slightly wider than shoulder width
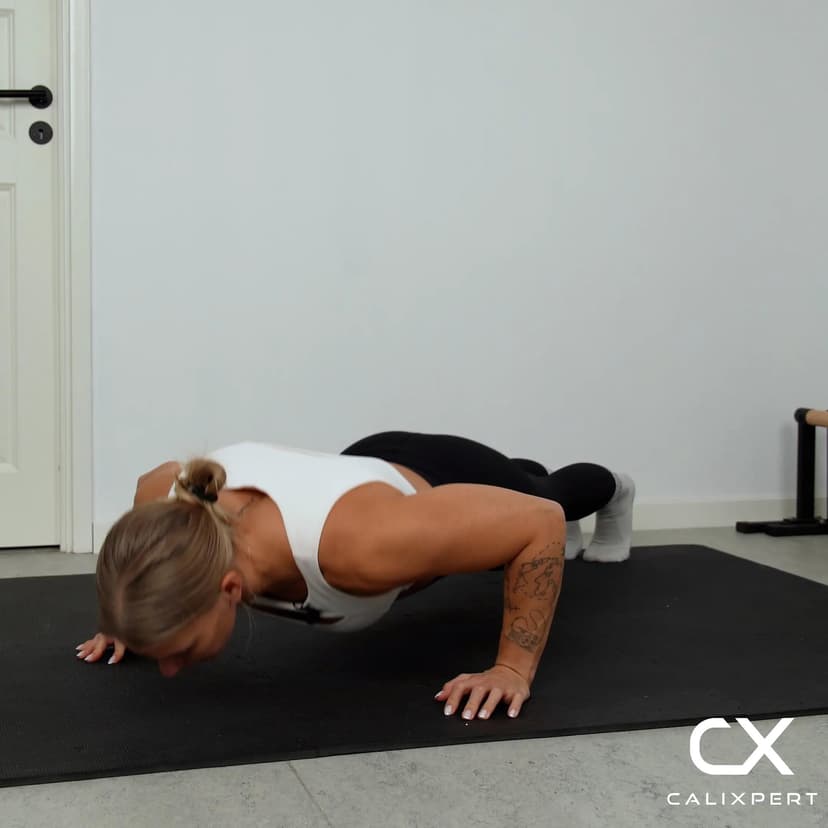
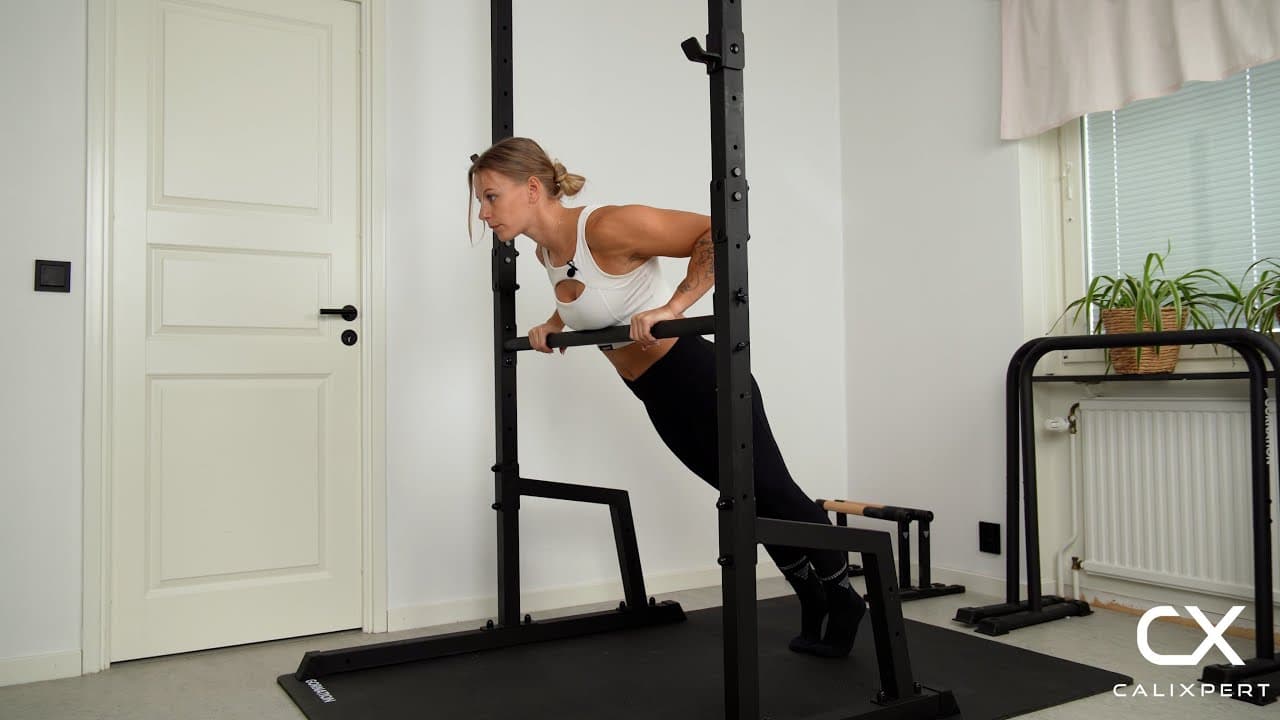
3. Walk Back and Lock Your Body
Step your feet back until your body forms a straight line from head to heels. Squeeze your glutes, brace your core, and lock your legs so nothing sags or pikes. Your weight should be loaded through your palms with your shoulders stacked directly over or slightly behind your hands.
Glutes tight, core braced, one straight line
4. Lower Your Chest to the Surface
Bend your elbows and lower your chest toward the surface in a controlled descent. Keep your elbows at roughly 45 degrees from your body, not flared straight out to the sides. Lower until your elbows reach at least 90 degrees and your chest nearly touches the surface.
Elbows at 45 degrees, chest to the bar
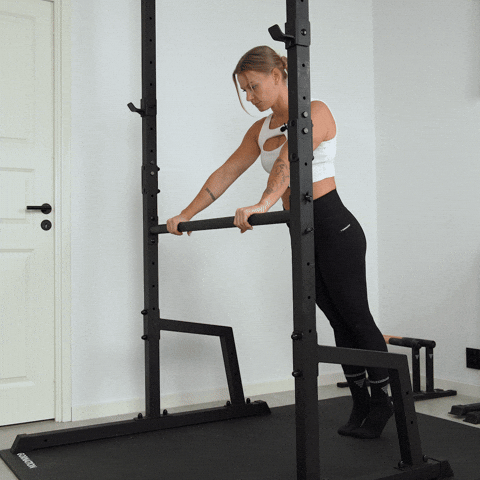
5. Press Back to Full Extension
Push through your palms and drive your body away from the surface until your arms are fully extended. Maintain the same rigid body line throughout the press. Do not let your hips drop or your head jut forward as you push up. Exhale as you press.
Push the surface away from you
6. Reset and Repeat
At the top, confirm your body is still in a straight line and your core is engaged before starting the next rep. Each rep should look identical, with the same elbow angle, the same body tension, and the same controlled tempo on the way down.
Reset tension before every rep
Most people rush incline push-ups because they feel easy compared to the floor version. That is exactly the wrong approach. Use the lighter load to drill perfect elbow tracking at 45 degrees and a locked body line, because those habits transfer directly into every push-up variation you will do later.
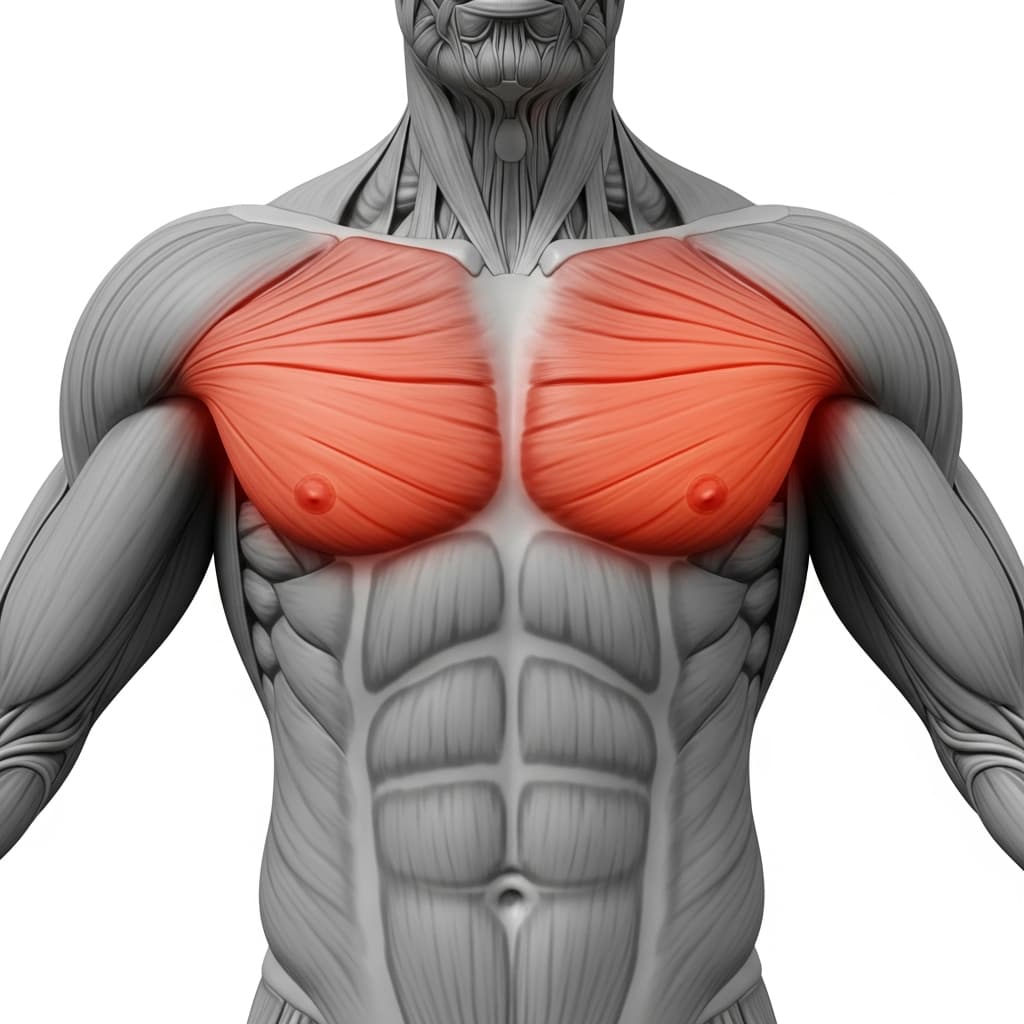
Muscles Worked During Hip Height Incline Push ups
Primary Muscles:
Secondary Muscles:

Primary Muscles
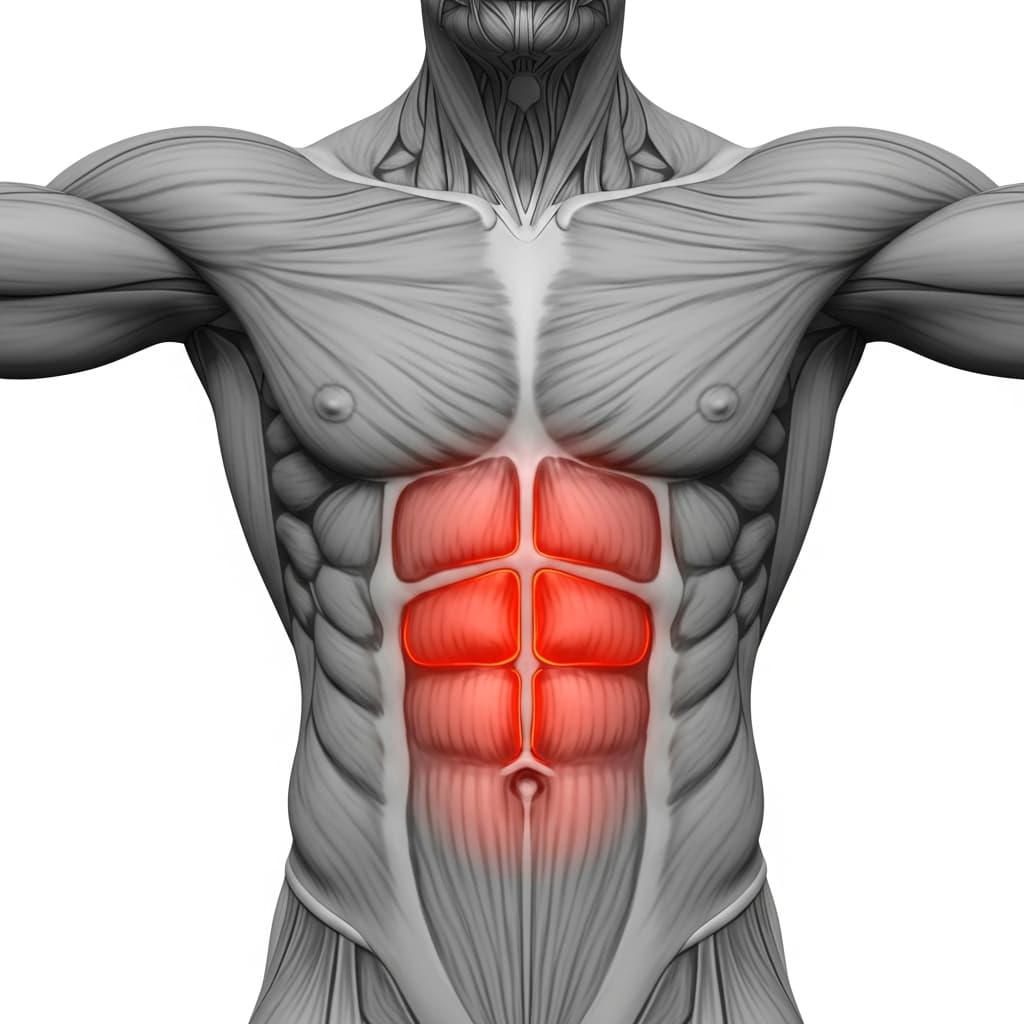
Pectoralis Major (Chest) - The pectoralis major drives the pressing motion by horizontally adducting and flexing the shoulder as you push away from the surface.
Secondary Muscles
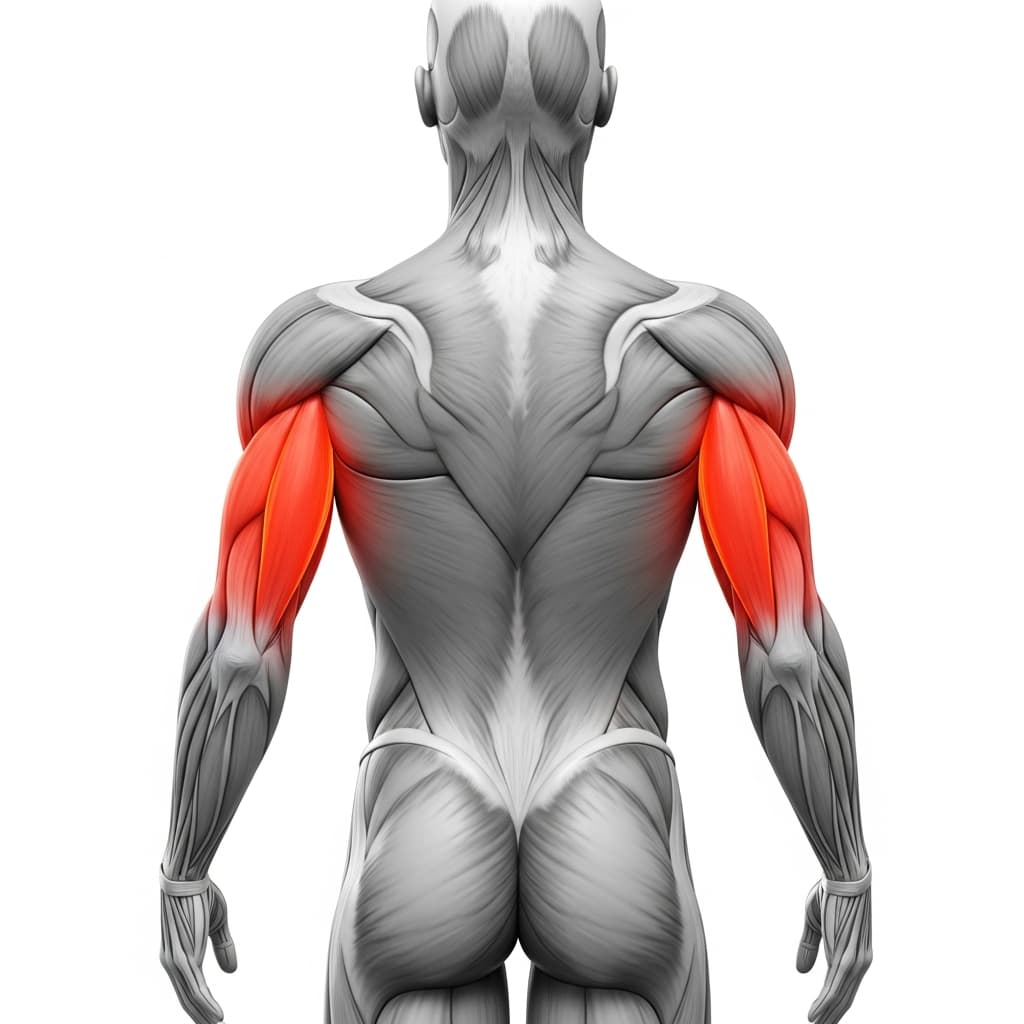
Triceps Brachii (Triceps) - The triceps extend the elbow during the pressing phase, locking out the arm at the top of each rep.
Anterior Deltoid (Front Deltoid) - The anterior deltoid assists the chest in flexing the shoulder joint, especially through the bottom portion of the movement.
Rectus Abdominis (Abs) - The rectus abdominis braces the torso to prevent the hips from sagging and maintains a rigid straight line from head to heels.
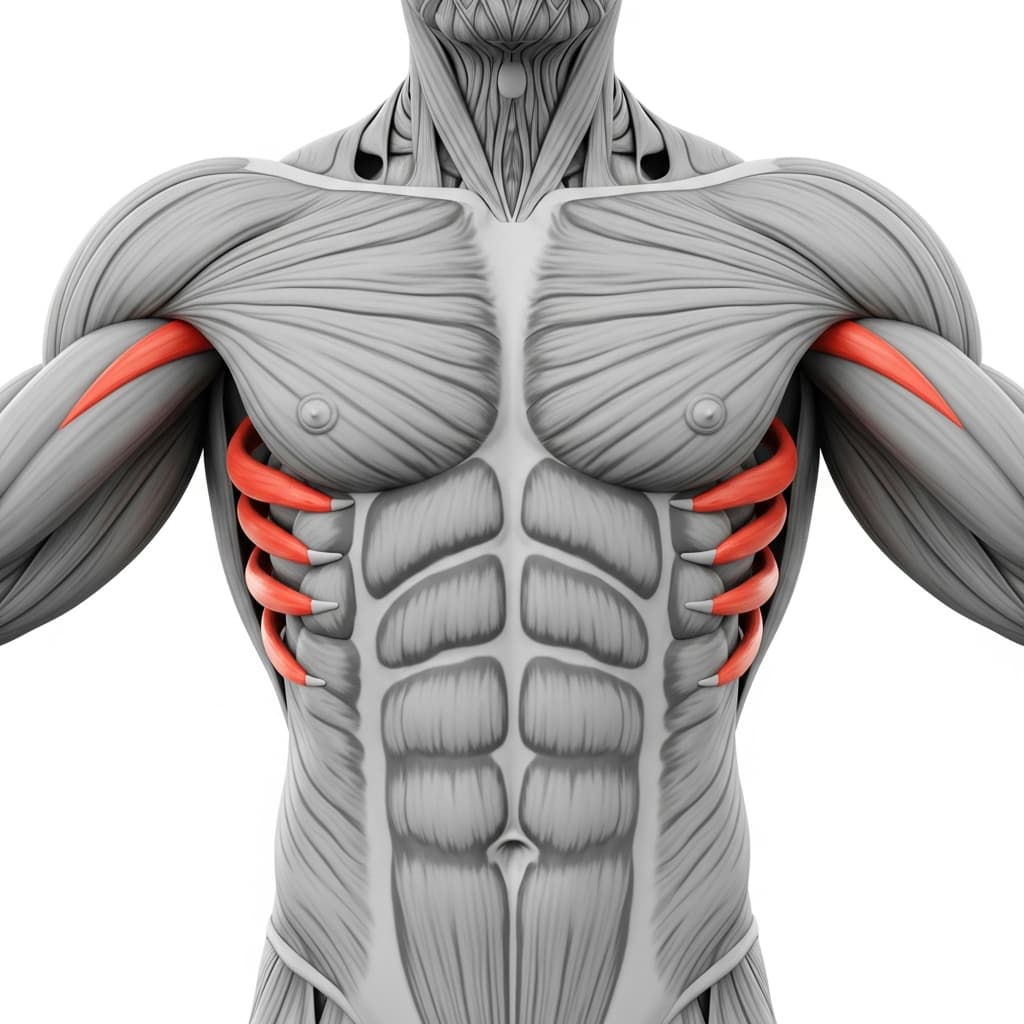
Serratus Anterior (Serratus Anterior) - The serratus anterior protracts and stabilizes the scapula against the ribcage during the pressing phase, keeping the shoulder blades in a strong position.
Benefits of Hip Height Incline Push ups
- Builds pressing strength in the chest, front deltoids, and triceps at a manageable load that allows beginners to train with proper form from day one
- Reinforces full-body tension and core bracing in the exact same alignment used for standard and advanced push-up variations
- Provides a measurable progression checkpoint between wall push-ups and floor push-ups, making strength gains easy to track over weeks
- Trains the shoulder stabilizers through a loaded range of motion without the joint stress that comes from pressing full bodyweight too early
Who Is This Exercise For?
You should be able to hold a straight-arm plank for at least 20 seconds with a neutral spine and engaged core before attempting hip height incline push-ups. If maintaining full-body tension in a plank is difficult, work on that foundation first. Wall push-ups with controlled tempo are the ideal preparation if this variation feels too heavy.
Common Mistakes to Avoid
Sagging hips: Squeeze your glutes and brace your abs before you start the set, and maintain that tension throughout every rep. If your hips drop, the chest disengages and the lower back takes unnecessary load.
Flaring elbows out to 90 degrees: Keep your elbows at roughly 45 degrees from your torso throughout the movement. Letting them flare wide places excessive strain on the shoulder joint and reduces pressing power.
Cutting the range of motion short: Lower until your elbows reach at least 90 degrees and your chest nearly touches the surface. Partial reps skip the most productive part of the movement and slow your progress toward full push-ups.
Dropping the head forward: Keep your neck neutral and your gaze slightly ahead of your hands. Craning the neck forward creates the illusion of depth without actually completing the rep.