Assisted Push Up
The assisted push-up is a band-supported horizontal pressing exercise that trains the chest, triceps, and front deltoids through a full range of motion while reducing the bodyweight load at the bottom of the movement. A resistance band attached to an overhead anchor point and looped around the chest provides the most assistance at the lowest point of the push-up, which is exactly where most beginners fail. Practiced with strict form, the assisted push-up builds the pressing strength and full-body tension needed to progress directly into unassisted push-ups and more advanced calisthenics movements.
The assisted push-up is a band-supported horizontal pressing exercise that trains the chest, triceps, and front deltoids through a full range of motion while reducing the bodyweight load at the bottom of the movement. A resistance band attached to an overhead anchor point and looped around the chest provides the most assistance at the lowest point of the push-up, which is exactly where most beginners fail. Practiced with strict form, the assisted push-up builds the pressing strength and full-body tension needed to progress directly into unassisted push-ups and more advanced calisthenics movements.
How to Do Assisted Push Up
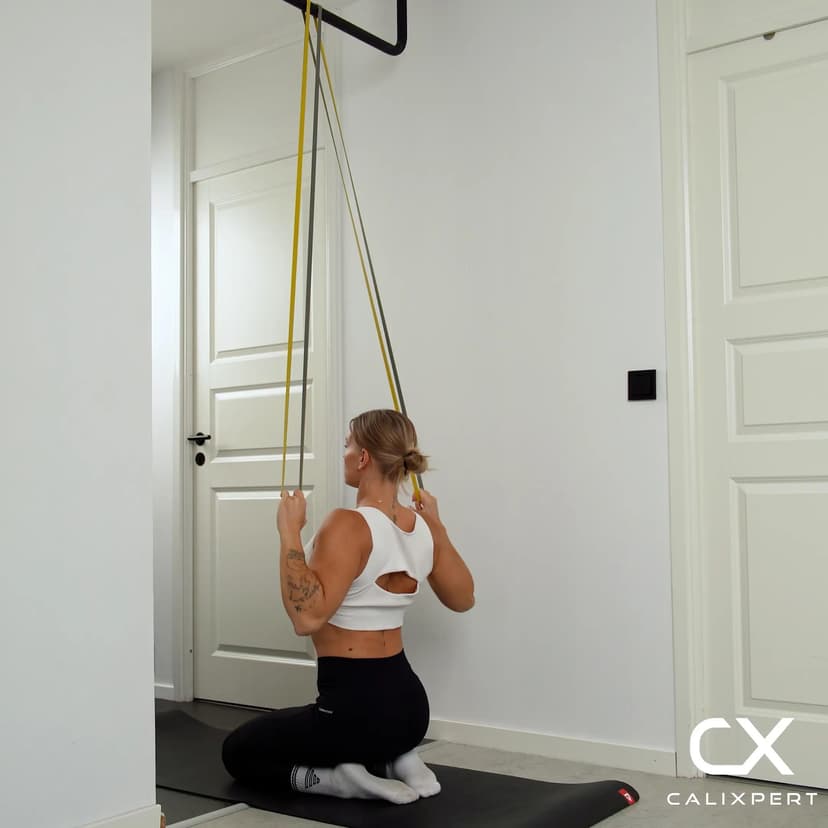
1. Attach the Band Overhead
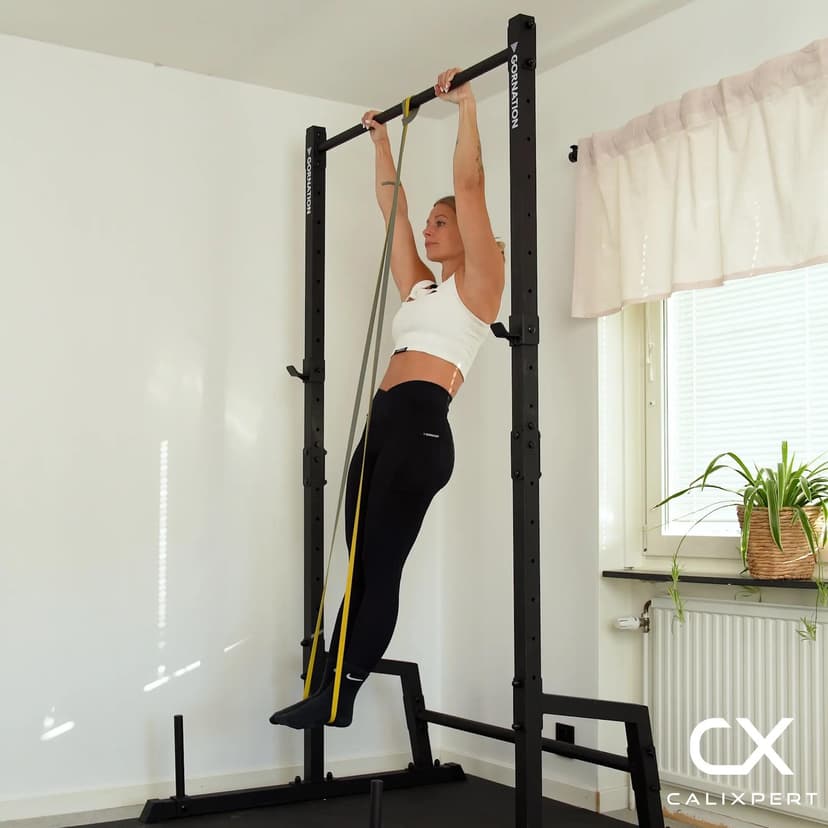
Loop a resistance band over a pull-up bar or a sturdy overhead anchor point so it hangs straight down. The band should be long enough to reach chest height when you are standing beneath it. Choose a band thickness that takes away enough load for you to complete clean reps, starting thicker and progressing to thinner bands over time.
Thicker band, more help
2. Position the Band on Your Chest
Stand facing the anchor and place the band directly under your chest, roughly at the lower edge of the sternum. The band should sit snug against your torso so it does not slide during the movement. Make sure the band is centered on your body and not twisted or off to one side.
Band sits right under the chest
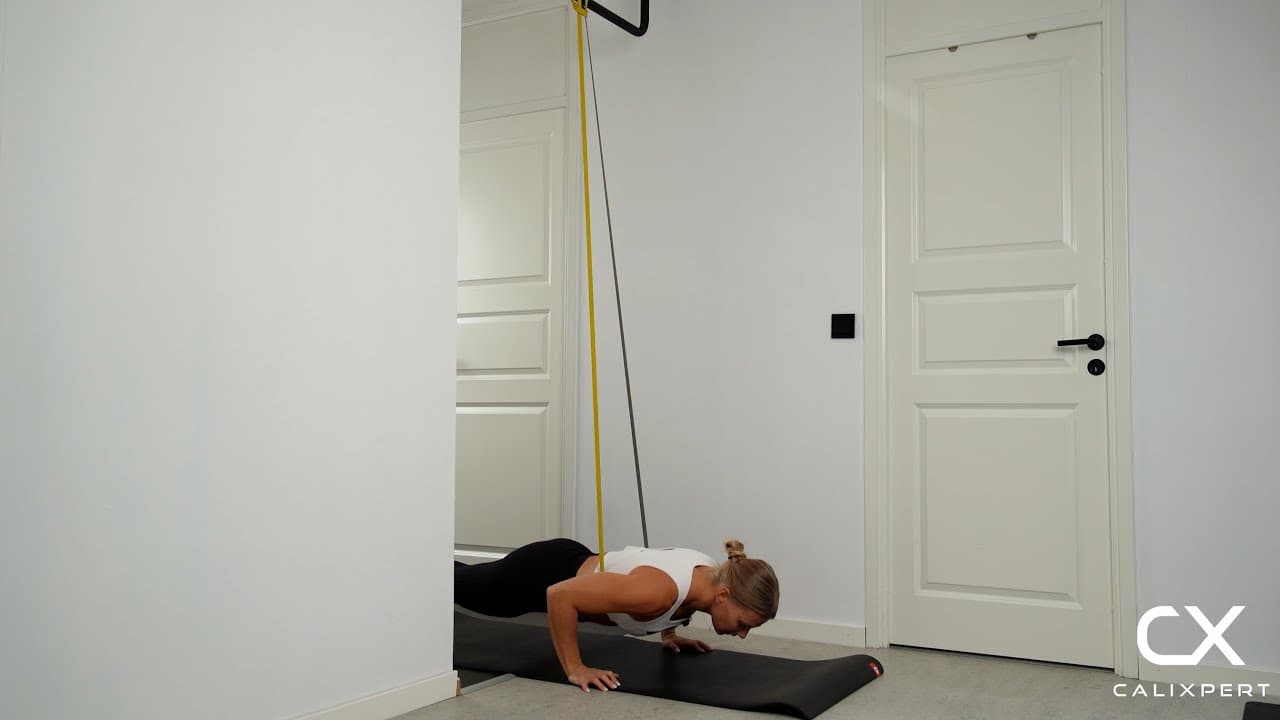
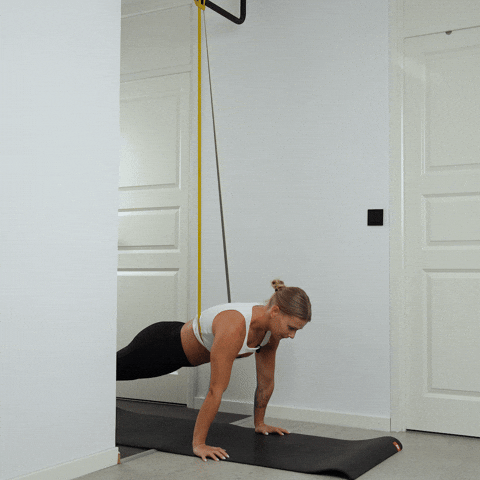
3. Set Up Your Push-Up Position
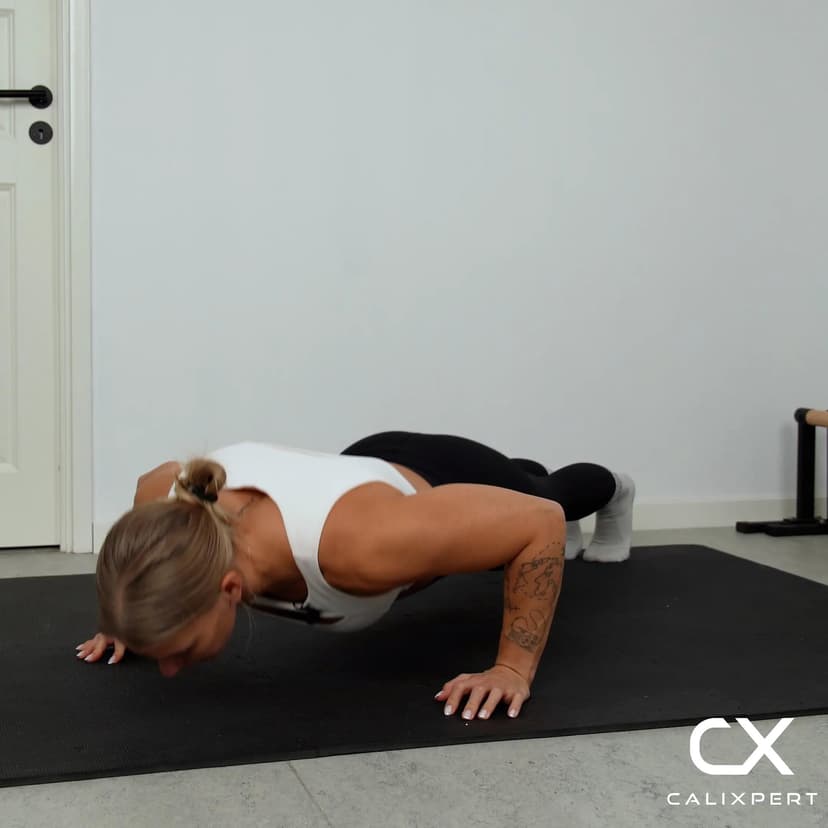
Walk your feet back and place your hands slightly wider than shoulder width on the floor. Your body should be positioned slightly in front of the anchor point so the band has a small forward angle. Lock your elbows out at the top and establish a straight line from your head through your hips to your heels. Squeeze your glutes and brace your core before initiating the first rep.
Glutes tight, core braced, body straight
4. Lower With Controlled Elbow Angle
Bend your elbows and lower your chest toward the floor, keeping your elbows at approximately 45 degrees from your torso. Do not let the elbows flare out to 90 degrees or tuck them tight against your ribs. Lower until your elbows reach at least a 90-degree bend. Keep your head in a neutral position, looking slightly ahead of your hands rather than straight down.
Elbows at 45 degrees, not flared
5. Press Back Up to Full Lockout
Drive through your palms and extend your elbows fully to return to the top position. Maintain your rigid body line throughout the press, not allowing your hips to sag or pike upward. The band will provide the most assistance at the bottom and gradually less as you press up, which teaches you to generate force through the entire range.
Push the floor away, lock out
6. Reset Tension Before Each Rep
At the top of each rep, confirm your glutes are still squeezed and your core is still braced before lowering into the next rep. If your hips have dropped or your shoulders have crept up toward your ears, reset your position completely. Every rep should look identical from start to finish.
Reset at the top, every rep
Most people default to knee push-ups when they cannot do a full push-up, but that skips the most important part of the movement, which is maintaining a rigid body line from head to heel. The band-assisted version keeps that full-body tension requirement intact while giving you just enough help at the bottom to complete quality reps. Progress by switching to a thinner band every two weeks, and you will reach your first strict push-up much faster than with knees on the floor.
Muscles Worked During Assisted Push Up
Secondary Muscles:

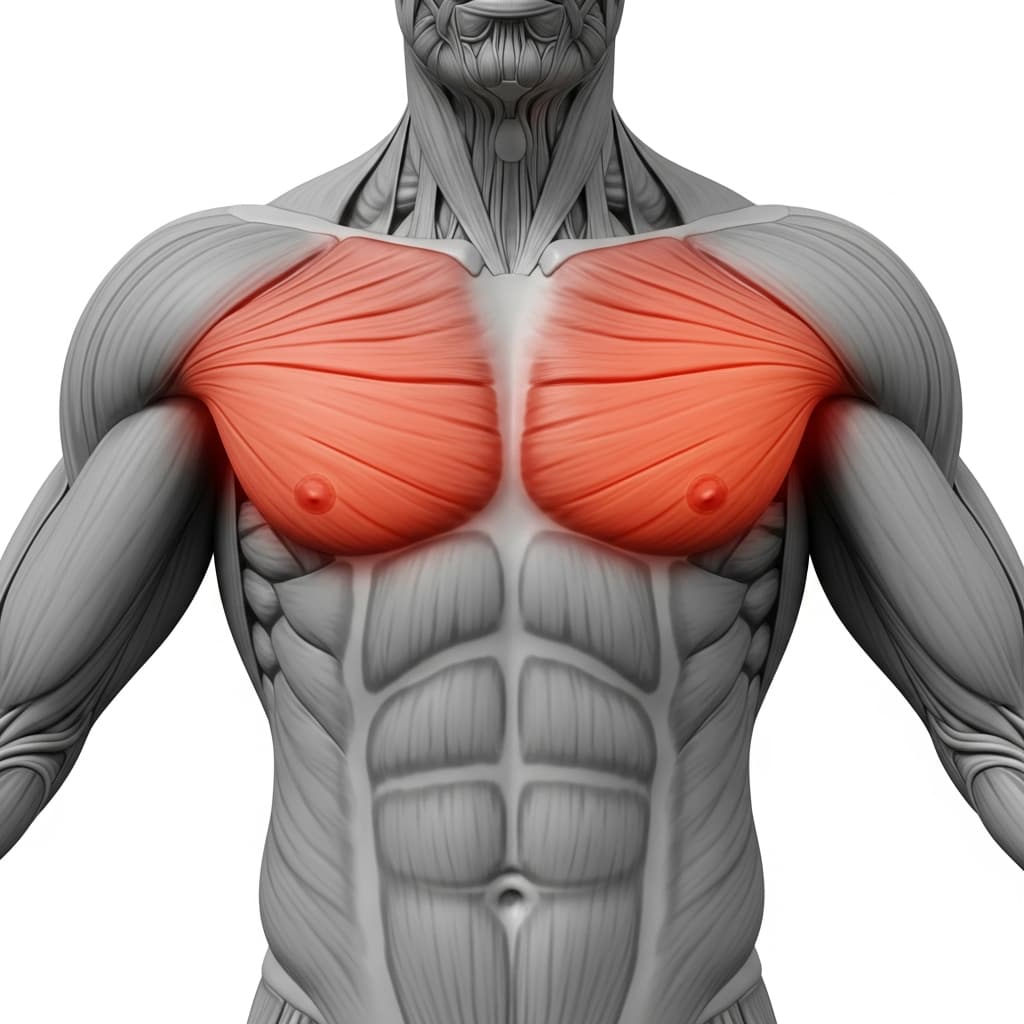
Primary Muscles
Pectoralis Major (Chest) - The pectoralis major drives horizontal shoulder adduction and flexion to push the body away from the floor during the pressing phase.
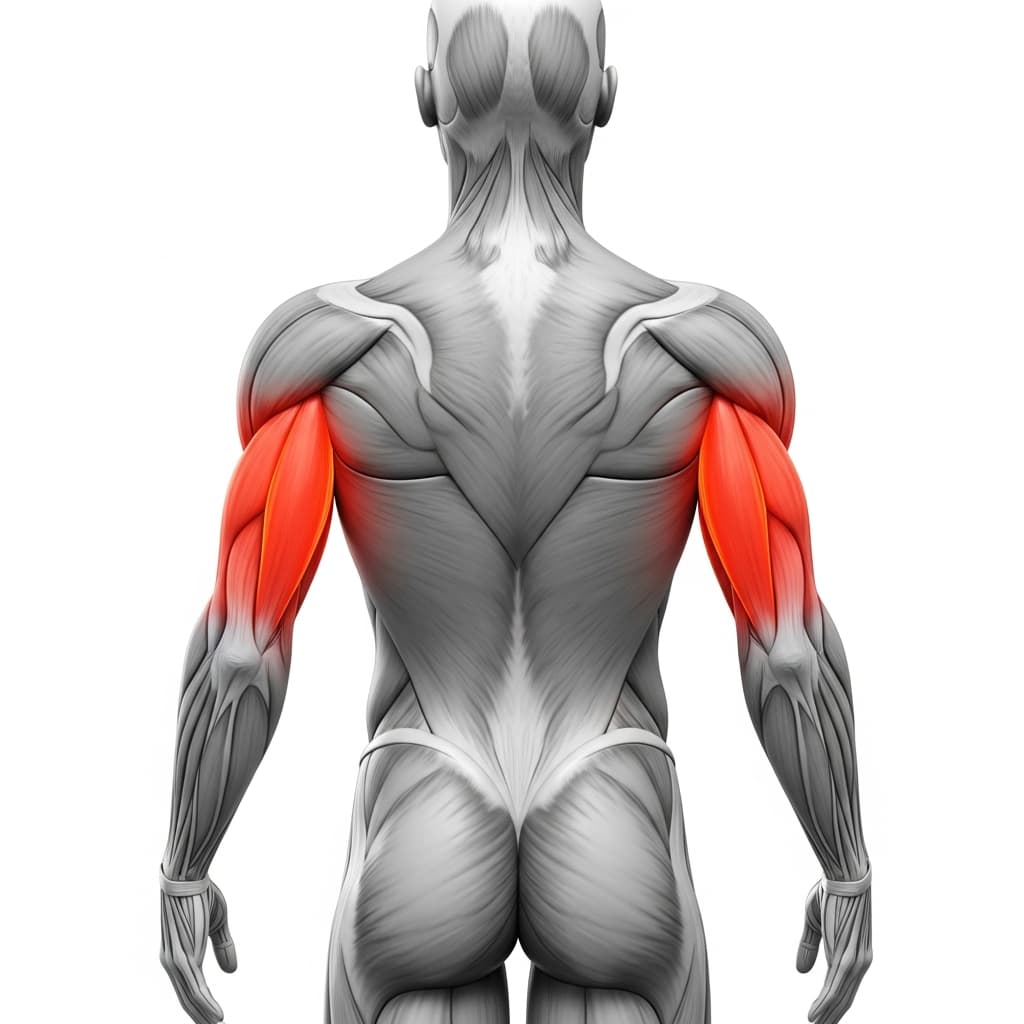
Triceps Brachii (Triceps) - The triceps extend the elbow joint through the second half of the press, completing the lockout at the top of each rep.
Secondary Muscles
Anterior Deltoid (Front Deltoid) - The anterior deltoid assists the chest in flexing the shoulder during the upward pressing phase of the movement.
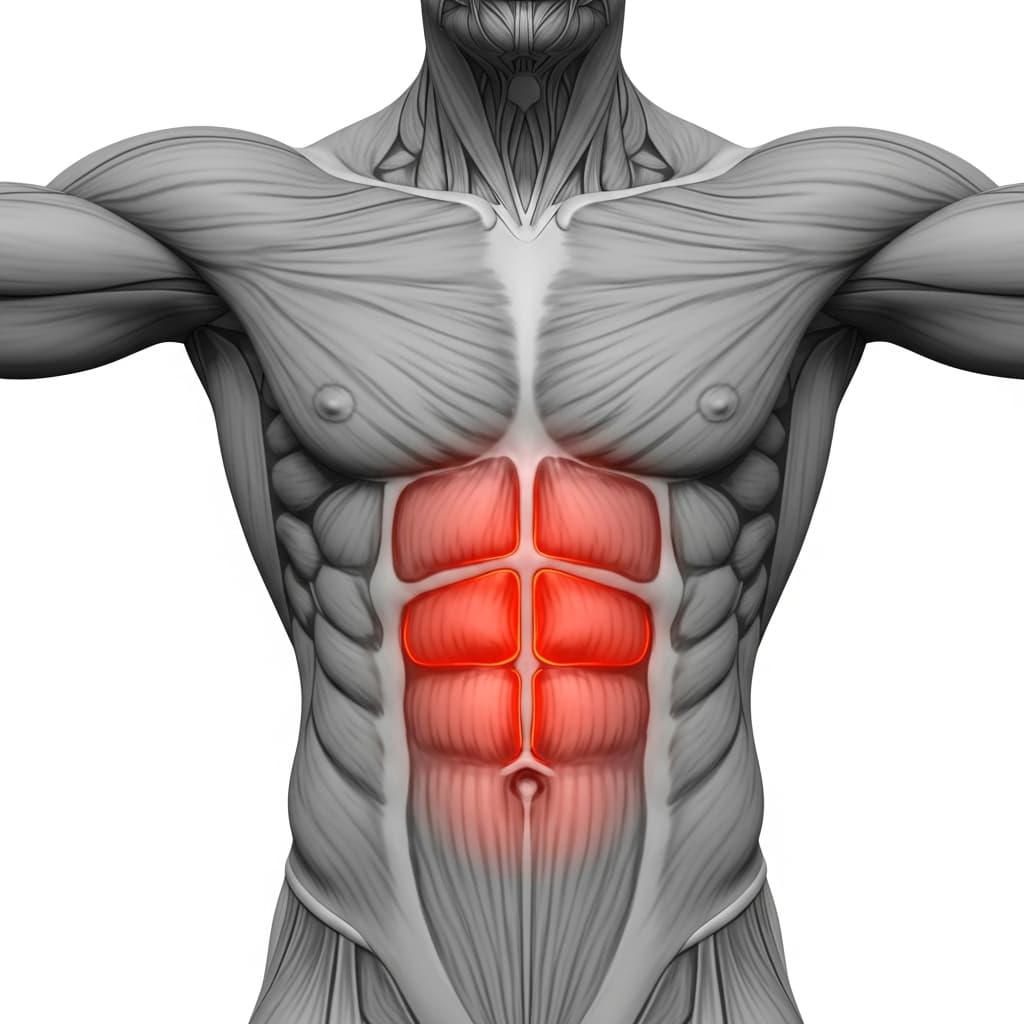
Rectus Abdominis (Abs) - The rectus abdominis and deep core muscles hold the torso rigid and prevent the hips from sagging toward the floor under load.
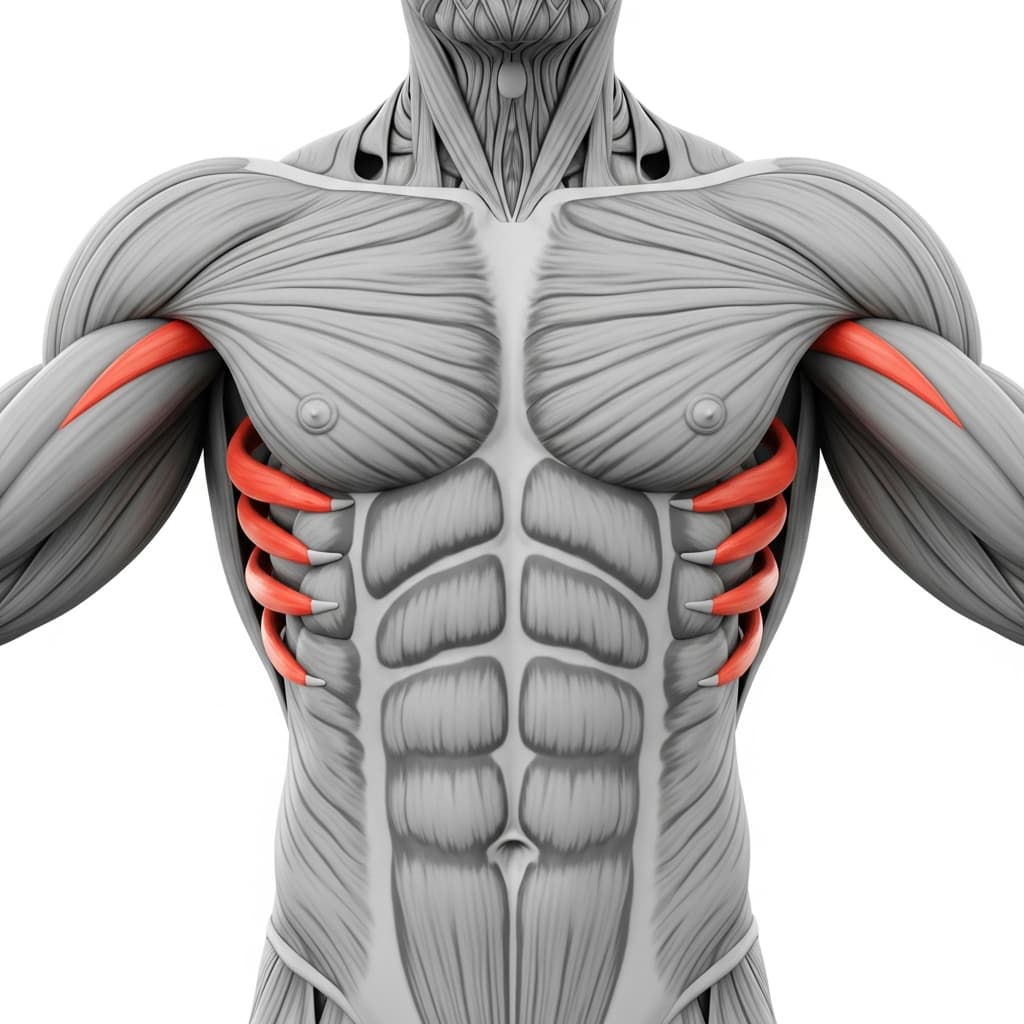
Serratus Anterior (Serratus Anterior) - The serratus anterior protracts the shoulder blades at the top of the push-up and stabilizes the scapulae against the ribcage throughout the movement.
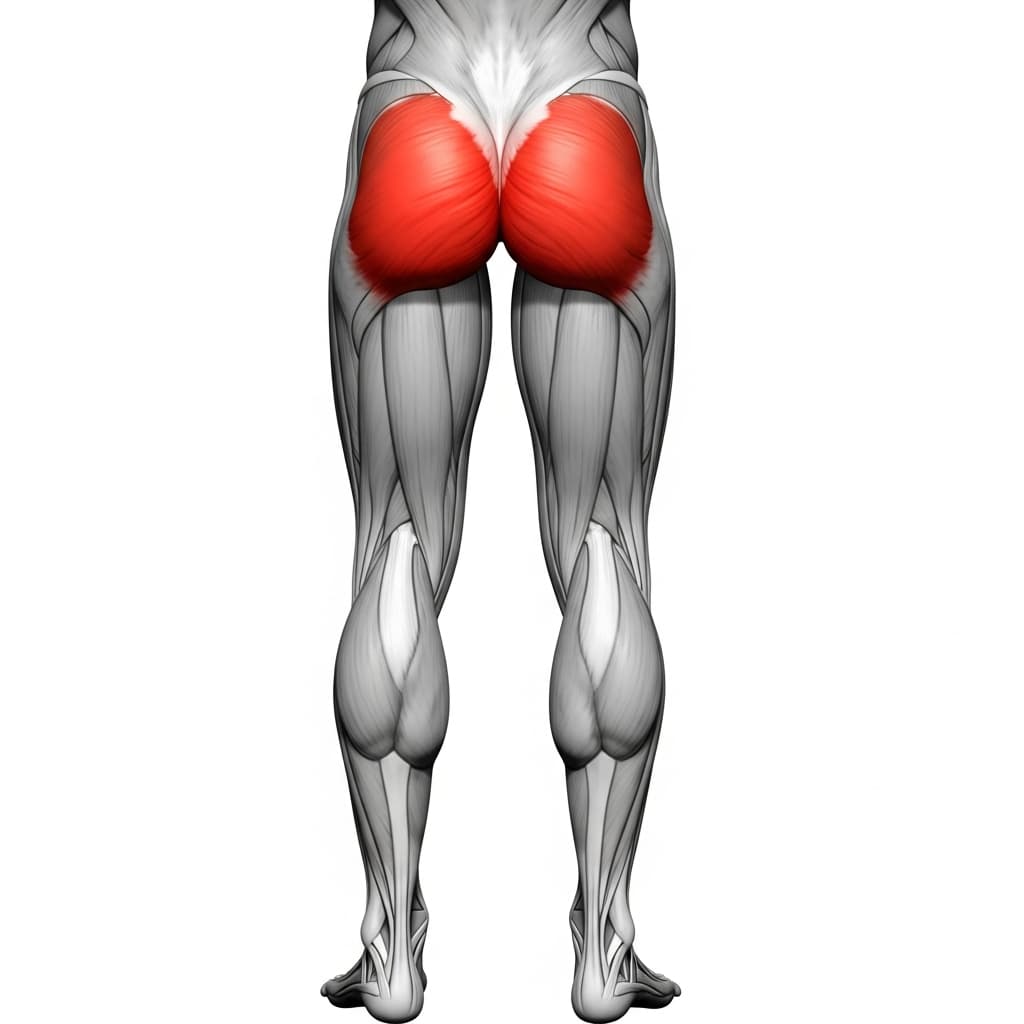
Gluteus Maximus (Glutes) - The glutes maintain hip extension and posterior pelvic tilt to keep the body in a straight line from head to heels during every rep.
Benefits of Assisted Push Up
- Develops chest, tricep, and front deltoid pressing strength through a full range of motion while reducing injury risk at the weakest point of the movement
- Preserves the full-body tension demand of a standard push-up, unlike knee push-ups which remove the hip and core stabilization requirement
- Provides scalable resistance through band selection, allowing precise weekly progression toward unassisted push-ups
- Builds the protraction and stabilization strength of the serratus anterior, which is critical for handstands and planche progressions later in training
Who Is This Exercise For?
You should be able to hold a plank on your hands for at least 20 seconds with a straight body line and engaged core before attempting band-assisted push-ups. If maintaining a rigid plank position is still a challenge, focus on plank holds and wall push-ups first to build the baseline core stability and shoulder endurance required. Knee push-ups alone do not prepare you well because they remove the full-body tension demand that the band-assisted version preserves.
Common Mistakes to Avoid
Letting the hips sag toward the floor: Actively squeeze your glutes and brace your abs throughout every rep. If your hips drop, the band takes the load off your chest and shifts strain to your lower back, making the exercise both less effective and riskier.
Flaring the elbows out to 90 degrees: Keep your elbows at roughly 45 degrees from your torso throughout the descent and ascent. Flaring puts excessive stress on the shoulder joint and reduces the chest's contribution to the press.
Placing the band on the hips or stomach: The band should sit directly under the chest so the assistance supports you at the sticking point of the push-up. Placing it on the hips or stomach shifts the support away from where you actually need it and encourages a broken body line.
Using too thick of a band for too long: Progress to thinner bands as soon as you can complete 3 sets of 8 clean reps with the current band. Staying on a heavy band too long delays the strength development you need for unassisted push-ups.
Jutting the head forward at the bottom: Keep your neck neutral and your gaze slightly ahead of your hands throughout the rep. Pushing your chin toward the floor creates the illusion of depth without actually completing the range of motion.