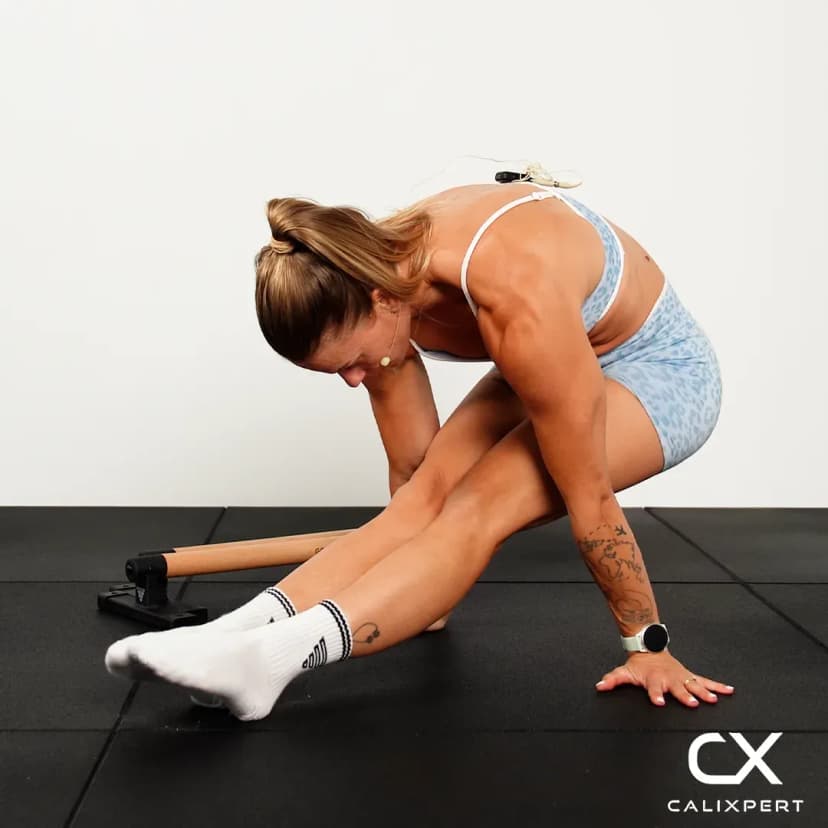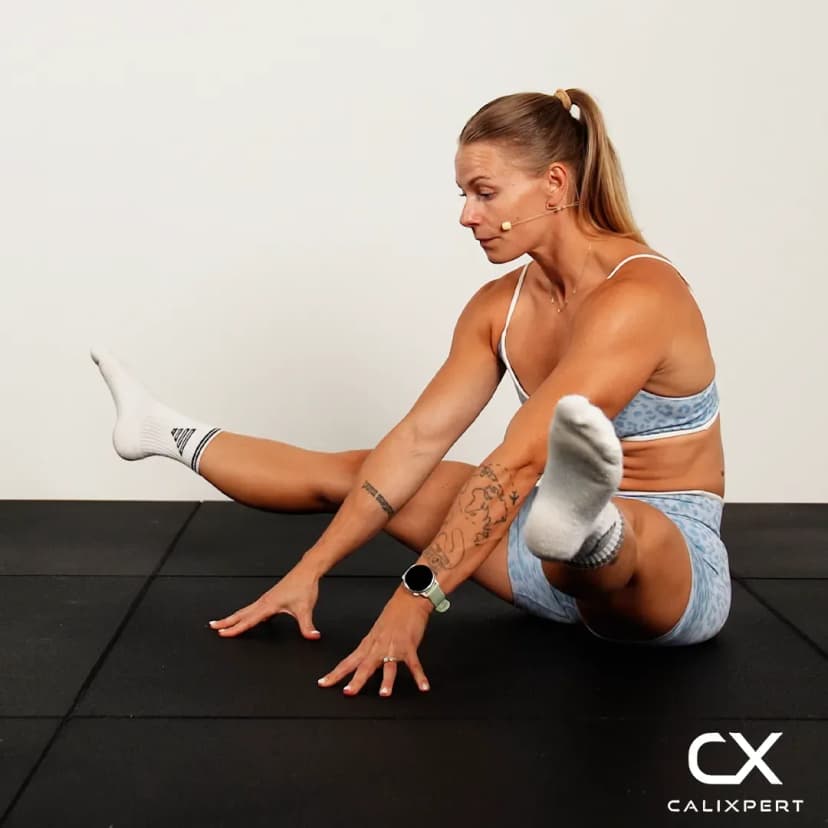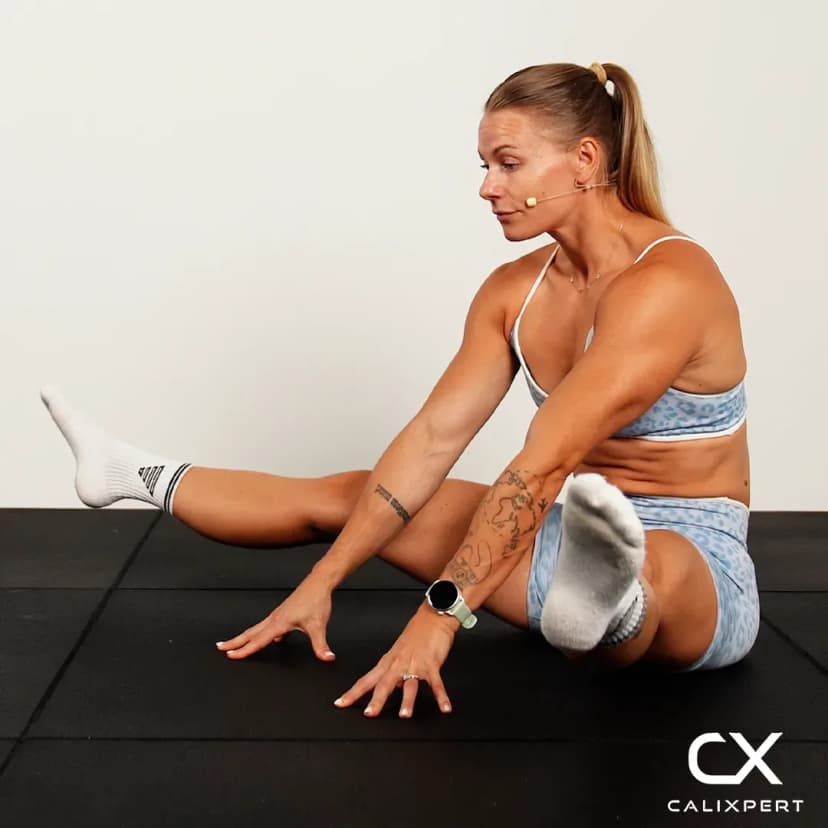
Assisted Tuck Planche
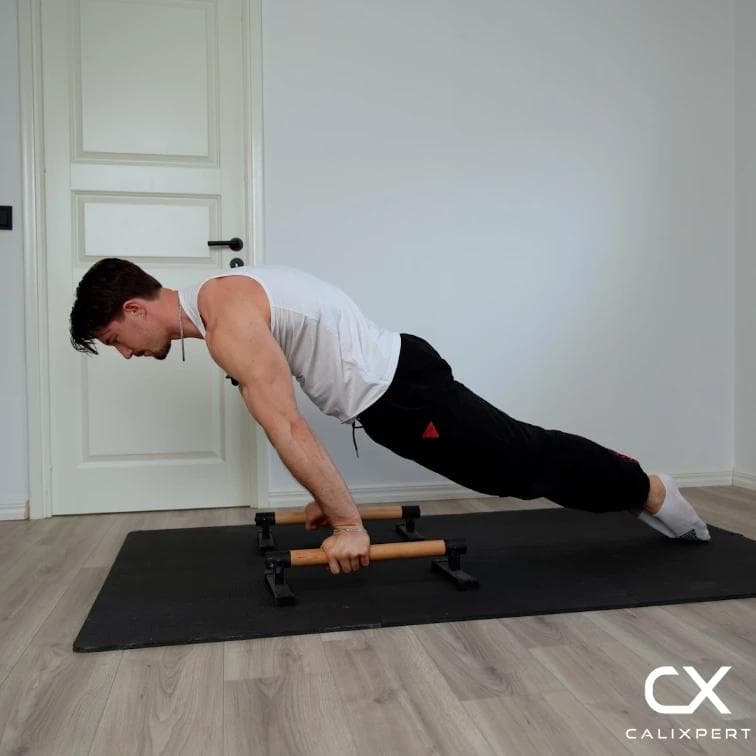
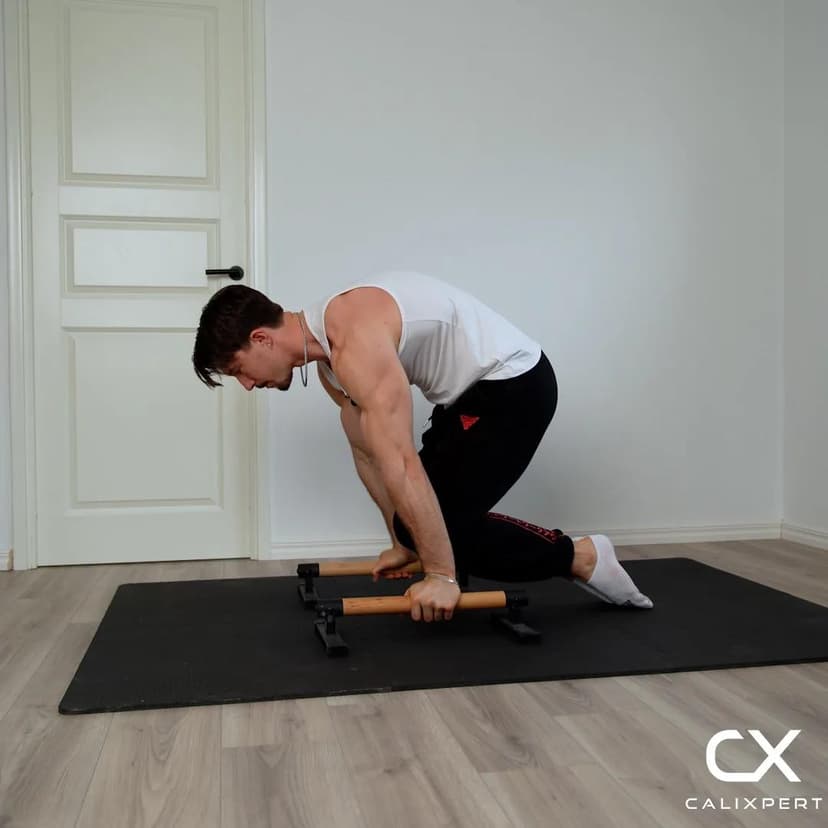
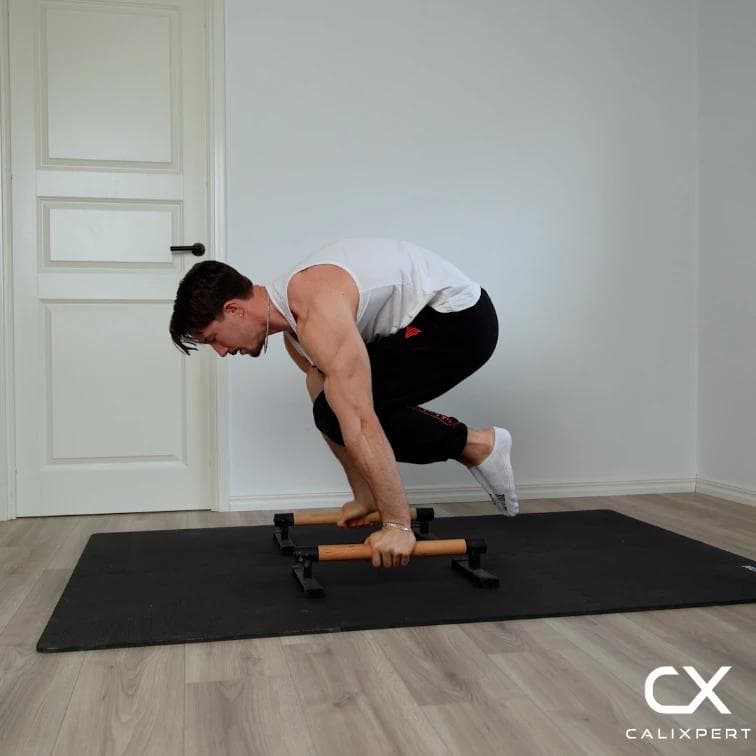
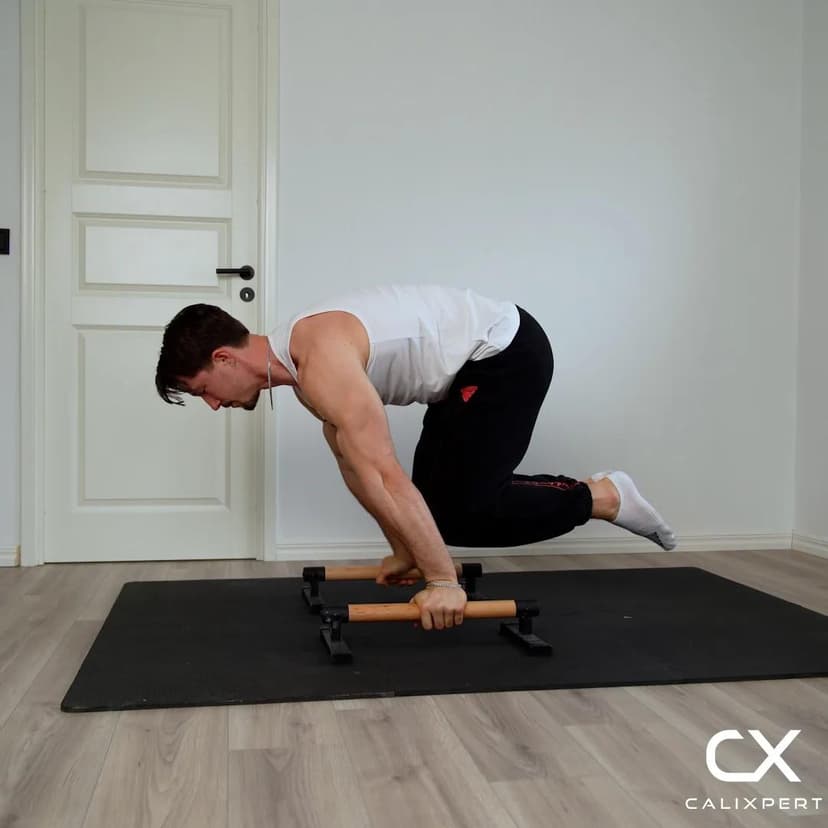
The assisted tuck planche is the tuck planche with your feet left on the ground to carry part of the load. Your hands go beside your knees, your elbows stay locked, and your shoulders push down and out into the same protracted position the real hold needs. Because your feet decide how much weight stays behind you, you can set the load to what your shoulders can hold today and take it away a little at a time. Floor or parallettes both work.
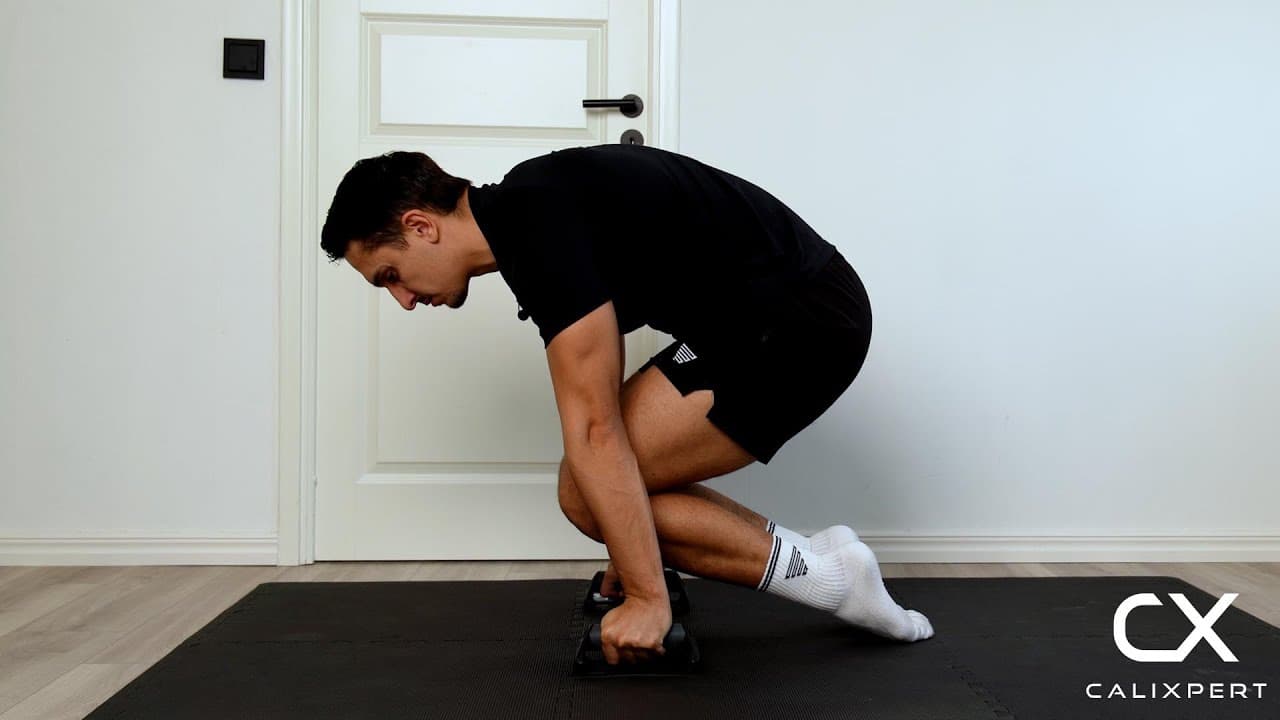
The assisted tuck planche is the tuck planche with your feet left on the ground to carry part of the load. Your hands go beside your knees, your elbows stay locked, and your shoulders push down and out into the same protracted position the real hold needs. Because your feet decide how much weight stays behind you, you can set the load to what your shoulders can hold today and take it away a little at a time. Floor or parallettes both work.
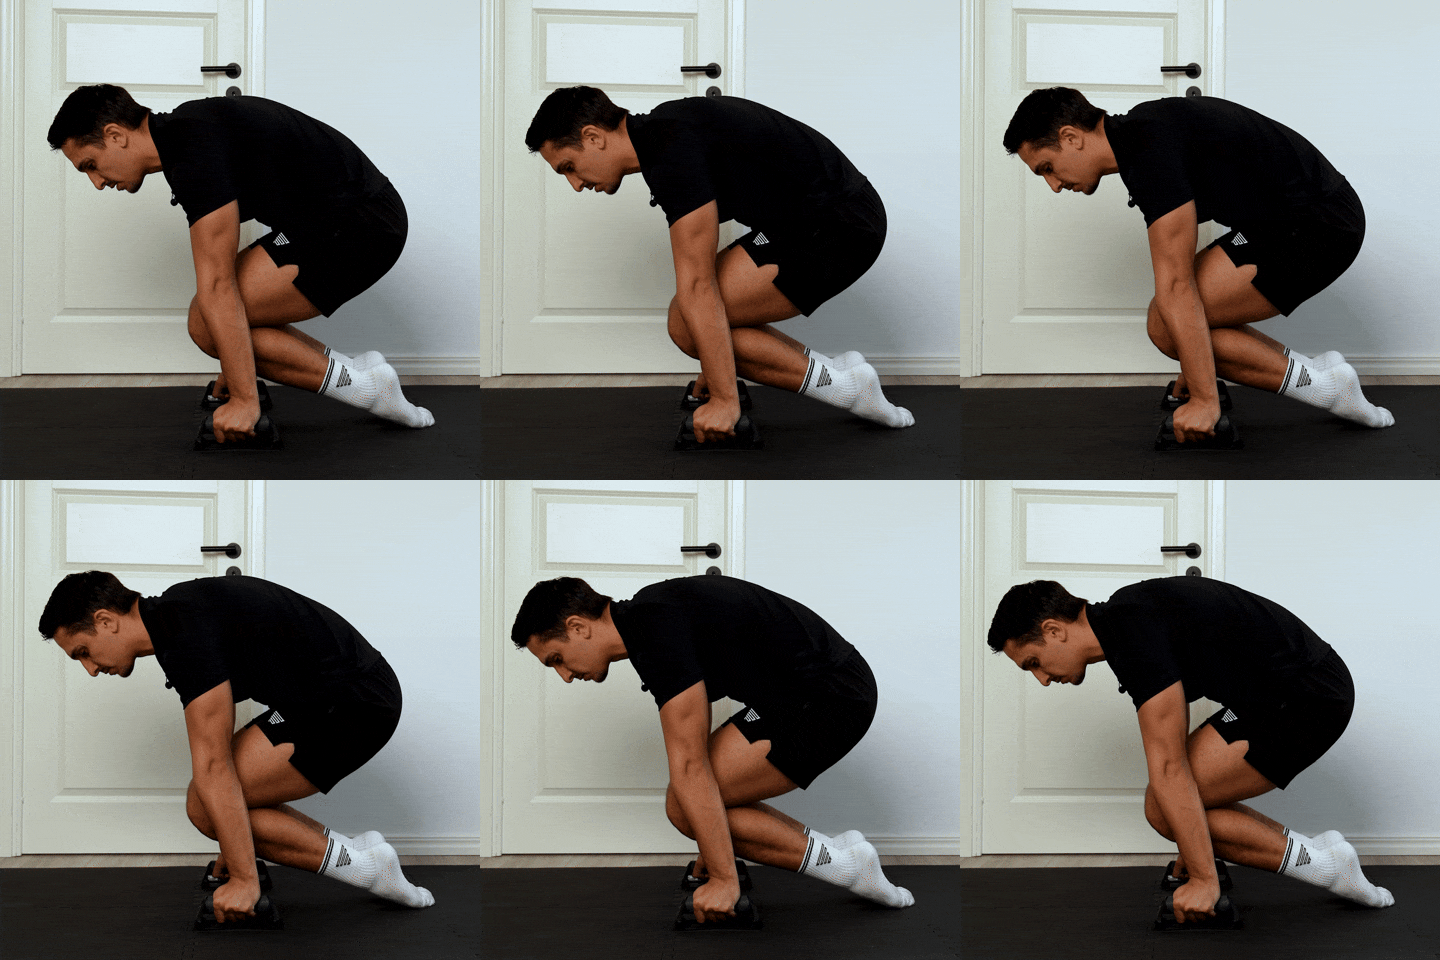
How to Do Assisted Tuck Planche
1. Pick The Floor Or Parallettes
Both work, and on the floor you put a little bit more pressure on the wrist. If that is uncomfortable and you are still not strong enough for it, parallettes are a little bit safer or a little bit more comfortable. It is the same principle either way, so pick the one you can hold cleanly today.
Floor loads the wrist more, parallettes less
2. Set Your Hands Beside Your Knees
Place your hands roughly shoulder width apart, just beside or around your knees. On the floor, turn the hands outwards a bit, since a parallette handle already puts the hand at a similar angle. This is your starting position before the hold.
Roughly shoulder width, level with the knees
3. Lock The Elbows Straight
Straighten the arms fully and keep tension in them. Do not sit there with them bent, because the point of this exercise is straight arm strength, and a soft elbow sends the load into the joint and the biceps tendon instead of the shoulder. Point your inner elbows, the biceps side, a little bit inwards rather than straight forward.
Straight arms, inner elbows turned a little inwards
4. Push The Shoulders Down And Out
Before anything lifts, push your shoulders down and out so your upper back is a little bit rounded. That is protraction, and it is the shoulder position the whole planche family is held in. If the shoulders ride up toward your ears instead, the hold collapses and the work moves to your traps and elbows.
Down and forward, never up toward your ears
5. Compress The Core And Lift
Tension and compress the core, then lift your hips and knees while your feet stay on the ground. The knees come in toward your chest and your hands finish beside them. Your feet are the assistance here: they stay in contact and take whatever your shoulders cannot hold yet.
Tension the core, knees in, feet stay down
6. Shift The Load Into Your Arms
Lean further forward over your hands until the feet feel light. You want the most strength being used by your arms and not your legs, and that is the whole difference between training a planche and just holding a crouch. Hold for 10 to 15 seconds, and end the set while the shoulders are still pushed down.
Most of the work in the arms, not the legs
7. Come Out Of It Under Control
When the shoulders start to ride up or the elbows soften, the set is over. Shift your weight back over your hands and put the knees down rather than dropping out of the position. Collapsing forward at the end is where wrists get hurt, and it teaches you nothing.
Shift back, do not collapse onto the wrists
The mistake I see most is people holding themselves up with their legs. The feet are there to help, not to do the work. Lock the elbows, push the shoulders down and out with a little bit rounded back, then press your weight forward into your hands until the feet feel almost empty. If the floor is uncomfortable on your wrists, parallettes are a little bit safer. You are not cheating, you are buying yourself enough time in the position to actually get strong in it.
Muscles Worked During Assisted Tuck Planche
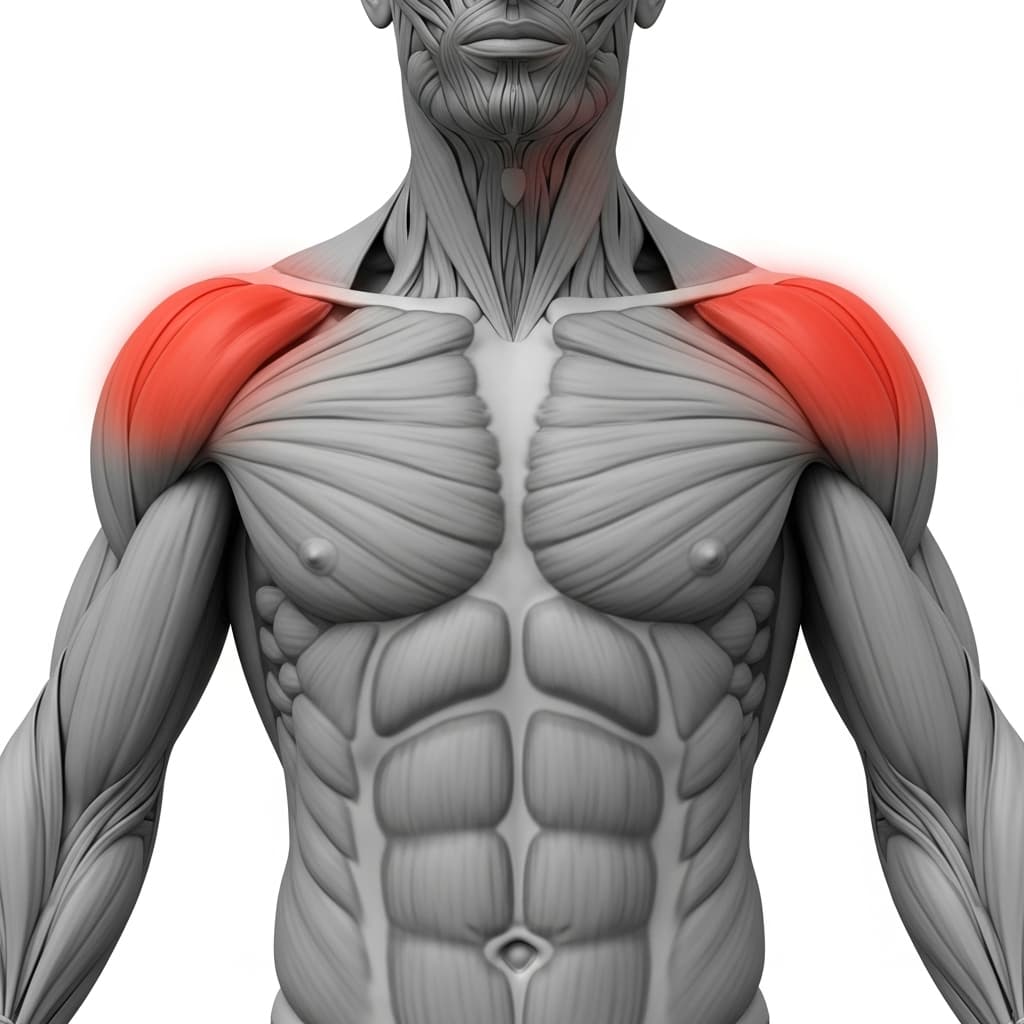
Primary Muscles:
Secondary Muscles:
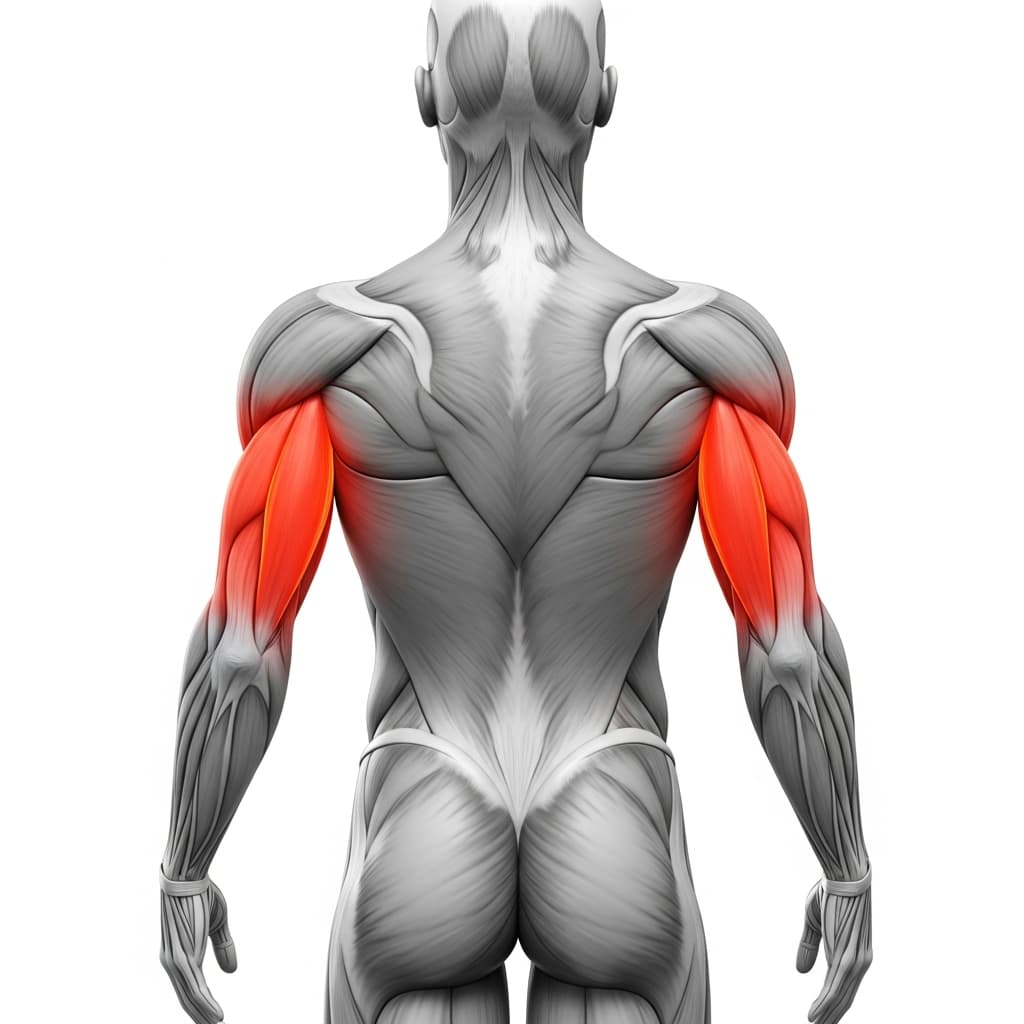
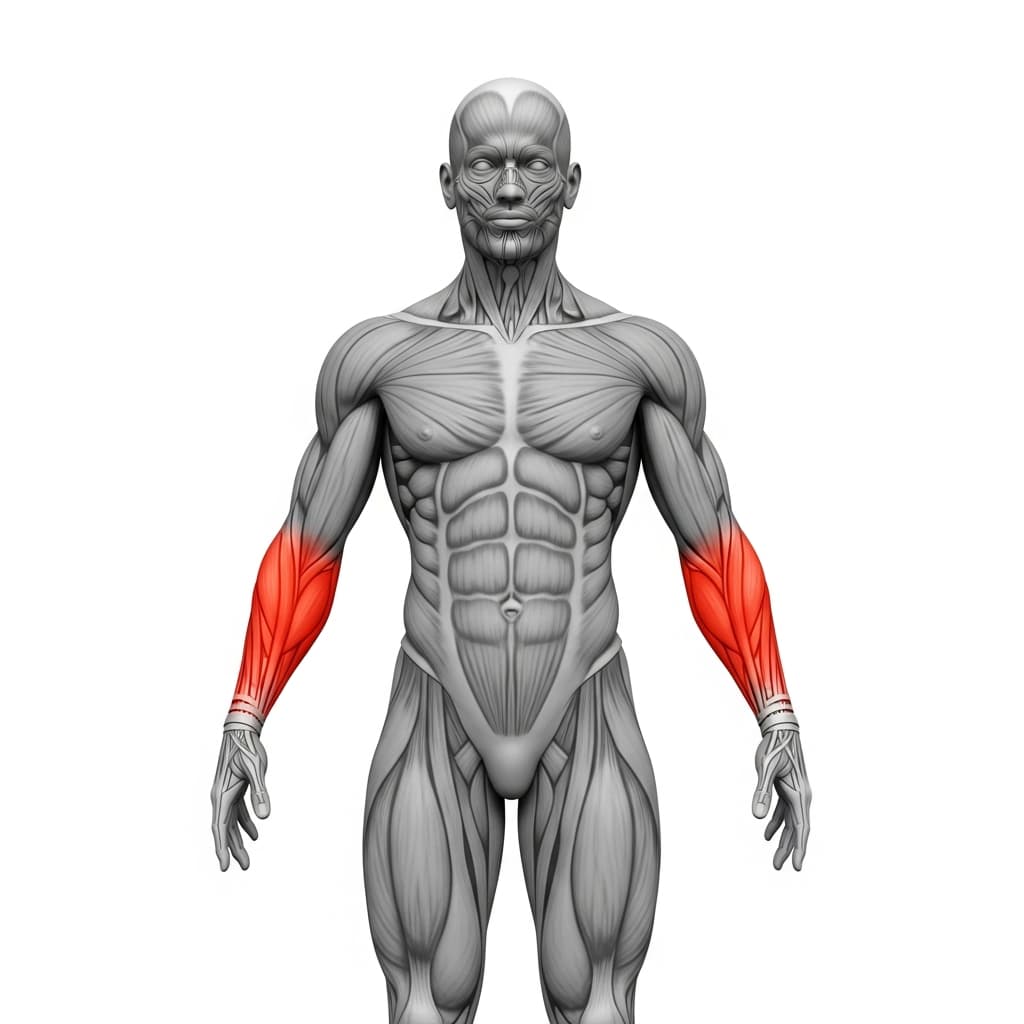
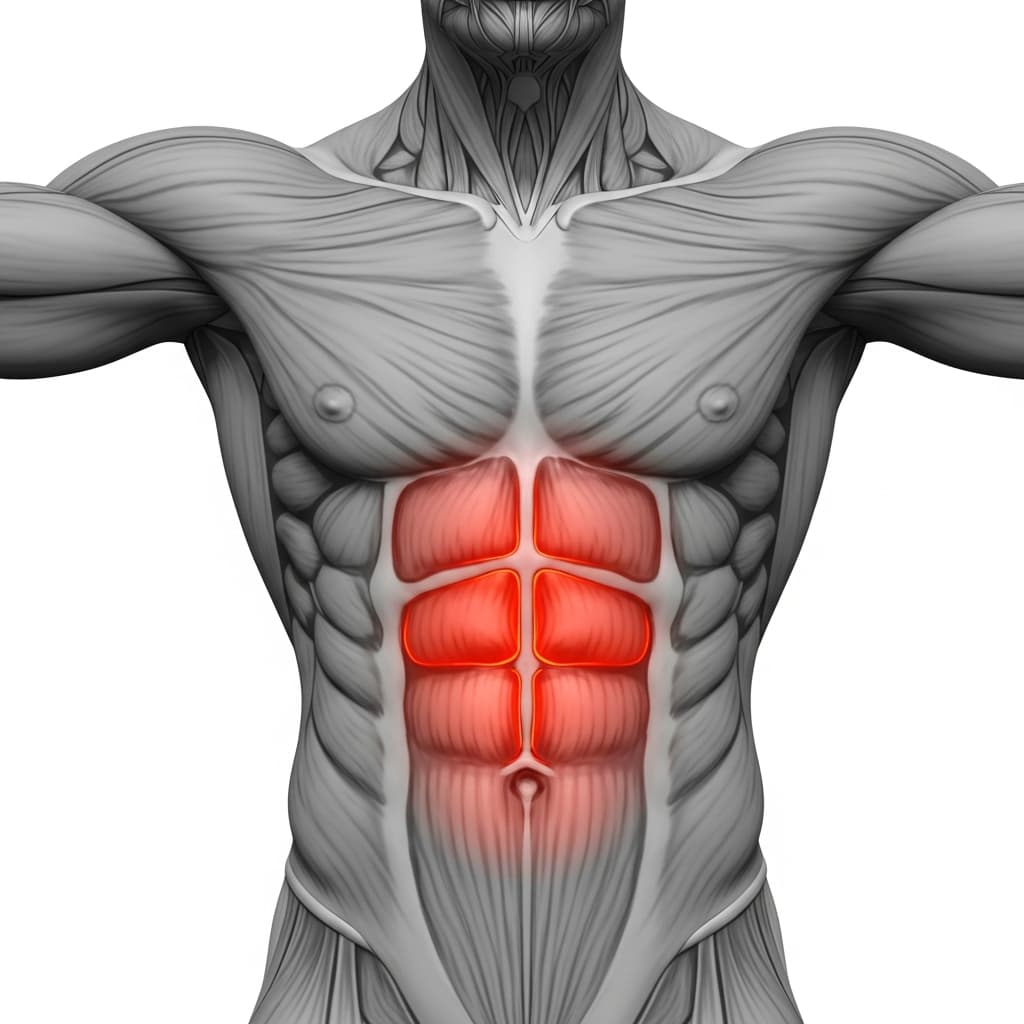
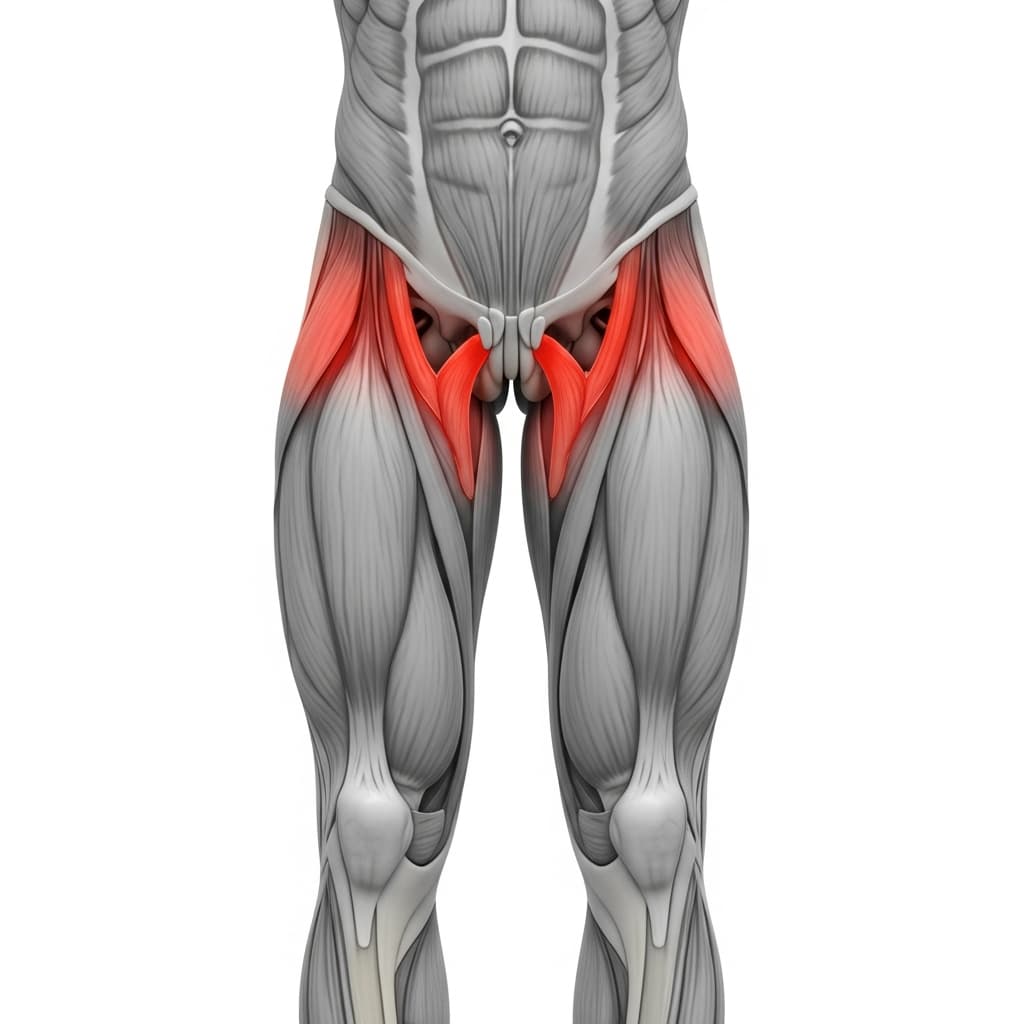
Primary Muscles
Anterior Deltoid (Front Deltoid) - The front deltoids hold your bodyweight in the forward leaned position, and the more weight you take out of your feet, the more of it they carry.
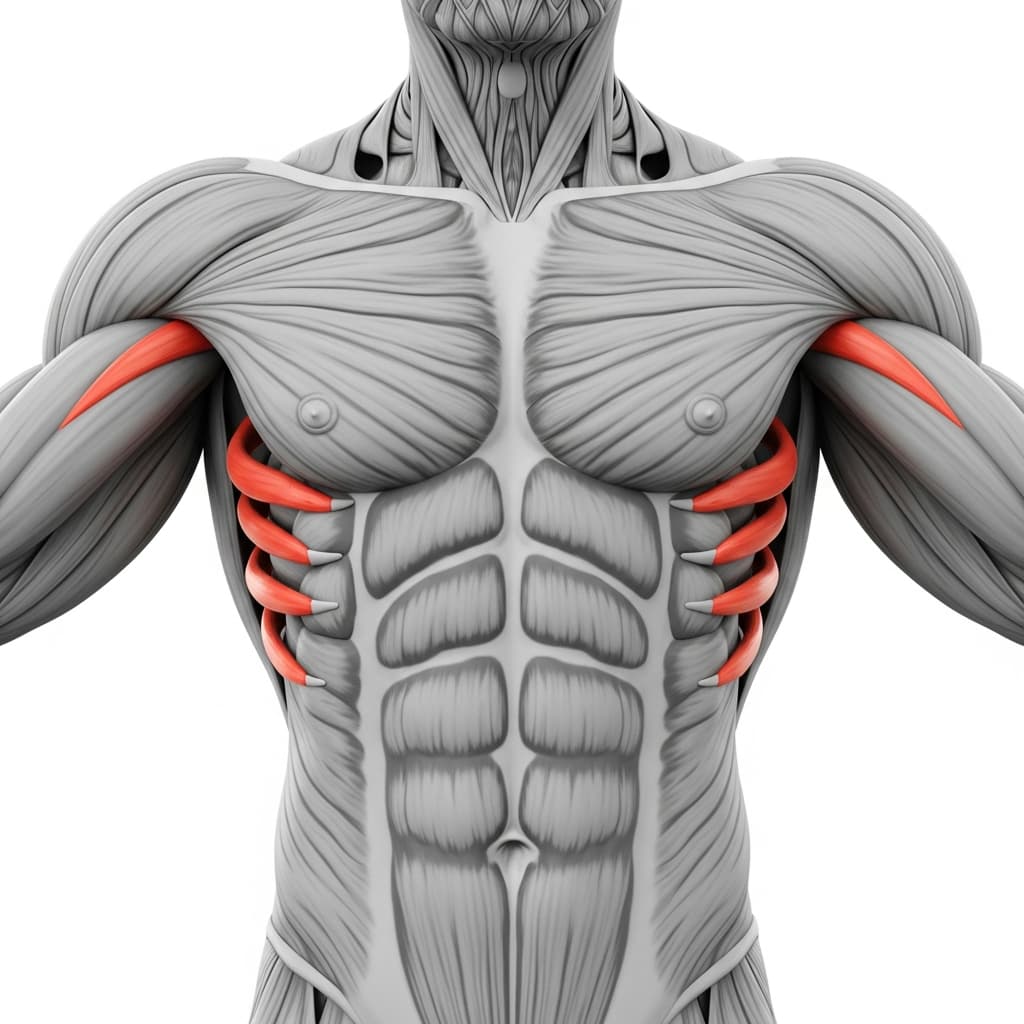
Serratus Anterior (Serratus Anterior) - The serratus anterior pushes your shoulder blades forward and down into protraction, which is what keeps the shoulder stable while you lean past your hands.
Secondary Muscles
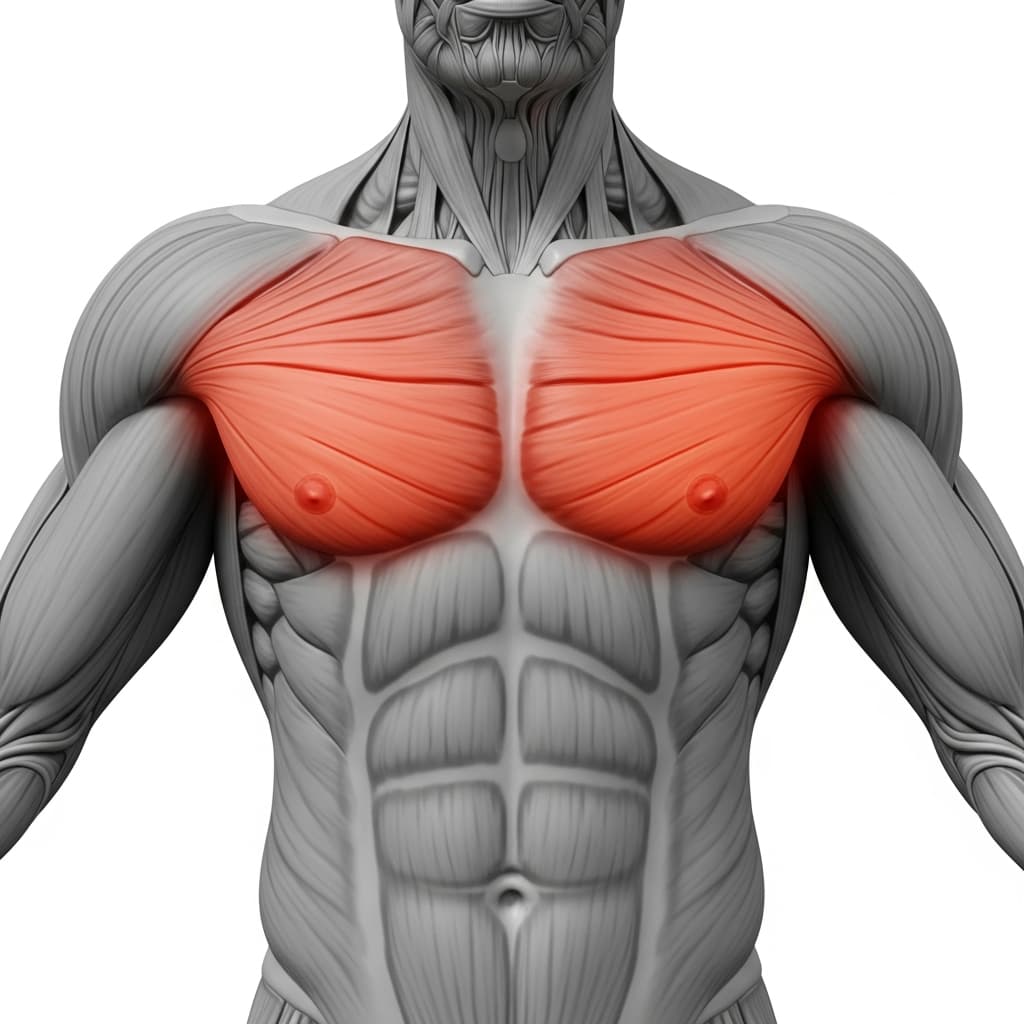
Pectoralis Major (Chest) - The chest supports the front deltoids in holding the lean and helps keep the shoulder joint stable under a long isometric hold.
Triceps Brachii (Triceps) - The triceps keep your elbows locked straight for the whole hold, which is what makes this straight arm work rather than a push-up hold.
Forearm Flexors & Extensors (Forearms) - The forearms grip the floor or the parallettes and hold your wrists steady at a deep extension angle.
Rectus Abdominis (Abs) - The abs compress your trunk and stop the hips sagging, which is why the core gets tensioned before anything leaves the ground.
Iliopsoas (Hip Flexors) - The hip flexors hold your knees pulled in toward your chest, keeping the lever short so the shoulders face a load they can actually hold.
Benefits of Assisted Tuck Planche
- Lets you train the exact tuck planche shape months before you can hold it, because your feet decide how much of your bodyweight the shoulders carry
- Builds straight arm strength with the elbows locked under load, which no bent arm pressing exercise gives you
- Trains shoulder protraction in the position you actually need it, so the serratus gets strong in the same place the planche is held
- Conditions the wrists and forearms at a load you control, with parallettes available whenever the floor angle is still too much
- Makes your first real tuck planche a change in load rather than a brand new skill, because the balance point and the shape are already familiar
Who Is This Exercise For?
Before this one you want a planche lean you can hold for around 15 seconds with your shoulders clearly past your wrists, a frog stand of about 10 seconds, and wrists that tolerate a deep lean without pain. You also need to lock your elbows straight and keep them locked under load, because arms that bend turn this into a push-up hold instead of straight arm work. A 30 second hollow body hold helps too, since the tuck is held by core compression rather than by your legs hanging there. If the floor angle hurts your wrists, start on parallettes and build the floor tolerance separately.
Common Mistakes to Avoid
Letting the legs do the work: This is the one that quietly wastes months, because the hold looks right from the side while the toes are pushing you up. Most of the strength should be used by your arms and not your legs. Lean further forward over your hands until the feet feel almost empty, and treat them as contact rather than support.
Shrugging the shoulders up instead of pushing them down: Under load the shoulders want to travel up toward your ears, which loses protraction and hands the work to your traps and elbows. Push down and out first, keep the upper back a little bit rounded, and only then lift. If you cannot keep them down, take less weight out of the feet.
Bending the elbows: A bent arm turns this into a hard push-up hold and moves the load off the shoulder and into the elbow and the biceps tendon, which is the tissue that adapts slowest. Lock the elbows before you lift anything, and if they soften mid hold, come down and rest rather than finishing the set bent.
Keeping the same amount of foot assistance for months: The help is meant to shrink. If your feet carry the same share in week ten as they did in week one, you are practising a position instead of progressing it. Each session, aim to press a little more weight forward into your hands, and use how light the feet feel as your measure of progress.