Halflay Planche
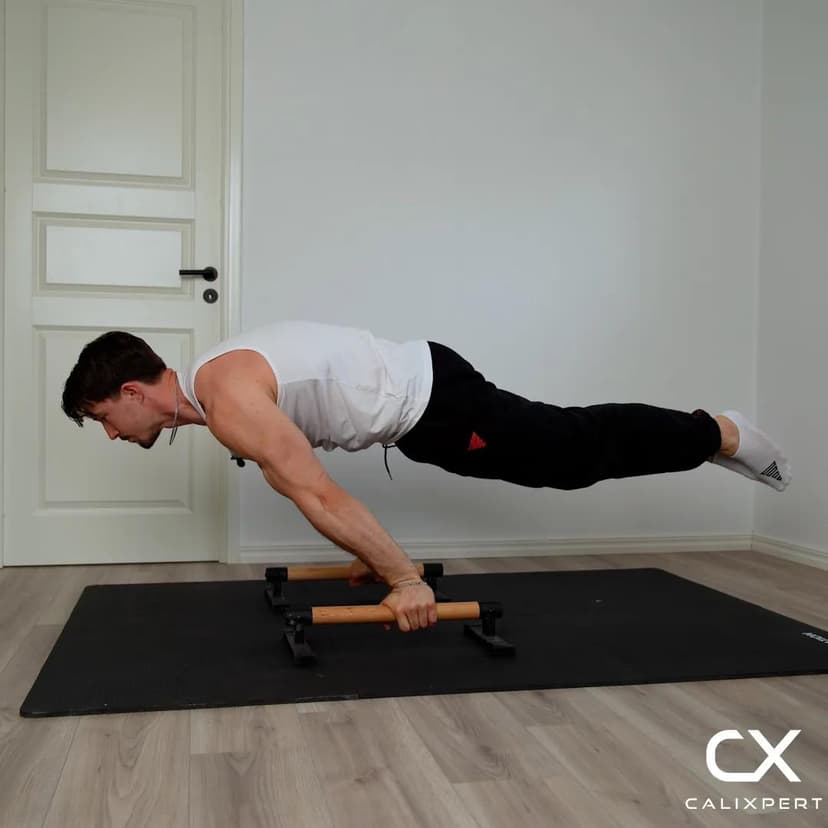
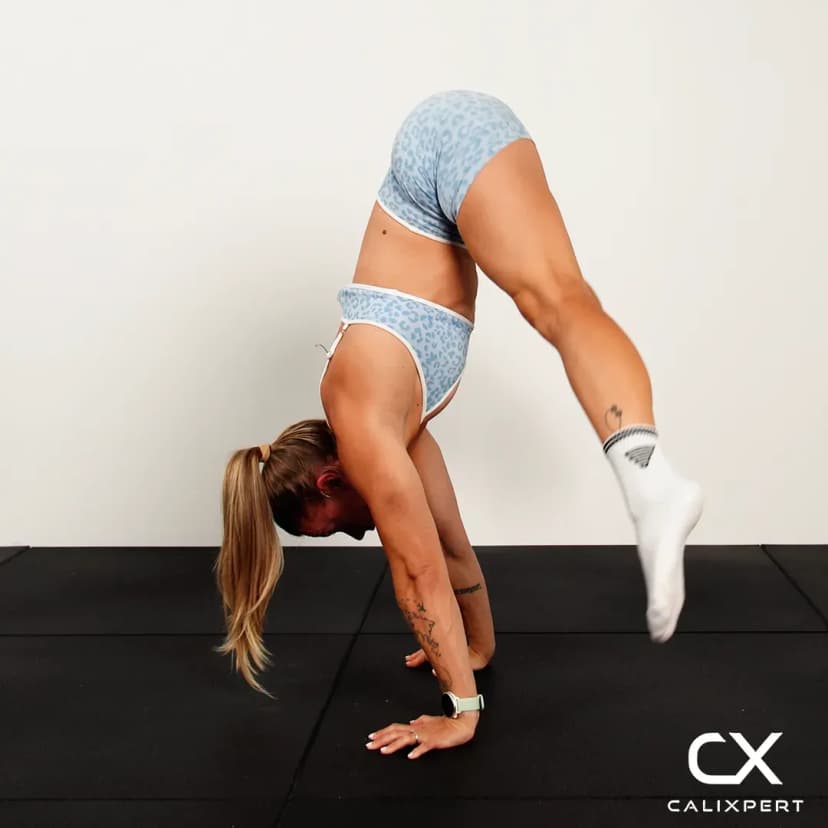
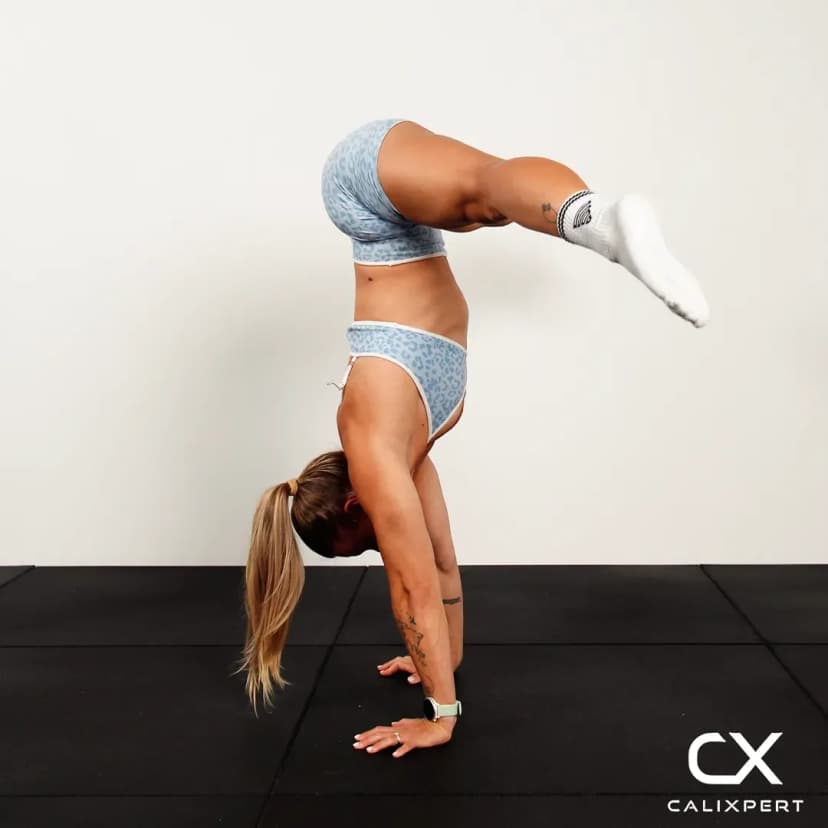
The halflay planche is a straight arm hold with your hips fully open, your legs pressed together and your knees bent so your shins angle up rather than hanging underneath you. That fold in the knees is the only thing making it easier than a full planche. Opening the hips puts your legs further behind your shoulders than any tuck position ever does, so the front deltoids and serratus carry far more, and your glutes have to hold that shape while they do it.
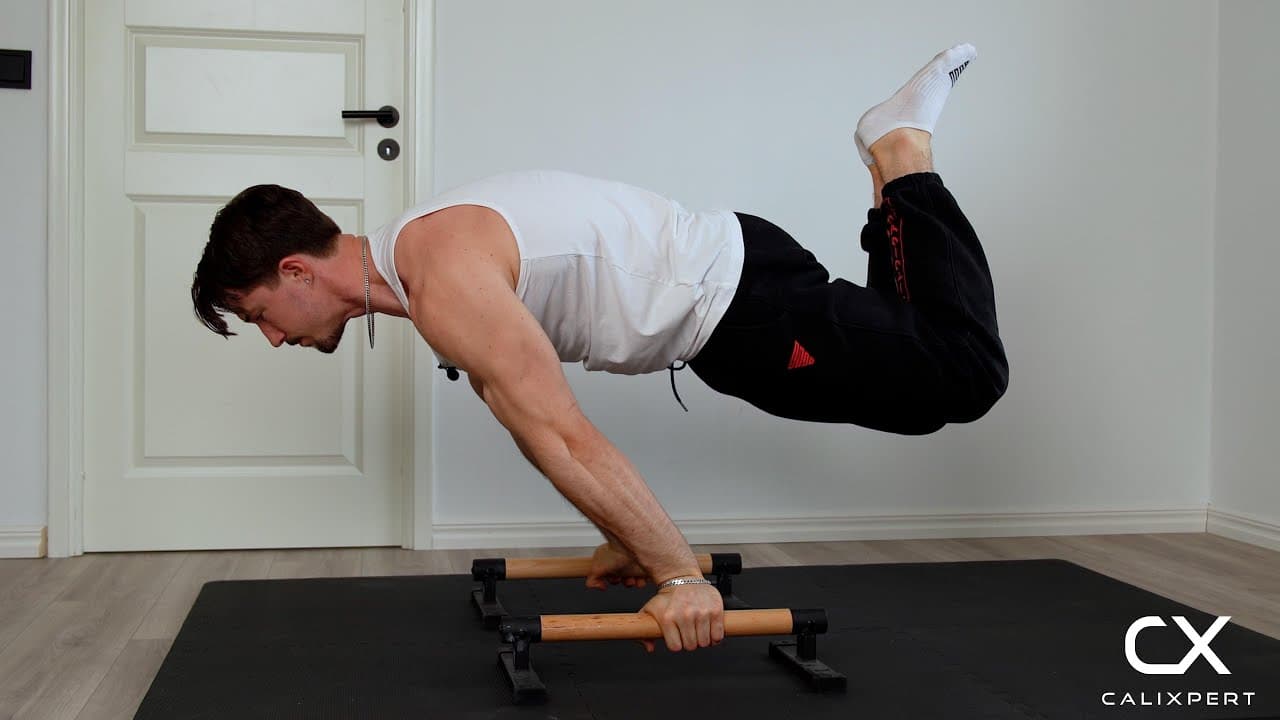
The halflay planche is a straight arm hold with your hips fully open, your legs pressed together and your knees bent so your shins angle up rather than hanging underneath you. That fold in the knees is the only thing making it easier than a full planche. Opening the hips puts your legs further behind your shoulders than any tuck position ever does, so the front deltoids and serratus carry far more, and your glutes have to hold that shape while they do it.
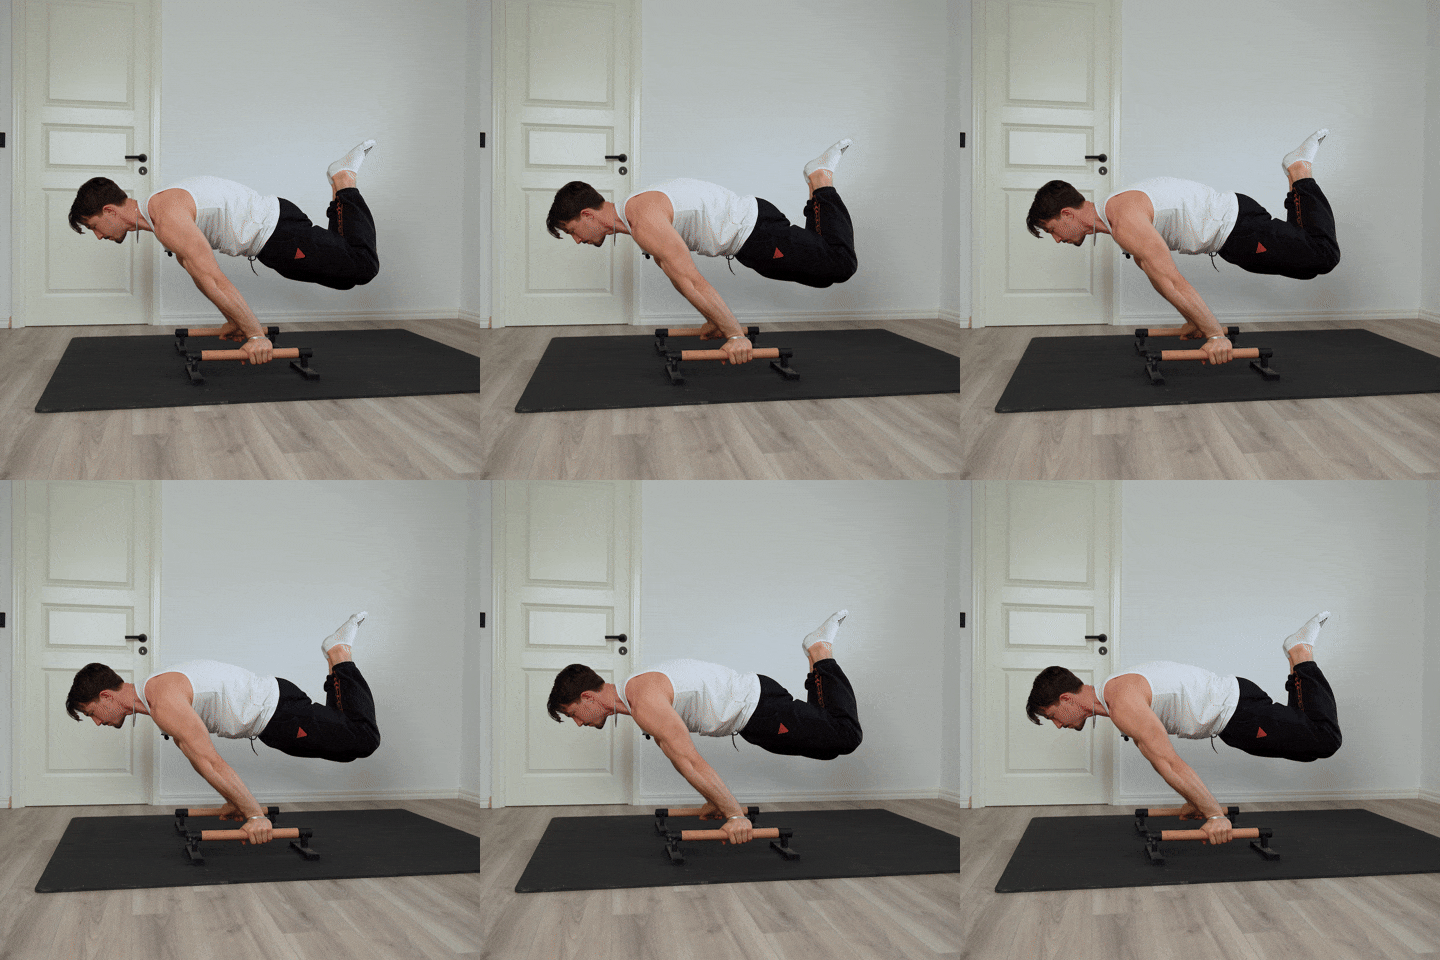
How to Do Halflay Planche
1. Set Up Under Your Shoulders
Place the parallettes about shoulder width apart and wrap your fingers fully around the bars. Kneel behind them with your hands directly under your shoulders. This one works on the floor too, the parallettes simply take some of the bend out of your wrists.
Bars parallel, hands under the shoulders
2. Lock The Arms
Straighten your elbows completely and keep them locked for the full hold. Daniel names this first for a reason. The moment an elbow softens, load slides off the shoulder and onto the elbow and biceps tendon, which is where the injuries in this progression cluster.
Elbows locked before anything else moves
3. Protract The Shoulders
Push your shoulders forward and downward, away from your spine, and keep them there. Your shoulder blades stay pushed forward around your ribcage, never pinched back together. That protracted position is the stable base the whole hold sits on, and it is the first thing that goes when you tire.
Push the shoulders forward and downward
4. Lean Until The Knees Float
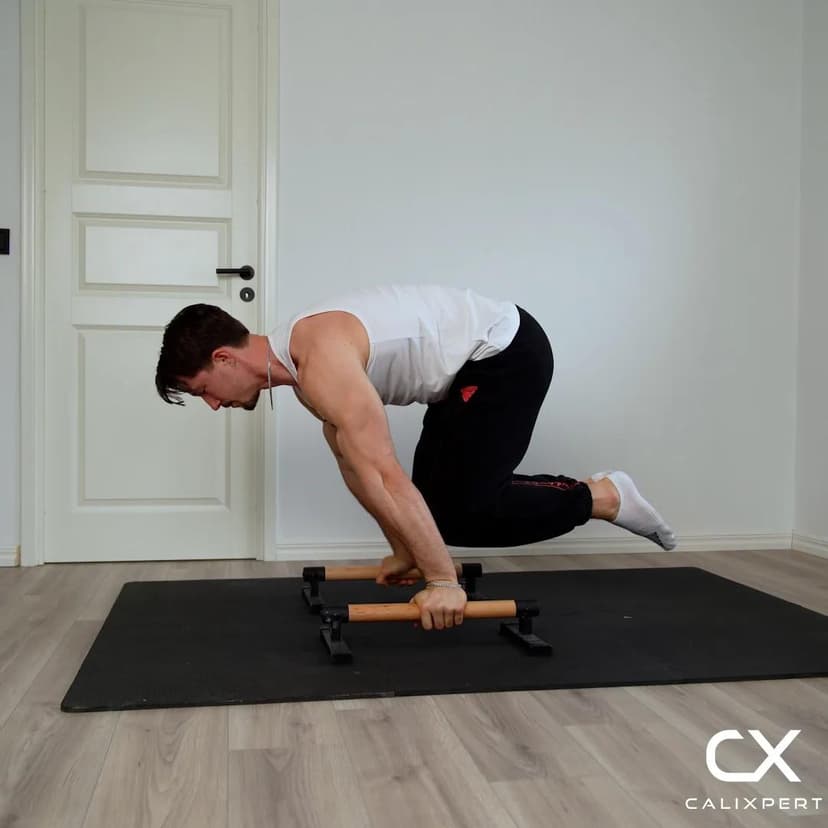
Lean forward so your shoulders travel past your hands until your knees come off the mat. Move into it gradually rather than throwing yourself forward. The lean is the dial that sets the difficulty here, so add it a couple of centimetres at a time across weeks.
Shoulders travel well past the hands
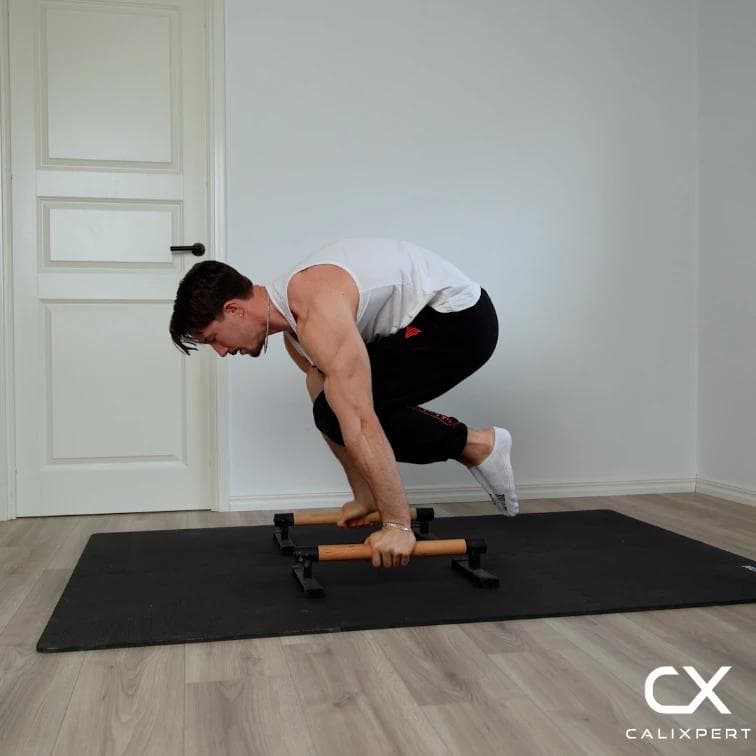
5. Bend The Knees And Glue The Legs Together
Bend your knees and press both legs against each other. Daniel is specific about this, in the half position the legs stay fully together. Letting them drift apart spreads your weight sideways and takes load off the shoulders without you noticing.
Knees bent, legs fully together
6. Squeeze The Core And Push The Hips Forward
Squeeze your core and push your hips forward so the hip angle opens and the body flattens out. This is what separates the halflay from the advanced tuck. If the hips stay closed, your knees hang underneath you and you are holding the easier position.
Hips forward, ribs down
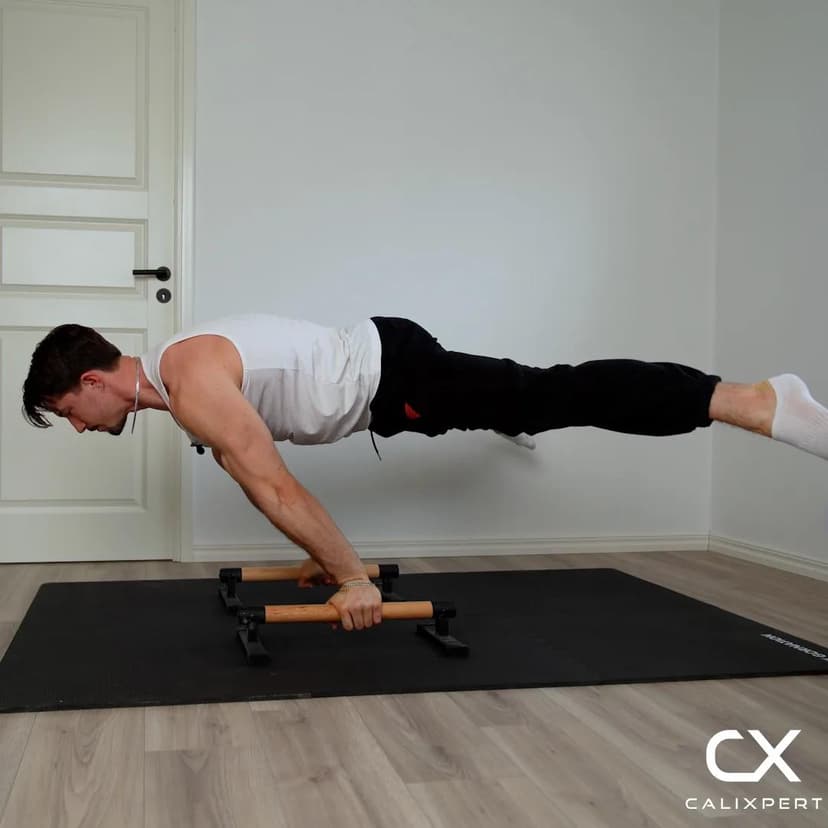
7. Raise The Legs With The Glutes And Hold
Squeeze your glutes to raise both legs back up in line with your body, then hold that shape. Work in holds of roughly 5 to 15 seconds for three to five sets. Come down on your terms while the position is still clean rather than hanging on with the hips sagging.
Glutes lift the legs to the line
There's a few things you want to focus on here. Arms fully locked throughout the whole hold. Shoulders protracted, pushed forward and downward, and kept there. Then the part that is specific to the halflay, bend the legs, squeeze the core, push your hips forward and use your glutes to raise both legs back up. Keep the legs fully together in the half position. Locked arms, protracted, squeezing the glutes.
Muscles Worked During Halflay Planche
Primary Muscles:
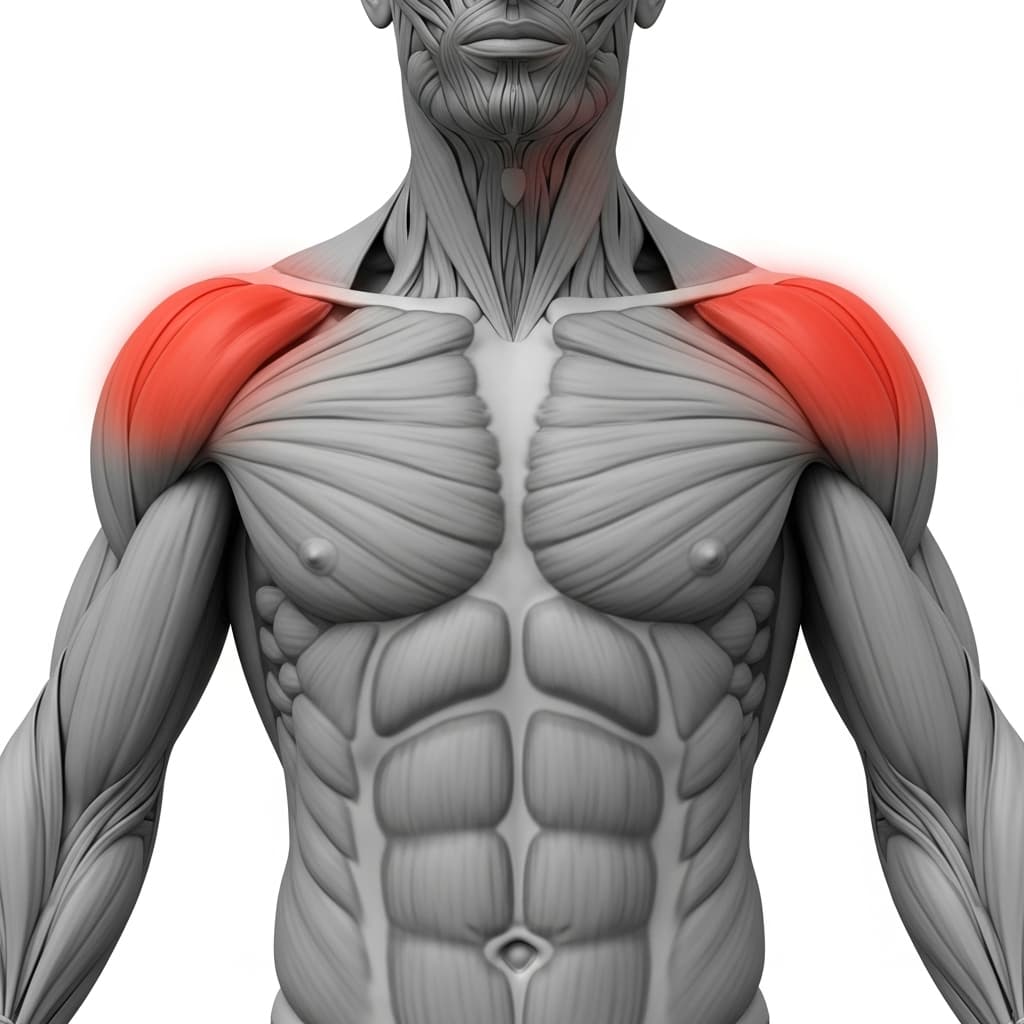
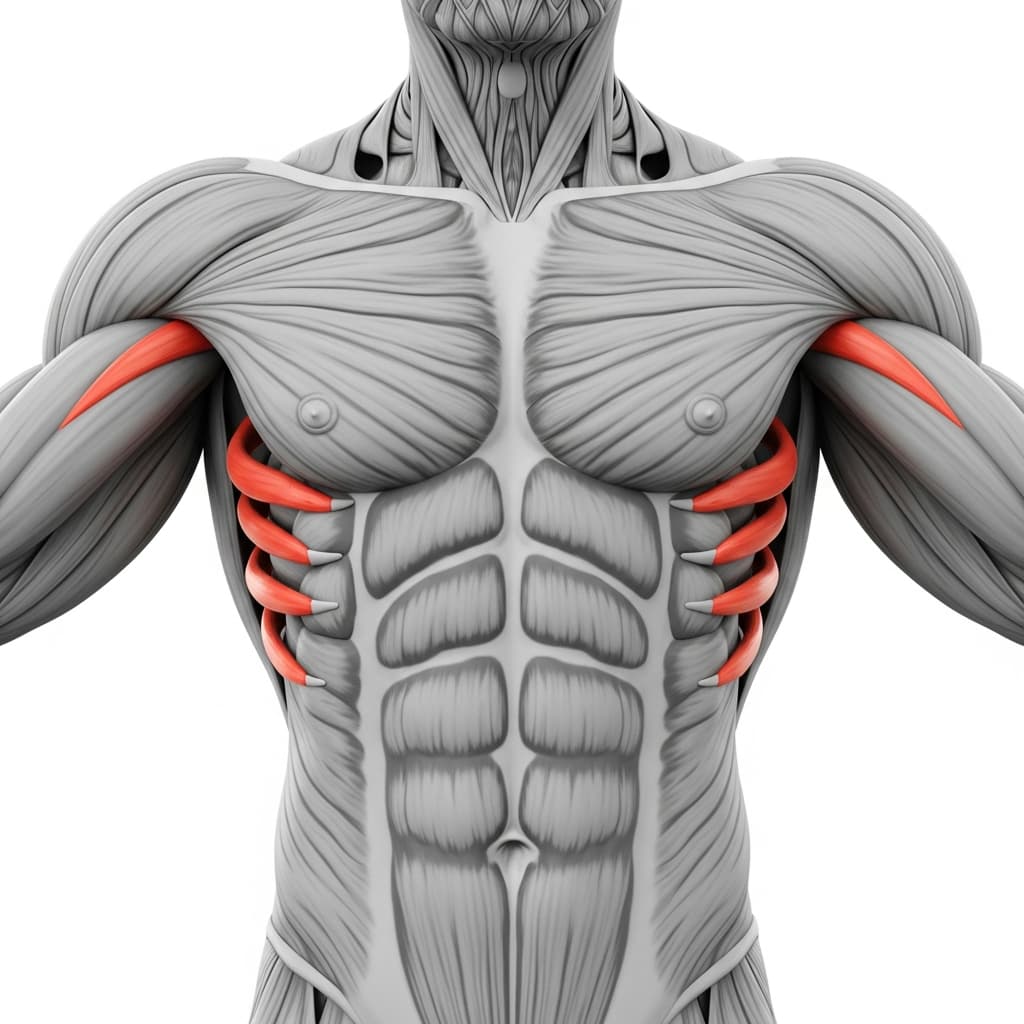
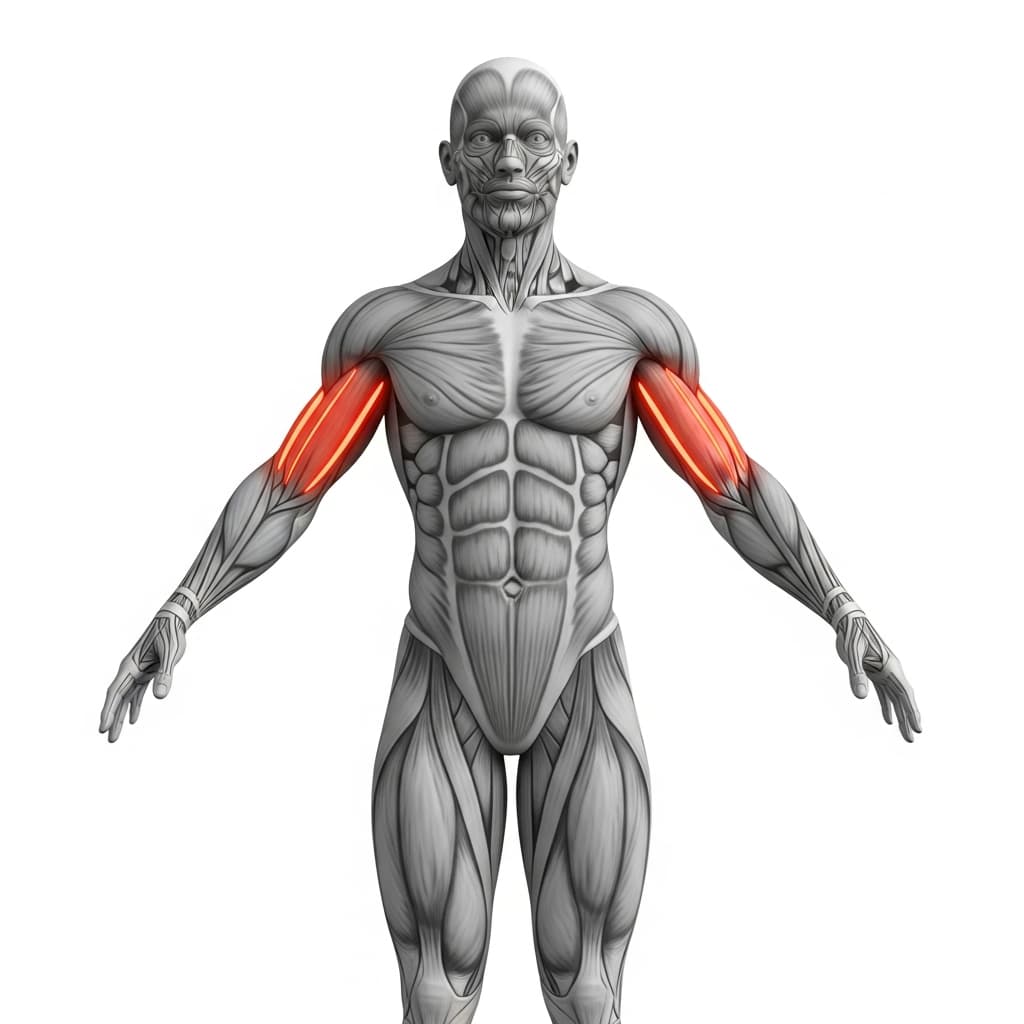
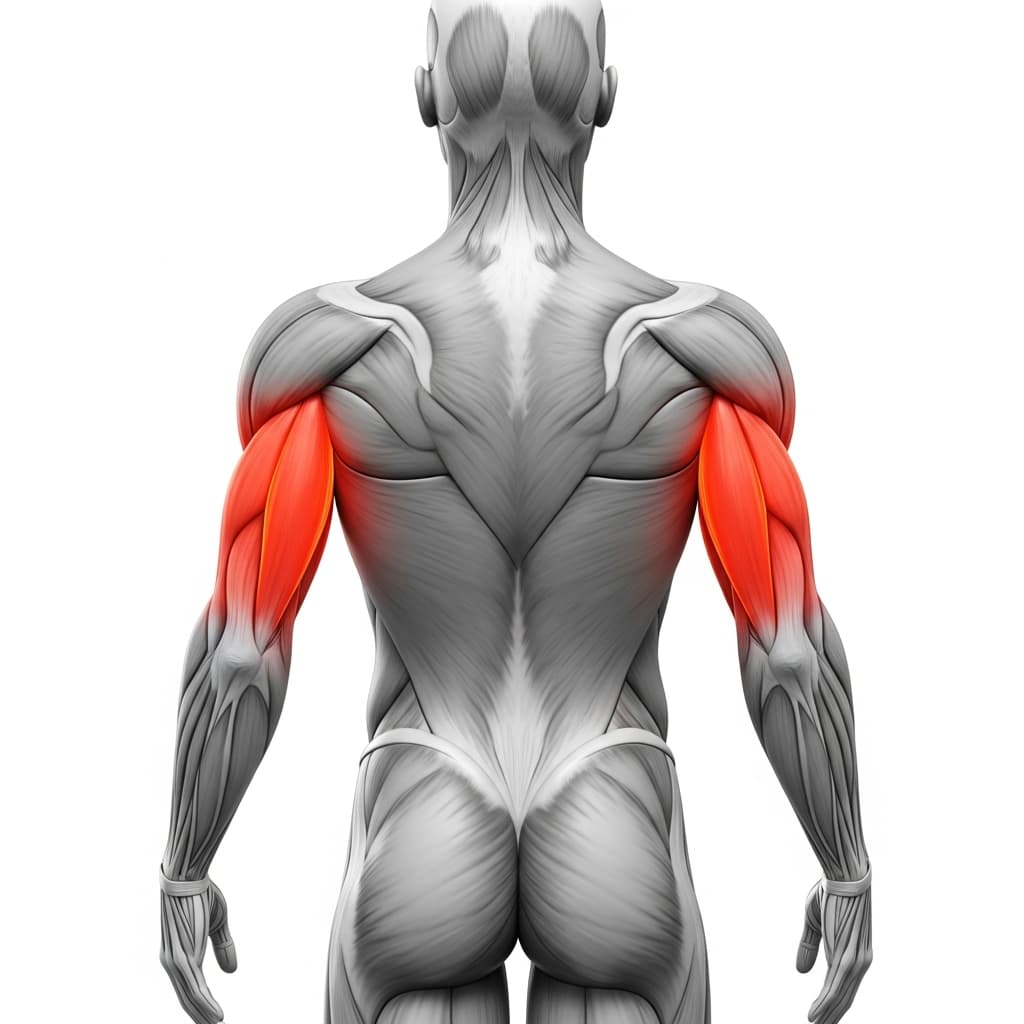
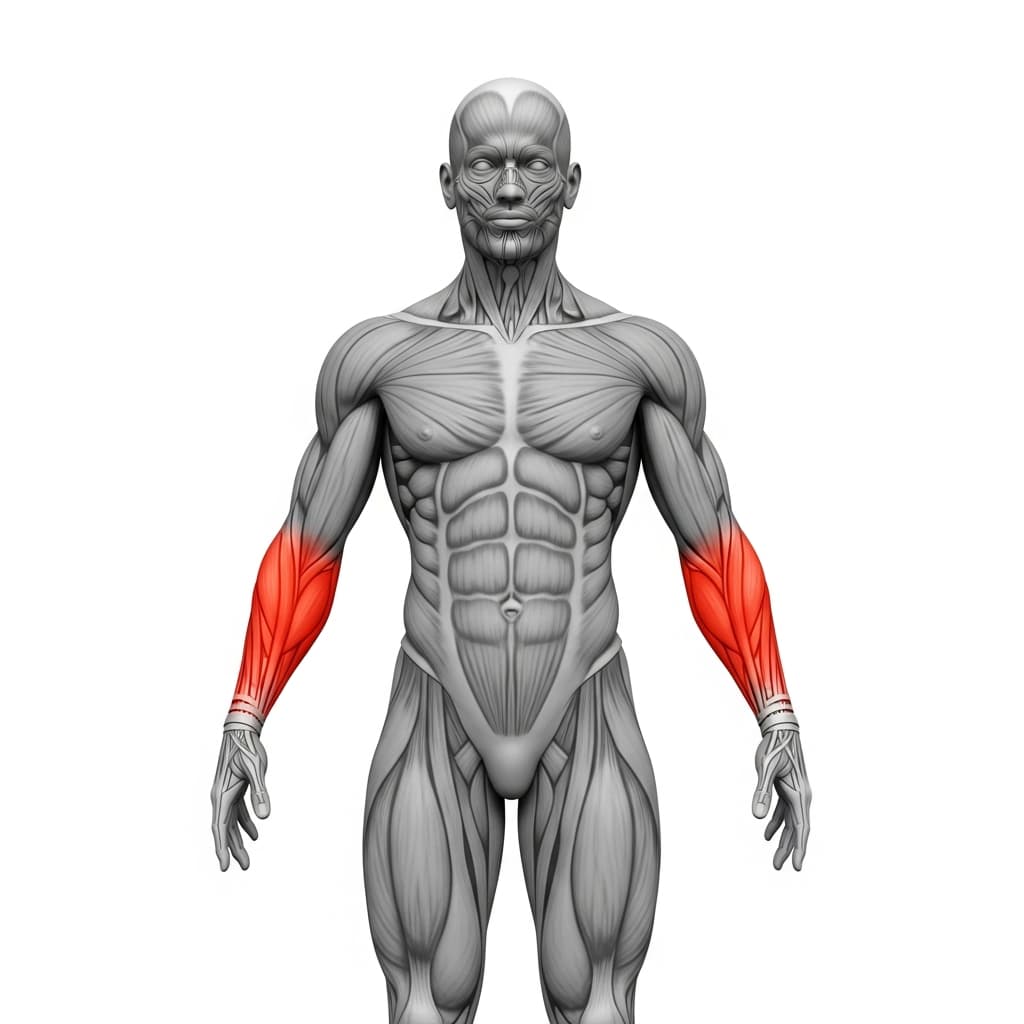
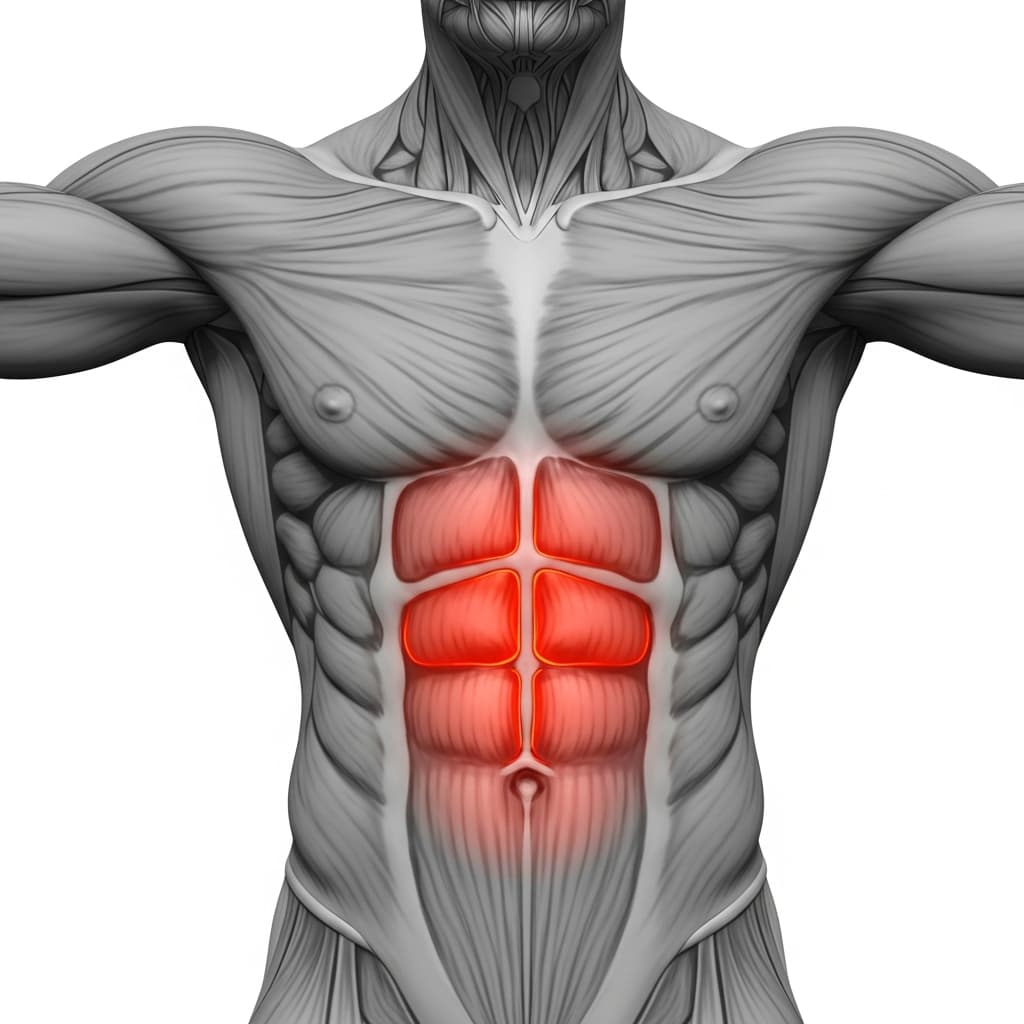
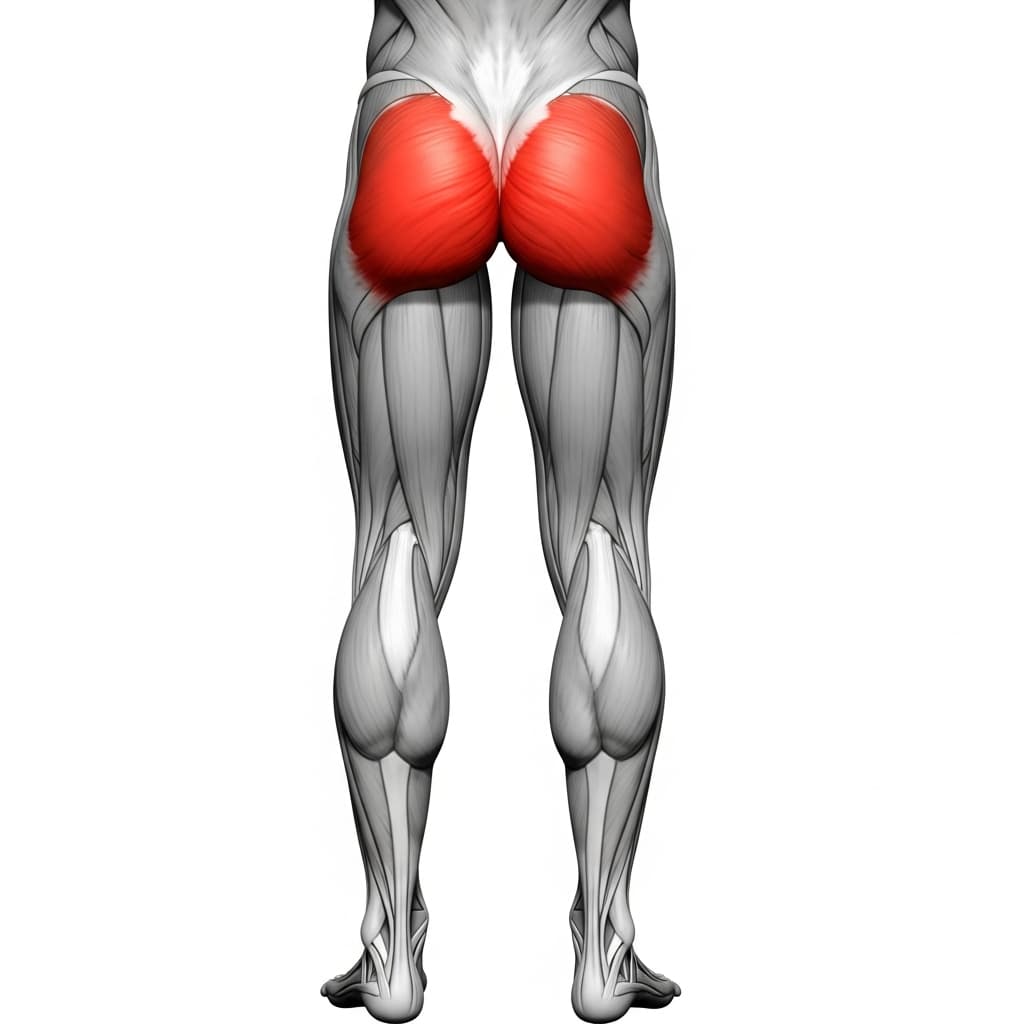
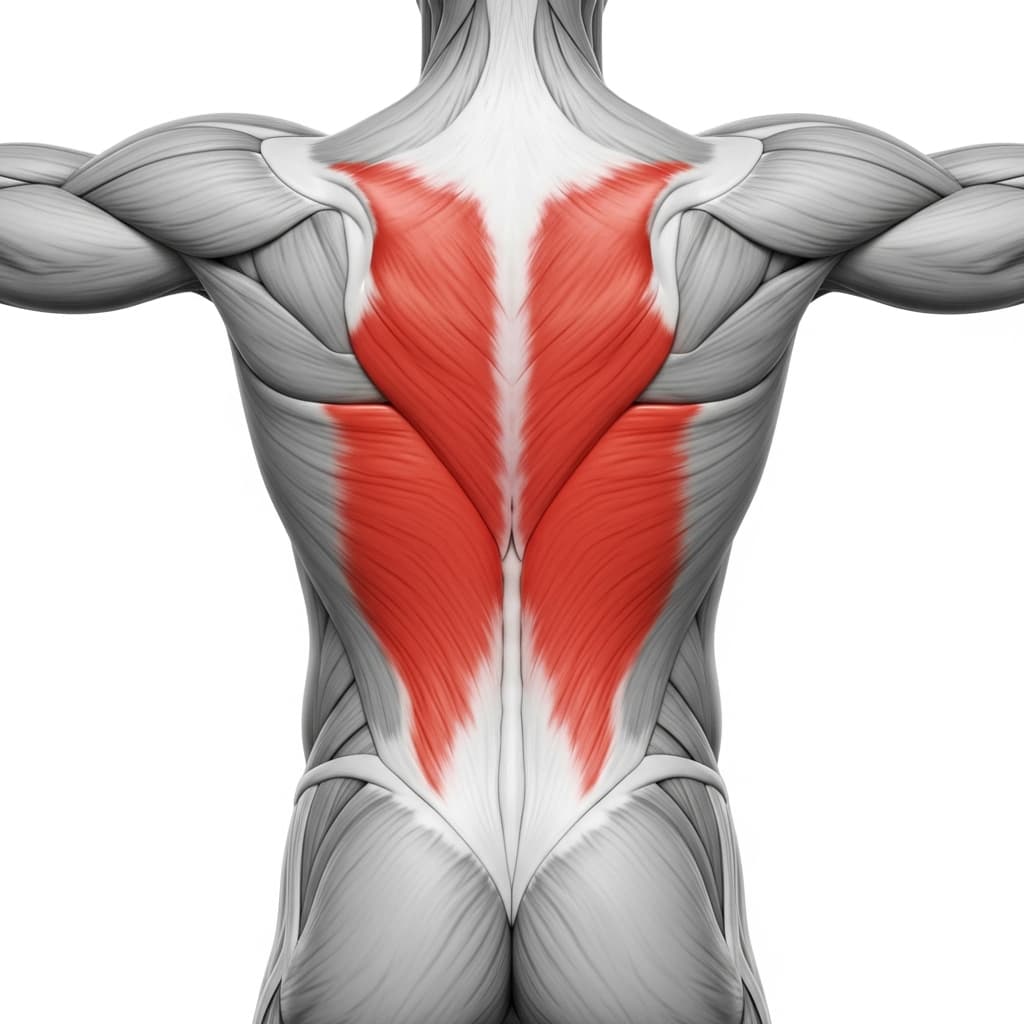
Primary Muscles
Anterior Deltoid (Front Deltoid) - Carries most of the load, holding your whole body weight forward of your hands with the arm locked straight.
Serratus Anterior (Serratus Anterior) - Holds the shoulder blades protracted around the ribcage, which is what keeps the shoulder stable once your feet leave the ground.
Secondary Muscles
Biceps Brachii (Biceps) - Works hard at the elbow against the straight arm load, which is why the volume here has to be built slowly.
Triceps Brachii (Triceps) - Keeps the elbows locked out for the entire hold, with no softening as the position gets heavy.
Forearm Flexors & Extensors (Forearms) - Grip the bars and hold the wrist position steady under a forward lean that is trying to tip you over.
Rectus Abdominis (Abs) - Squeezed hard to keep the ribs down and stop the hips from sagging below the line of your shoulders.
Gluteus Maximus (Glutes) - Push the hips into full extension and raise both legs back up to body height, which is the cue Daniel gives for this exact position.
Erector Spinae (Spinal Erectors) - Hold the open hip and flat body shape so the position does not quietly fold back into a tuck.
Benefits of Halflay Planche
- Loads straight arm shoulder strength far beyond anything a tuck position can reach, because the hips are fully open and the legs sit well behind you.
- Trains protraction and the serratus close to full planche load, which is what keeps the shoulder stable in the positions above this one.
- Builds active hip extension under load, the quality that usually fails first once the legs come out of the tuck.
- Gives you a real step between the advanced tuck planche and the straddle planche instead of jumping to a shape you cannot hold for three seconds.
- Conditions the wrists, elbows and forearms in a locked out position, provided you add the volume slowly enough for the tendons to keep up.
Who Is This Exercise For?
You should already own the advanced tuck planche, roughly 10 to 15 seconds for three to five sets with your hips level with your shoulders, no elbow pain and no shaking. Your elbows need to lock out fully and stay locked under a heavy lean, and your wrists need months of graded exposure behind them, whether you train on the floor or on parallettes. The part most people arrive without is hip extension, so bring glute bridges, hyperextension holds and a 30 second hollow body hold with you. This is an advanced skill and it is the wrong place to be learning any of those pieces for the first time.
Common Mistakes to Avoid
Knees hanging underneath the hips: This is the halflay quietly turning back into an advanced tuck, and it happens because hip extension gives out long before the shoulders do. Push the hips forward and squeeze the glutes to bring the thighs back in line with your torso. If you cannot hold that, train hip extension on its own with glute bridges and hyperextension holds instead of piling on more shoulder work.
Letting the legs come apart: As the hold gets heavy the legs drift apart and the weight spreads sideways, which quietly makes the hold easier, so it feels like you are still holding on when the shape has changed underneath you. Keep both legs pressed together the whole time. Treat the moment they separate as the end of the set and note the honest time.
Losing protraction: The shoulder blades pinch back together when the serratus tires before the deltoids do. The shoulder loses its stable base and the load shifts onto your elbows and biceps tendon, which is exactly the tissue you do not want taking a surprise. Keep pushing the shoulders forward and down for the whole hold, and end the set the moment the shoulder blades pinch back together.
Elbows softening under load: Bent arms mean the position is heavier than your straight arm strength can handle right now. Reduce the lean or go back to advanced tuck holds for a few weeks rather than fighting through it. If you find you cannot lock your elbows out fully in any position, that is a range of motion issue and needs assessing, not more volume.