Glute Bridge
The glute bridge is a foundational hip extension exercise that targets the glutes, hamstrings, and lower back while reinforcing core stability under load. The movement teaches you to generate force through the hips without compensating through the lumbar spine, a pattern that carries over to every squat, jump, and pulling movement in calisthenics. When performed with deliberate glute activation and a controlled tempo, the glute bridge builds posterior chain strength and corrects the weak hip extension patterns that hold back more advanced bodyweight training.
The glute bridge is a foundational hip extension exercise that targets the glutes, hamstrings, and lower back while reinforcing core stability under load. The movement teaches you to generate force through the hips without compensating through the lumbar spine, a pattern that carries over to every squat, jump, and pulling movement in calisthenics. When performed with deliberate glute activation and a controlled tempo, the glute bridge builds posterior chain strength and corrects the weak hip extension patterns that hold back more advanced bodyweight training.

How to Do Glute Bridge
1. Set Up on Your Back
Lie on your back with your knees bent and feet flat on the floor, positioned hip-width apart. Place your arms at your sides with palms facing down. Keep your head resting on the floor and your gaze directed at the ceiling.
Feet hip-width, head down, arms flat
2. Brace Your Core
Before lifting, draw your belly button inward and press your lower back gently into the floor. This core compression eliminates any arch in the lumbar spine and ensures the glutes do the work instead of the lower back. Maintain this bracing throughout every rep.
Suck in the belly button, flatten the back
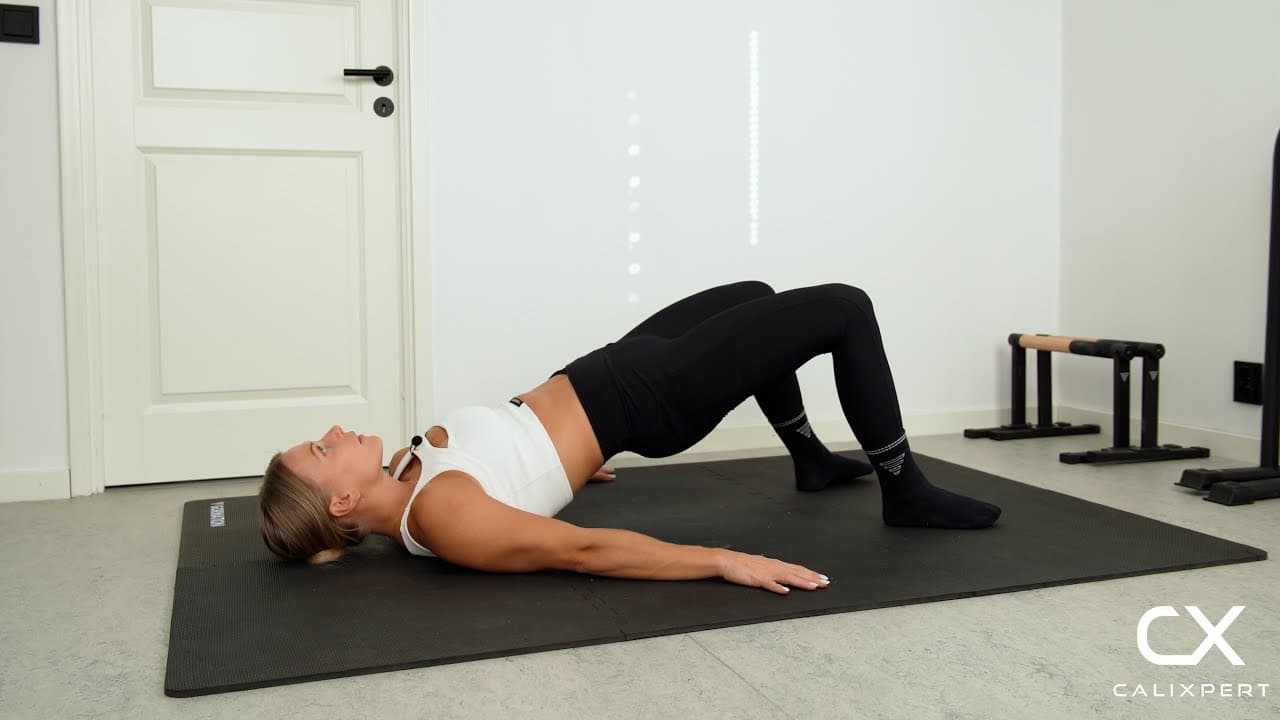
3. Drive Hips Up Through Your Heels
Press through your heels and squeeze your glutes to lift your hips toward the ceiling. Your body should form a straight line from your shoulders to your knees at the top. Do not push beyond this line by hyperextending the lower back.
Squeeze glutes, straight line shoulders to knees
4. Hold and Squeeze at the Top
Pause at the top position for one full second with your glutes fully contracted. Keep your core engaged and your ribs pulled down to prevent the lower back from arching. This brief hold forces the glutes to work isometrically and builds the mind-muscle connection that makes every rep more effective.
One-second squeeze at the top
5. Lower Under Control
Slowly lower your hips back to the starting position without letting your lower back arch on the way down. Maintain glute tension through the entire descent. Reset your core brace before initiating the next rep.
Control the descent, no back arch
Most people rush through glute bridges and never actually feel their glutes fire. Slow it down, hold the top for a full second, and focus on squeezing the glutes as hard as you can before lowering. If you feel the exercise mostly in your hamstrings, bring your feet closer to your body until the burn shifts to where it belongs.
Muscles Worked During Glute Bridge
Primary Muscles:
Secondary Muscles:
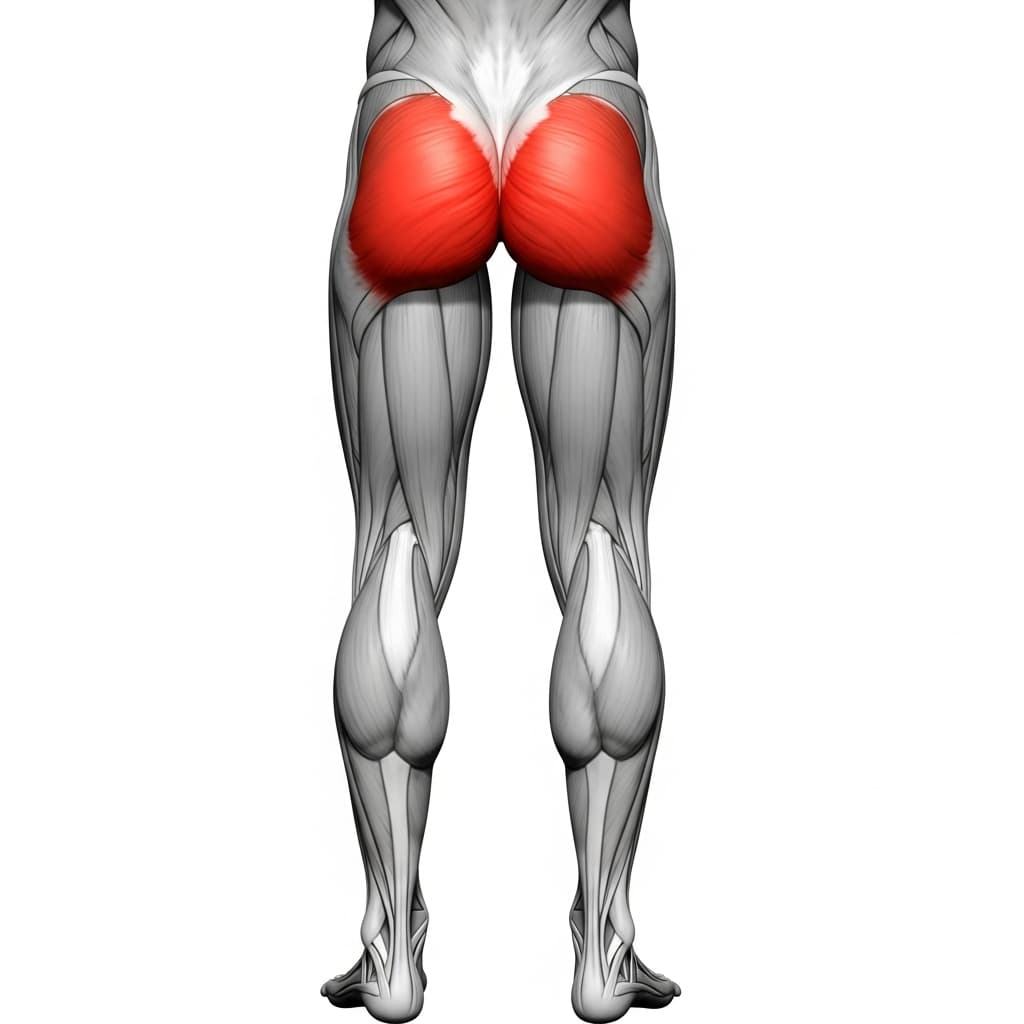
Primary Muscles
Gluteus Maximus (Glutes) - The glutes are the primary hip extensors in the glute bridge, driving the hips upward from a flexed position and holding the top contraction under load.
Secondary Muscles
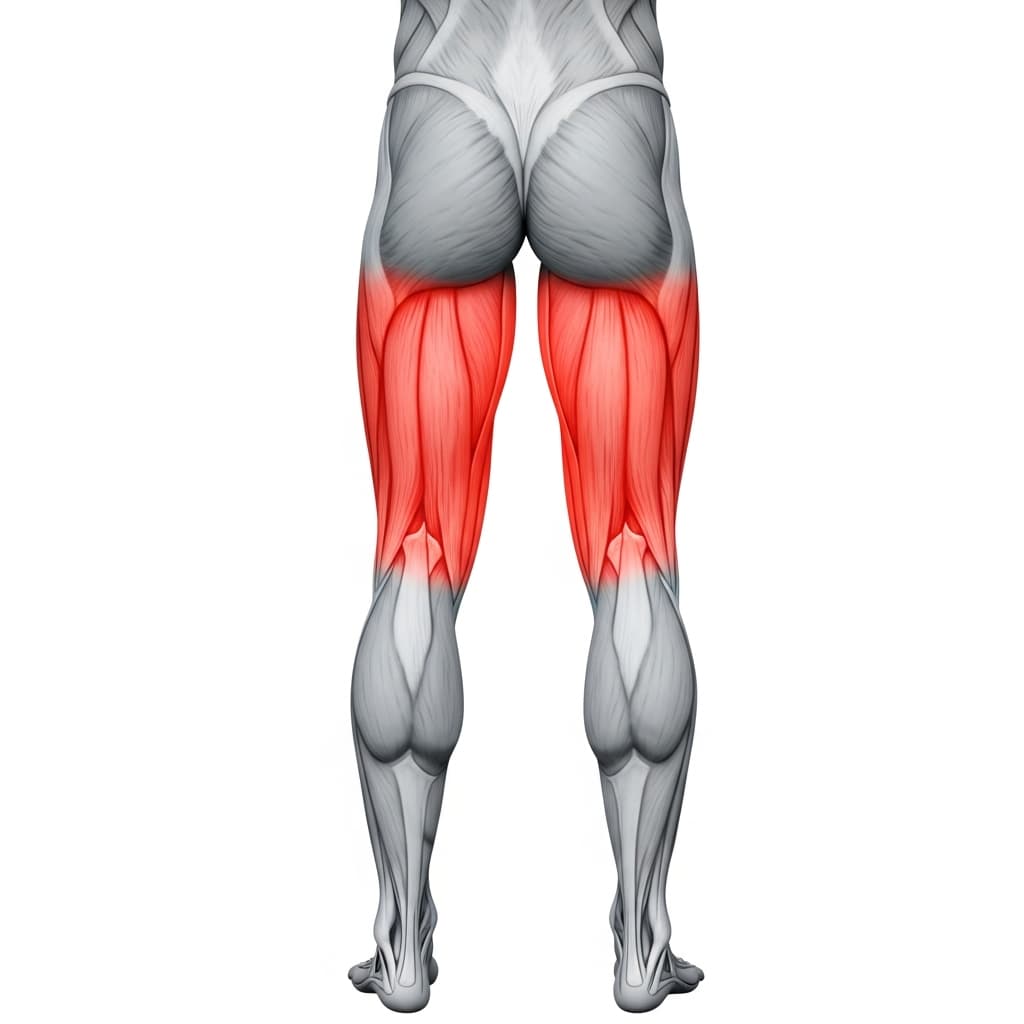
Hamstring Group (Hamstrings) - The hamstrings assist hip extension and stabilize the knee angle throughout the movement, working hardest when the feet are positioned further from the body.
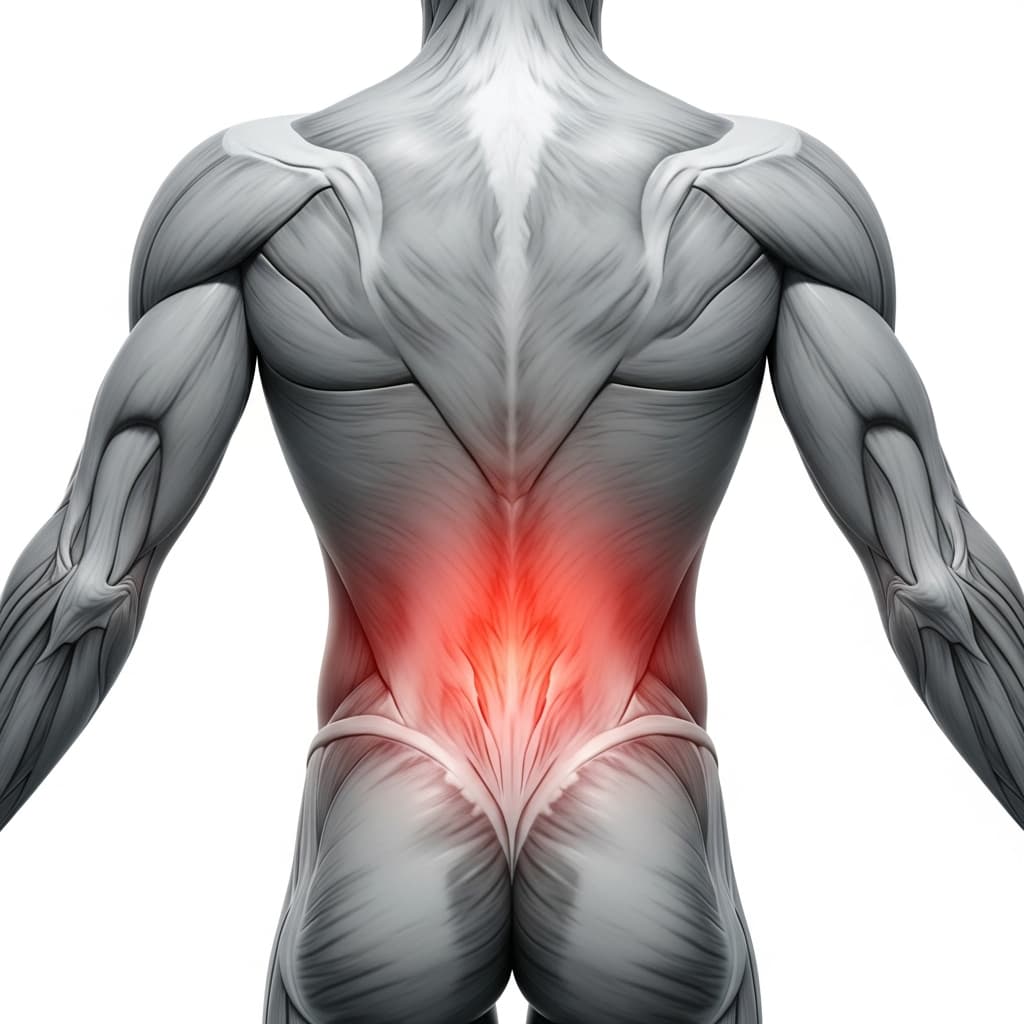
Erector Spinae (Lower Back) - The lower back muscles maintain spinal stability during hip extension, working isometrically to keep the lumbar spine in a neutral position throughout the lift.
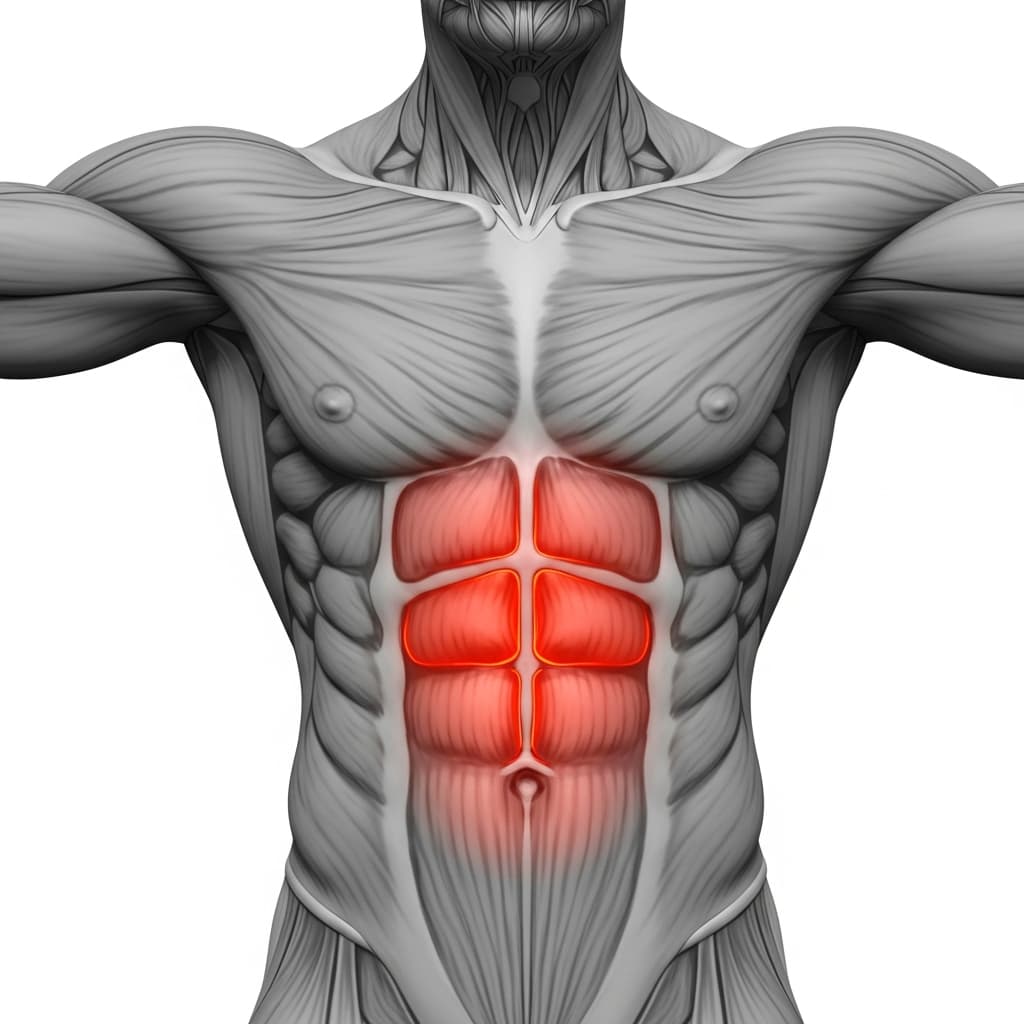
Rectus Abdominis (Abs) - The abdominals brace the core and prevent lumbar hyperextension at the top of the bridge, keeping the pelvis in a posterior tilt throughout each rep.
Benefits of Glute Bridge
- Builds glute strength and activation patterns that transfer directly to squats, jumps, and every hip extension movement in calisthenics
- Strengthens the posterior chain without axial spinal loading, making it accessible for athletes recovering from back issues or working around injuries
- Develops core bracing endurance by requiring constant abdominal engagement to prevent lumbar hyperextension throughout each set
- Corrects anterior pelvic tilt and weak glute activation, two of the most common postural imbalances in people who sit for long periods
Who Is This Exercise For?
The glute bridge is a beginner-level exercise with no strict strength prerequisites. You should be able to lie flat on your back and maintain a neutral spine position without discomfort before performing repetitions. If you cannot flatten your lower back against the floor while lying down, start with pelvic tilts to build awareness of your spinal position first.
Common Mistakes to Avoid
Arching the lower back at the top: Stop the lift when your body forms a straight line from shoulders to knees. If your lower back arches, you have gone too high and the load has shifted from your glutes to your lumbar spine. Draw the belly button inward throughout the movement to keep the core locked.
Pushing through the toes instead of the heels: Drive through your heels to maximize glute activation. When the push comes from the toes, the quads and calves take over and the glutes barely engage.
Rushing through reps without a pause: Hold each rep at the top for at least one second with a deliberate glute squeeze. Skipping the pause turns the exercise into momentum-driven bouncing and removes the isometric contraction that builds real strength.
Placing feet too far from the body: Position your feet so that your shins are roughly vertical at the top of the bridge. When the feet are too far forward, the hamstrings dominate and the glutes lose their mechanical advantage.
Variations & Progressions
Partial Range Glute Bridge
Lift your hips only halfway up and hold for one second before lowering. This reduces the range of motion and is useful for anyone who feels lower back discomfort at full hip extension.
Single-Leg Glute Bridge
Extend one leg straight out while performing the bridge on the other leg. This doubles the load on the working glute and demands significantly more hip stability and core control.
Elevated Glute Bridge
Place your feet on a bench or elevated surface to increase the range of motion at the bottom. The deeper hip drop creates more stretch on the glutes and increases the total work per rep.